

Original Sculpey Flower Frame
Original Sculpey Flower Frame
Read More
This beautiful frame is the perfect addition to any room!
Read Less
ADDITIONAL SUPPLIES
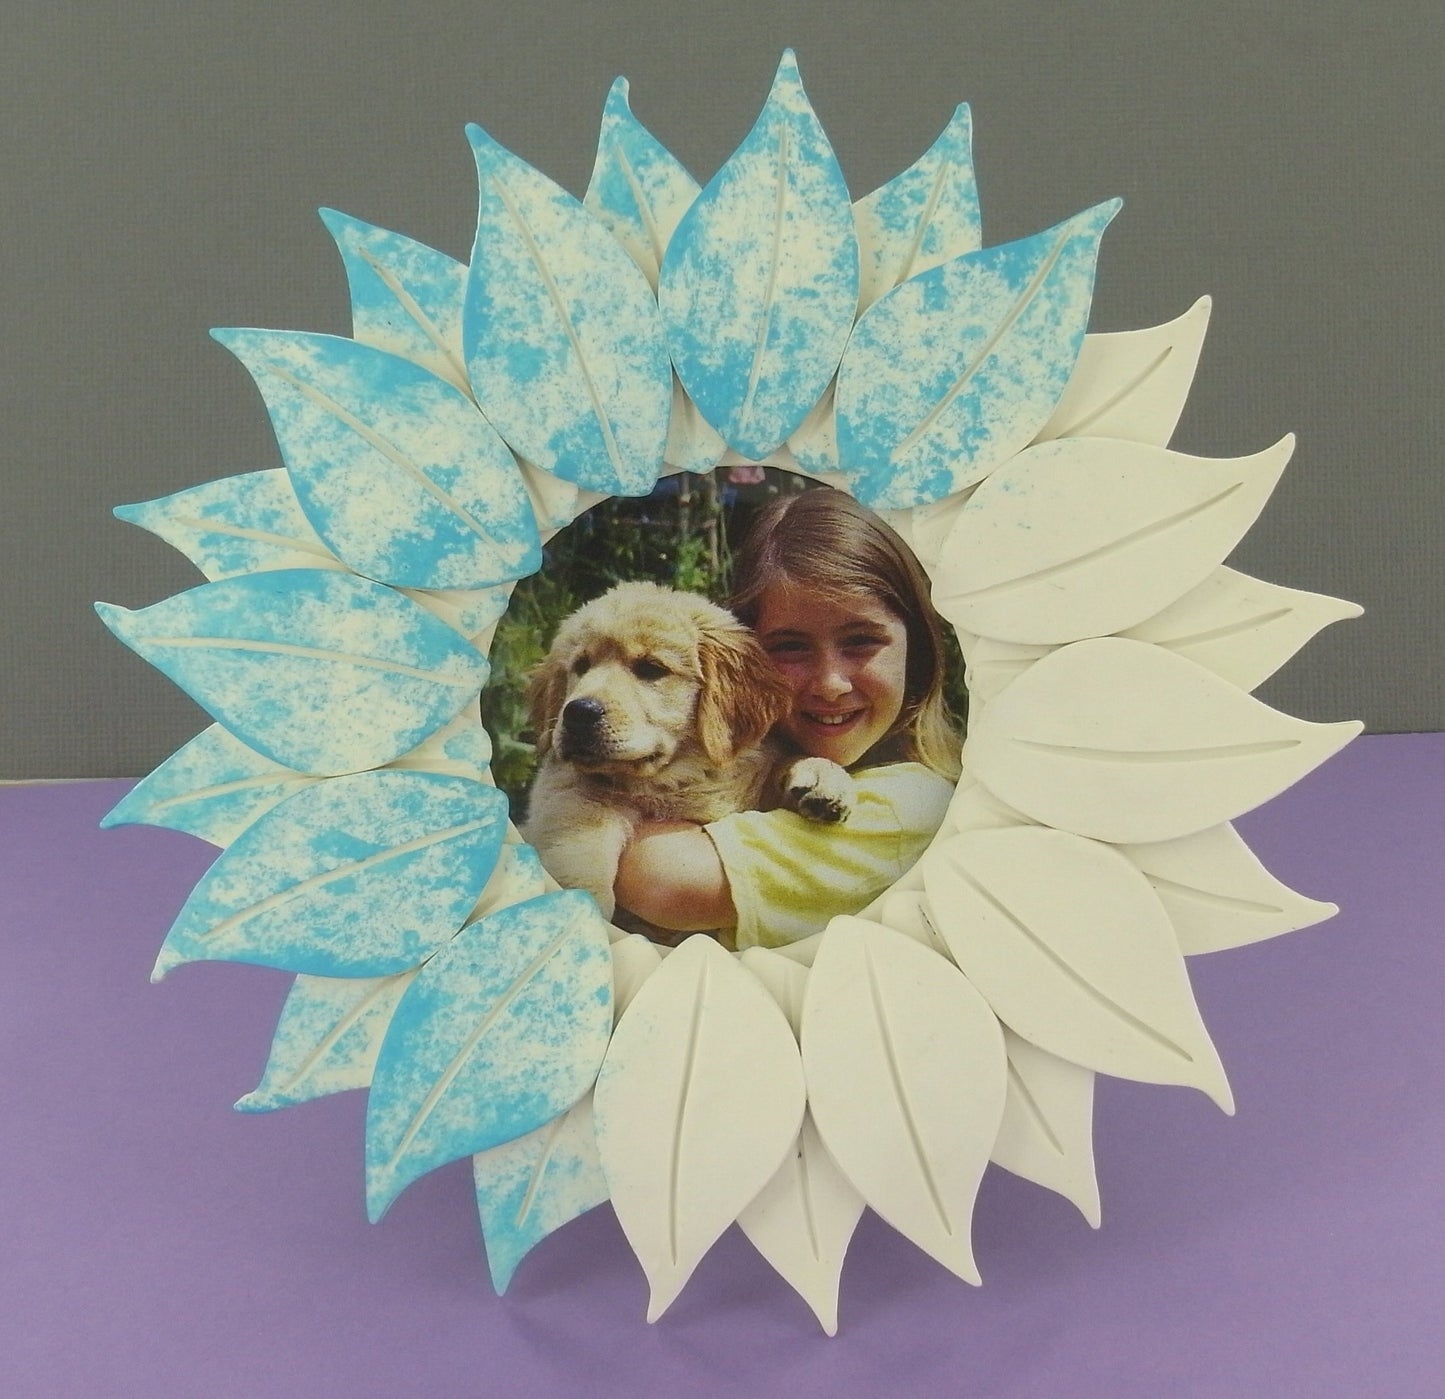
Wilton leaf cookie cutter set, light blue craft paint, metal frame 3x3 round, craft knife, painting sponge, toothpick, template (circle with 4 1/2" diameter, center is 2 3/8" in diameter)|Wilton leaf cookie cutter set, light blue craft paint, metal frame 3x3 round, craft knife, painting sponge, toothpick, template (circle with 4 1/2" diameter, center is 2 3/8" in diameter)
Project Instructions
Getting StartedPolymer clay may stain. CLAY MAY DAMAGE UNPROTECTED FURNITURE OR FINISHED SURFACES. DO NOT USE polymer clay on unprotected surfaces. We recommend working on the Sculpey clay mat, wax paper, metal baking sheet, or disposable foil. Start with clean hands and work surface area. Knead clay until soft and smooth. For best results, clean your hands in between colors. Shape clay, pressing pieces together firmly. Bake on oven-proof glass or metal surface at 275°F (130 °C) for 15 minutes per ¼" (6 mm) thickness. For best baking results, use an oven thermometer. DO NOT USE MICROWAVE OVEN. DO NOT EXCEED THE ABOVE TEMPERATURE OR RECOMMENDED BAKING TIME. Wash hands after use. Baking should be completed by an adult.Begin by preheating oven to 275 °F (130 °C). Test temperature with oven thermometer for perfectly cured clay. For best results, condition all clay by running it through the Clay Conditioning Machine for several passes on the widest setting. Fold the clay in half after each pass and insert the fold side into the rollers first.Remove glass and backing from frame and set aside.Using the clay conditioning machine on a #1 setting make a sheet of clay. Use the template provided and cut out your circle frame base out of clay. Lay this on top of your frame. Position properly, add some Bake N Bond below the clay and press onto frame. Smooth edges. Set aside.


With the clay conditioning machine set on a #1 create another sheet of clay. Using the middle sized leaf cutter, cut out 24. Smooth edges. Using your toothpick make lines down the center of each petal.

Time to attach the petals to the frame. Start by making your first layer of petals go around the frame. Place the bottom edge of each petal onto the edge of the center ring of the frame. Place 12 petals around in this manner, snugging them close to each other leaving no gaps. If desired you can change the direction of the tips of the petals to give a nice effect. Attach second round of petals. Lay your second round of 12 petals right on top of the first. Start in the same way placing the bottom edge of the petal to the edge of the frame opening. These petals will be placed in-between the other petals. Go all the way around again making sure to keep petals very snug to each other. Change tip directions again if you desire. Smooth any edges.

Bake according to directions above. Allow to cool completely.
Squirt some of your pond colored paint onto a paper plate. Dab your sponge into the paint. Have an extra piece of paper handy to dab off any excess paint so that when you sponge paint your flower it won’t go on gloppy. Gently sponge paint your flower leaving some areas light and some darker to give it a nice effect. Allow to dry.
