

Original Sculpey® Carved Terra Cotta Bowl
Original Sculpey® Carved Terra Cotta Bowl
Designed by Amy Koranek
Read More
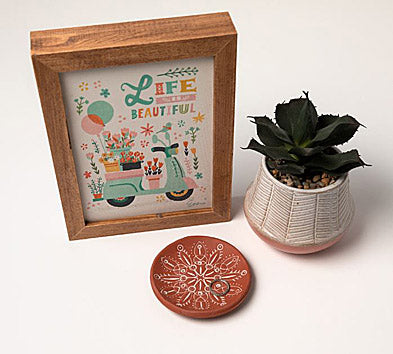
This simple “carving” technique can be shown off on nearly any color of clay with any color of Liquid Sculpey® as the antiquing medium to highlight all the cool details. Here I show you how to make the look in our Original Sculpey® Terra Cotta with White Liquid Sculpey® highlights.
COMPLETION TIME:
65 Minutes to make and bake the project twice
Read Less
ADDITIONAL SUPPLIES
- Scrap paper
- Large circle cookie cutter 3.5”-4”
- Flat bottom ceramic, glass, or metal bowl to use as a bowl form
- Paper towel

Project Instructions
- Getting Started:
Start with clean hands, unwrap and knead clay until soft and smooth, or condition by running clay though a Pasta Machine. We recommend using a designated machine for clay purposes only. When working with multiple colors, clean hands with soap and water or baby wipes (we have found that baby wipes work best) before switching colors. Shape clay, pressing pieces firmly together. Wash hands after use.
- Baking:
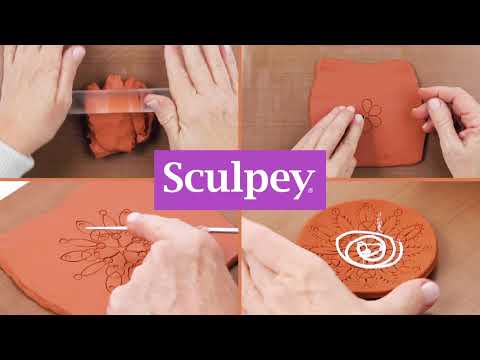
From 1/3 package of Terra Cotta (1 pound pack), condition the clay well and roll out a sheet that is 3/16” thick. You might enjoy working this project on top of a scrap piece of paper. Having the paper between the clay and the work surface will keep the clay from sticking and it will also enable you to turn the pattern as you work on it so that you always have the same orientation as you work out the circular pattern.

Take a deep breath and relax. This process of doodling with cutters, to achieve a faux carved look, is very simple but takes some focus. Take your time and enjoy the process. If you make a mistake, you can either adapt it to a unique design, or condition the clay again and start over.
In the very center of the sheet, start with a North pointing and a South pointing teardrop shape leaving a 1/4” gap in the center. I like to turn the cutter upside down for this technique, using the folded over edge of the cutter (or non-cutting side) to make my lines. That way the lines are just slightly thicker than when using the cutting side. Also, every time you impress the cutter into the clay, don’t go all the way through. I usually just go as deep as the folded edge. We are not cutting the design out, just using the perfect little shapes to create a lined pattern in the clay. Maybe try practicing on another sheet of clay before beginning. You might want to adjust the thickness of your clay to better suit you, maybe even making the clay thicker than I suggested in Step 2. As long as you keep the clay at least 3/16” thick, the dish should be sturdy enough to stand on its own.
In the very center of the sheet, start with a North pointing and a South pointing teardrop shape leaving a 1/4” gap in the center. I like to turn the cutter upside down for this technique, using the folded over edge of the cutter (or non-cutting side) to make my lines. That way the lines are just slightly thicker than when using the cutting side. Also, every time you impress the cutter into the clay, don’t go all the way through. I usually just go as deep as the folded edge. We are not cutting the design out, just using the perfect little shapes to create a lined pattern in the clay. Maybe try practicing on another sheet of clay before beginning. You might want to adjust the thickness of your clay to better suit you, maybe even making the clay thicker than I suggested in Step 2. As long as you keep the clay at least 3/16” thick, the dish should be sturdy enough to stand on its own.

Add more teardrops so that they make a radiating pattern like flower petals. I’m basing my design on a pattern of six, so every time I add in a new shape, there will be six of them in a mandala fashion.

Next, use the thin tapered marquis shape to add six shapes radiating out from between the petals.

Add an impression of the football shape to the tip of each petal.

Impress small circles connecting the teardrop petals to the footballs.

Use the tip of the Medium Etch ‘n Pearl to impress decorative lines in the teardrops, footballs, and marquis shapes.

Use the Etch ‘n Pearls from the pearl ends to make little circles as shown here.

Use the point of the Small Etch ‘n Pearl to make tiny dots as shown. Use the tip at an angle to make little feather type lines as shown.

Use the circle cutter to cut out around the outside of your pattern.

Peel the clay up from the paper or the work surface. Smooth the outside cut edges with your fingertips. Drop the clay circle into the bottom of a flat bottom dish. Gently use fingertip pressure to sit the dish down into the bottom of the bowl. You can also repeat the circles and the dashes with the Etch ‘n Pearls as a way to create pressure that will help the clay rest into the bottom of the bowl. It’s important to get the clay all the way down in the bowl so that air is not trapped between the clay and the bowl. If air is trapped it may cause an air bubble to form during baking which will distort your beautiful artwork.
Bake the clay in the bowl following the baking instructions for Original Sculpey.
Bake the clay in the bowl following the baking instructions for Original Sculpey.

When the bowl is completely cool, use your fingertips to gently release the clay from the bowl.
Squirt a small amount of White Liquid Sculpey® (LS) into the center of the pattern.
Squirt a small amount of White Liquid Sculpey® (LS) into the center of the pattern.

Rub the White LS into all the textures working from the center outward.

Add more White LS as needed to cover the entire pattern and get the LS into every detail.

Remove all excess White LS from the surface with a paper towel.
Bake again following the baking instructions for Original Sculpey® and allow to cool completely before handling.
Bake again following the baking instructions for Original Sculpey® and allow to cool completely before handling.

- Choosing a selection results in a full page refresh.
- Opens in a new window.