

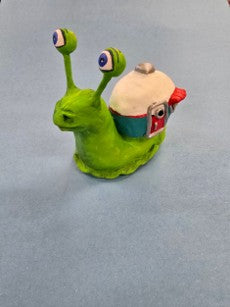
Original Sculpey® Snail Shell
Original Sculpey® Snail Shell
Read More
This project was designed as a classroom project but the questions work for an artist working at home as well.
• The point of this project is to make the shell anything else except a shell!!
• What do snails represent in our culture?
• What kinds of other homes are in our community or around the world?
• Do you want to make a funny statement or do something more serious?
Read Less
ADDITIONAL SUPPLIES
- Aluminum foil
- Wire
- Hot Glue Gun with Glue
- Matte Acrylic Paints
- Paint brush
Project Instructions
Step 1
Step 2

Step 3


Step 4


Step 5


Step 6

Step 7

Step 8


Step 9
