Liquid Sculpey® Potted Mini Succulents

Liquid Sculpey® Potted Mini Succulents

Designed by Amy Koranek
Read More
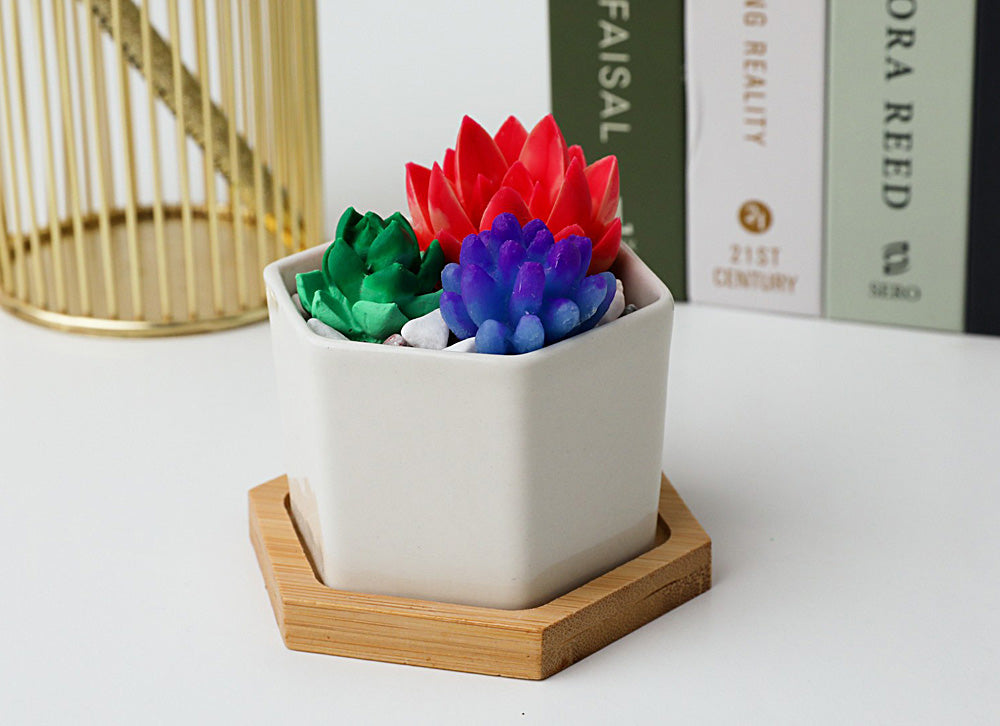
Create your own unique design to fit that “special” pot you have been saving - each mini succulent is a two-tone blend creating a colorful tiny table top garden. TIME TO COMPLETE: 2 Hours to make, bake, and assemble
Read Less
ADDITIONAL SUPPLIES
  • Paper towel
  • Miniature silicone succulent molds 1”-2” size
  • Mini silicone cupcake liners
  • Small vessel for holding succulent display
  • Decorative garden gravel
View full details
Project Instructions

Step 1

Please make sure your work area is covered and you are not working on an unprotected surface. We recommend working on the Sculpey® Oven Safe Work Mat, wax paper, metal baking sheet, or disposable foil. Uncured Liquid Polymer Clay may damage unprotected furniture or finished surfaces. Be sure to cover your crafting area appropriately.

- Stir Liquid Sculpey® completely. Thin with Sculpey® Liquid Clay Softener as needed

- Wash hands after use (we have found that baby wipes work best)

Baking/Curing:

 -It is important to use oven thermometer when you bake the liquids so that you can ensure your oven is at the correct temperature.

-Do not microwave the liquids. They must be baked in a Preheated oven at 275 ºF (130 ºC) for liquid colors and 300 ºF (149 ºC) for Clear – Do not exceed baking temperatures.

-If your piece is less than 1/4” bake for 15 minutes. For thicker pieces that are 1/4” or above bake for 30 minutes.

-If your liquid project has become yellowed or discolored in the oven, when you remake it, tent it by placing either – folding an index card in half and placing your project under it by using aluminum foil over your project.

Here’s a tip for baking perfectly in silicone molds. Dampen a dish towel with water and wring out as much of the water as you can. Fold the damp towel so that the molds can sit level on top of it. The damp towel will slow down the curing process so that the LS will cure evenly throughout and avoid warping.


Step 2

Fuchsia/Orange Succulent:

To get the tips of the succulents in an accent color, I sometimes turn the silicone mold inside out.
This can be tricky to hold as the mold wants to naturally spring back the other
way. Practice this before adding Liquid Sculpey® to the mold. This also works
better with molds that are slightly larger.

Step 3

Squirt the smallest amount of Fuchsia Liquid Sculpey® (LS) into just the tips of the succulents while holding the mold inside out.

Step 4

Carefully allow the mold to go back right side out. Use the tip of a tool to carefully poke into the tips helping the LS settle there.

Step 5

Fill the mold halfway with Light Orange LS.

Step 6

Tap the sides of the mold with the 12 mm Ball Tool to release air bubbles.

Step 7

Add more Light Orange LS to the mold and tap again. Keep adding and tapping until the mold is filled to level.

Step 8

Purple/Blue Succulent:

Add a little bit of Purple LS to the bottom of another succulent shape mold.

Step 9

Use the tip of the Blunt Point Tool to help move the Purple LS into all the tips of the succulent.

Step 10

Fill the mold halfway with Translucent Turquoise. Tap the mold to release air bubbles.

Step 11

Repeat filling the mold and tapping until the mold is filled to level.

Step 12

Green/Light Green Succulent:

Turn the mold inside-out.

Step 13

Add drops of Green LS to just the tips of the succulents shape while holding the mold inside out.

Step 14

Carefully allow the mold to turn back right side out.

Step 15

Use the tip of the Blunt Point Tool to make sure the Green LS is settled into the tips.

Step 16

In a mini silicone cupcake liner, mix equal parts Green and White LS to make Light Green.

Step 17

Pinch the mini silicone cupcake liner to form a spout while holding it above the mold.

Step 18

Back fill the mold halfway with the Light Green.

Step 19

Here is another bubble releasing tip - carefully squeeze the half-filled mold to help move LS into all the details, to mix the colors, and to release air bubbles.

Step 20

Tap the side of the mold with the 12 mm Ball Tool.

Repeat filling and tapping until the mold is filled to level.

Bake all three succulents following the baking instructions for Liquid Sculpey®.

Allow to cool completely before flexing the molds to release the baked pieces.

Step 21

Add gravel to the pot. Arrange the baked/cured succulents, settling them slightly into the gravel. Add more gravel as necessary to hold them in place.