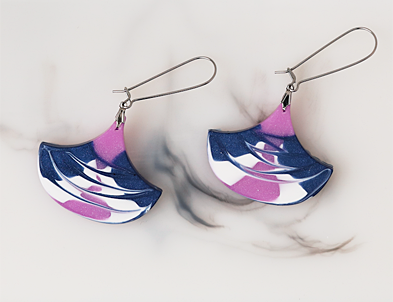

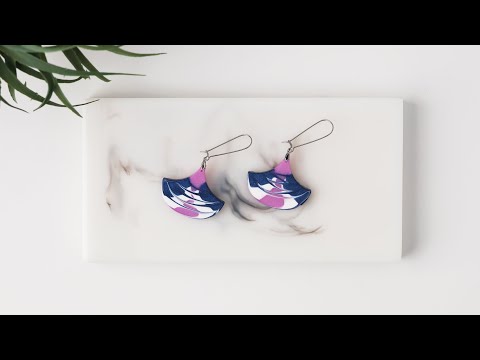

Liquid Sculpey® Marbled Morocco Earrings
Liquid Sculpey® Marbled Morocco Earrings
Designed by Amy Koranek
Read More
These pretty danglers are created using our Liquid Sculpey and the Sculpey Geometric Jewelry Mold.
TIME TO COMPLETE:
90 Minutes to make, bake, and assemble
Read Less
ADDITIONAL SUPPLIES
- Paper towel
- Flat nose pliers
- Silver tone pinch bails (2)
- Antique silver tone ear wires (2)

Project Instructions
- Getting Started with Liquid Sculpey®:
- Baking:
- It is important to use oven thermometer when you bake the liquids so that you can ensure your oven is at the correct temperature.
- Do not microwave the liquids. They must be baked in a Preheated oven at 275 ºF (130 ºC) for liquid colors and 300 ºF (149 ºC) for Clear – Do not exceed baking temperatures.
- If your piece is less than 1/4” bake for 15 minutes. For thicker pieces that are 1/4” or above bake for 30 minutes.
- If your liquid project has become yellowed or discolored in the oven, when you remake it, tent it by placing either – folding an index card in half and placing your project under it or by using aluminum foil over your project.
Begin by making sure the bottles of Liquid Sculpey® (LS) are stirred completely. Stirring tools can be wiped clean with paper towel.
Squirt a line of Navy Metallic LS along the outer edges of the Morocco shape.
Squirt a line of Navy Metallic LS along the outer edges of the Morocco shape.

Next add lines of White LS right next to the Navy.

Layer the remaining area with Amethyst Pearl LS, but not to level yet. At this point we only need the shape to be covered with the colors not filled.

Starting at the top left part of the Navy Metallic stripe, dip the tip of the blunt point tool into the LS. Make sure the tip goes all the way through the LS and touches the mold. Keep the point touching the mold as you drag the tip back and forth through the LS colors. When you have gone back and forth several times, and are happy with your pattern, carefully remove the tool from the LS and wipe clean with paper towel.

Back fill the entire shape to level with Amethyst Pearl. Tap the mold several times on the work surface to release air bubbles. Stubborn air bubbles can be popped with the Needle Tool.

Designer’s Tip - Baking Liquid Sculpey® in shallow molds: To eliminate the possibility of warping during curing, place a damp dishcloth on the baking tray and then place the mold on top of the dishcloth. The damp dishcloth will keep the mold from unevenly heating during curing. It’s the uneven heat of the bottom of the mold where it touches the pan that causes molds to warp which can cause clay pieces to warp.
Bake the mold and allow to cool completely before handling. When the mold is completely cool, gently flex the mold to remove the baked piece. Repeat Steps 2-7 to create a second piece for the pair.
Bake the mold and allow to cool completely before handling. When the mold is completely cool, gently flex the mold to remove the baked piece. Repeat Steps 2-7 to create a second piece for the pair.

Here’s the layout for the earrings.

Poke a pilot hole in the tip of the Morocco shape. Poke the Needle Tool all the way through. Remove the tool.

Line up the prongs of the pinch bail with the pilot holes. Use flat nose pliers to carefully pinch the prongs into the holes.

Add ear wires to the pinch bails.
