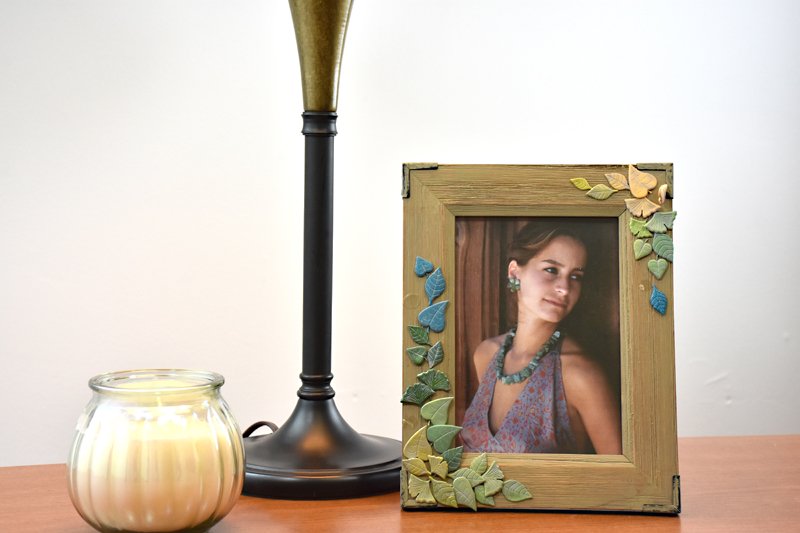
Liquid Sculpey Leaf Frame
Liquid Sculpey Leaf Frame
Read More
This frame creates a puzzle of shape and color – all created by Liquid Sculpey and the Sculpey leaf mold!
Design by syndee holt
Silicone Bakeable Mold - Flower coming soon!
Read Less
ADDITIONAL SUPPLIES
Have on hand: 6x4 frame with a wide flat front

Project Instructions
Getting started:
Please make sure your work area is covered and you are not working on an unprotected surface. We recommend working on the Sculpey® Work ‘n Bake Clay Mat, wax paper, metal baking sheet, or disposable foil. Uncured Liquid Bakable Medium may damage unprotected furniture or finished surfaces. Be sure to cover your crafting area appropriately.
-Gently stir the bottle of liquid bakeable medium.-Wash hands after use (we have found that baby wipes work best) Baking
-It is important to use oven thermometer when you bake the liquids so that you can ensure your oven is at the correct temperature. -Do not microwave the liquids. They must be baked in a Preheated oven at 300 ºF (149 ºC) for liquid colors and 325 ºF (163 ºC) for Clear – Do not exceed baking temperatures. -If you are using the liquids as a glaze or in thin pieces less than ¼ inch bake for 15 minutes. For thicker pieces that are ¼ or above bake for 30 minutes. -If you are baking on a ceramic tile then you will also need to bake at 30 minutes since it will take longer for the tile to heat up. This will ensure the proper fusing of the liquid material. -When baking these liquids you may experience some vapors or a slight odor. This is not harmful and will not affect your creation. -If your liquid project has become yellowed or discolored in the oven, when you remake it, tent it by placing either – folding an index card in half and placing your project under it or by using aluminum foil over your project.
Place a small portion of the Gold LS into a small plastic cup and add a couple of drops of alcohol ink. LESS IS MORE! You can always add more ink after stirring! I also add a drop or two of Sculpey clay softener if the mixture feels thick. Stir well with a toothpick. Repeat with other ink colors and Gold Ls in separate plastic cups. You want about 5 shades of greens (including straight Gold LS)

Add a small amount of the LS mixture to the leaf mold, using a toothpick to help spread the liquid in the mold. Use the small squeegee to carefully scrap any excess from the top of the mold. Once the mold is filled, bake according to the directions above.

You can start planning your frame with each batch of leaves when they are baked!

Since my frame was already washed with a grey color, I decided to wash my leaves as well to better match the frame and bring out the texture in the leaves.

Once you have your leaves arranged, carefully glue each leaf into place and add your photo to your new frame!


