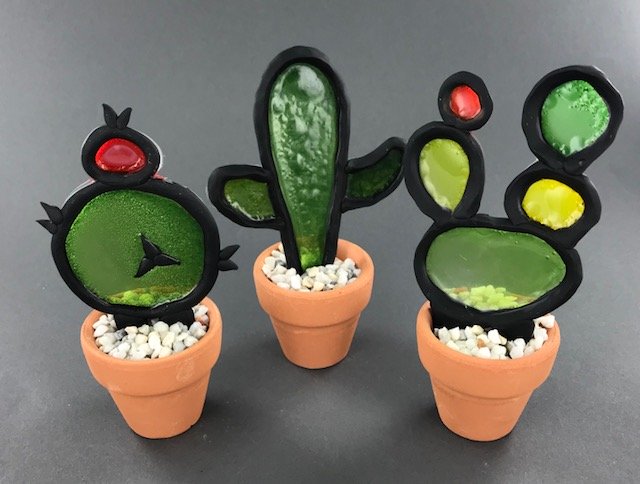
Liquid Sculpey Cactus Trio
Liquid Sculpey Cactus Trio
Read More
Read Less
Create your own little table top cactus garden using Clear Liquid Sculpey. This miniature faux stained glass artwork stands alone thanks to the frame support of Sculpey III.
ADDITIONAL SUPPLIES
Alcohol inks red, green, and yellowDisposable paint brushes
Glass baking surface - I use a piece of glass that I removed from a photo frame and taped the edges with masking tape to protect myself from sharp edges.

Project Instructions
Getting Started:
Polymer clay may stain. CLAY MAY DAMAGE UNPROTECTED FURNITURE OR FINISHED SURFACES. DO NOT USE polymer clay on unprotected surfaces. We recommend working on the Sculpey® Work ‘n Bake Clay Mat, wax paper, metal baking sheet, or disposable foil. Start with clean hands and work surface area. Knead clay until soft and smooth. For best results, clean your hands in between colors. Shape clay, pressing pieces together firmly. Bake on oven-proof glass or metal surface at 300°F (130 °C). For best baking results, use an oven thermometer. DO NOT USE MICROWAVE OVEN. DO NOT EXCEED THE ABOVE TEMPERATURE OR RECOMMENDED BAKING TIME. Wash hands after use.
Baking:
Baking should be completed by an adult. Begin by preheating oven to 300°F (130 °C). Test temperature with oven thermometer for perfectly cured clay. Gold, Silver, Pearl, Black, and White Liquid Sculpey may be cured at 275°F if used in conjunction with solid clays. However, Clear Liquid Sculpey only goes perfectly clear if it is heated to at least 300°F and can be heated to as high as 325°F.
Working on a glass surface, make a simple frame from a rope of Black Sculpey® III. Make sure the shape of the cactus is pressed down well onto the glass so that it seals and there is nowhere for the liquid clay to leak out in between. I added little “feet” to this squaty cactus to give it support and help it stand up later.

Just for fun I added a few prickles to the cactus with little triangles of black clay.

Next, pour enough Clear Liquid Sculpey into the frame of the cactus so that when spread it will just make a nice even layer inside the shapes.

I use an old paint mixing pan to place just a couple of drops of alcohol inks into. I’m using bright red, lime green, and yellow ink colors.

Using a disposable paintbrush, pick up just a dab of color and dip it into the Clear Liquid Sculpey. The alcohol ink is extremely vibrant so you only need a tiny amount to color your Clear LS. Stir the ink into the LS with the tip of the paintbrush.

Using a different brush, add a tiny dab of red ink to the flower on the top. Mix it in completely. As you are mixing, make sure you mix all the way to the edges but be careful not to disrupt the shape of the Black frame since it is not yet baked. When the color is mixed in, the cactus is ready to bake at 300F for 10-15 minutes. Monitor the baking closely - you just need enough time to turn the Liquid Sculpey Clear but you do not want to burn the Black SIII.

Make another cactus in a different shape. This one is a more traditional type of cactus.

Add little arms. Make sure again that the Black Sculpey III seals down to the glass and that all the parts are hooked together well.

Add enough Clear Liquid Sculpey to just flood the shapes.

For this one, I wanted to make the parts of the cactus different shades of green. I started by mixing yellow ink into the arm areas first.

Then I went back and mixed green ink into the arms as well.

I tinted the body with just green ink. When the color is mixed in, the cactus is ready to bake at 300F for 10-15 minutes. Monitor the baking closely - you just need enough time to turn the LS clear but you do not want to burn the Black Sculpey III.

Make as many different shapes of cacti as you wish and have fun with the process. When they are all baked, stand them up in a pot of sand or pebbles and enjoy!


