Sculpey Bake Shop™ Eraser Clay Animal Face Erasers
Sculpey Bake Shop™ Eraser Clay Animal Face Erasers
Read More
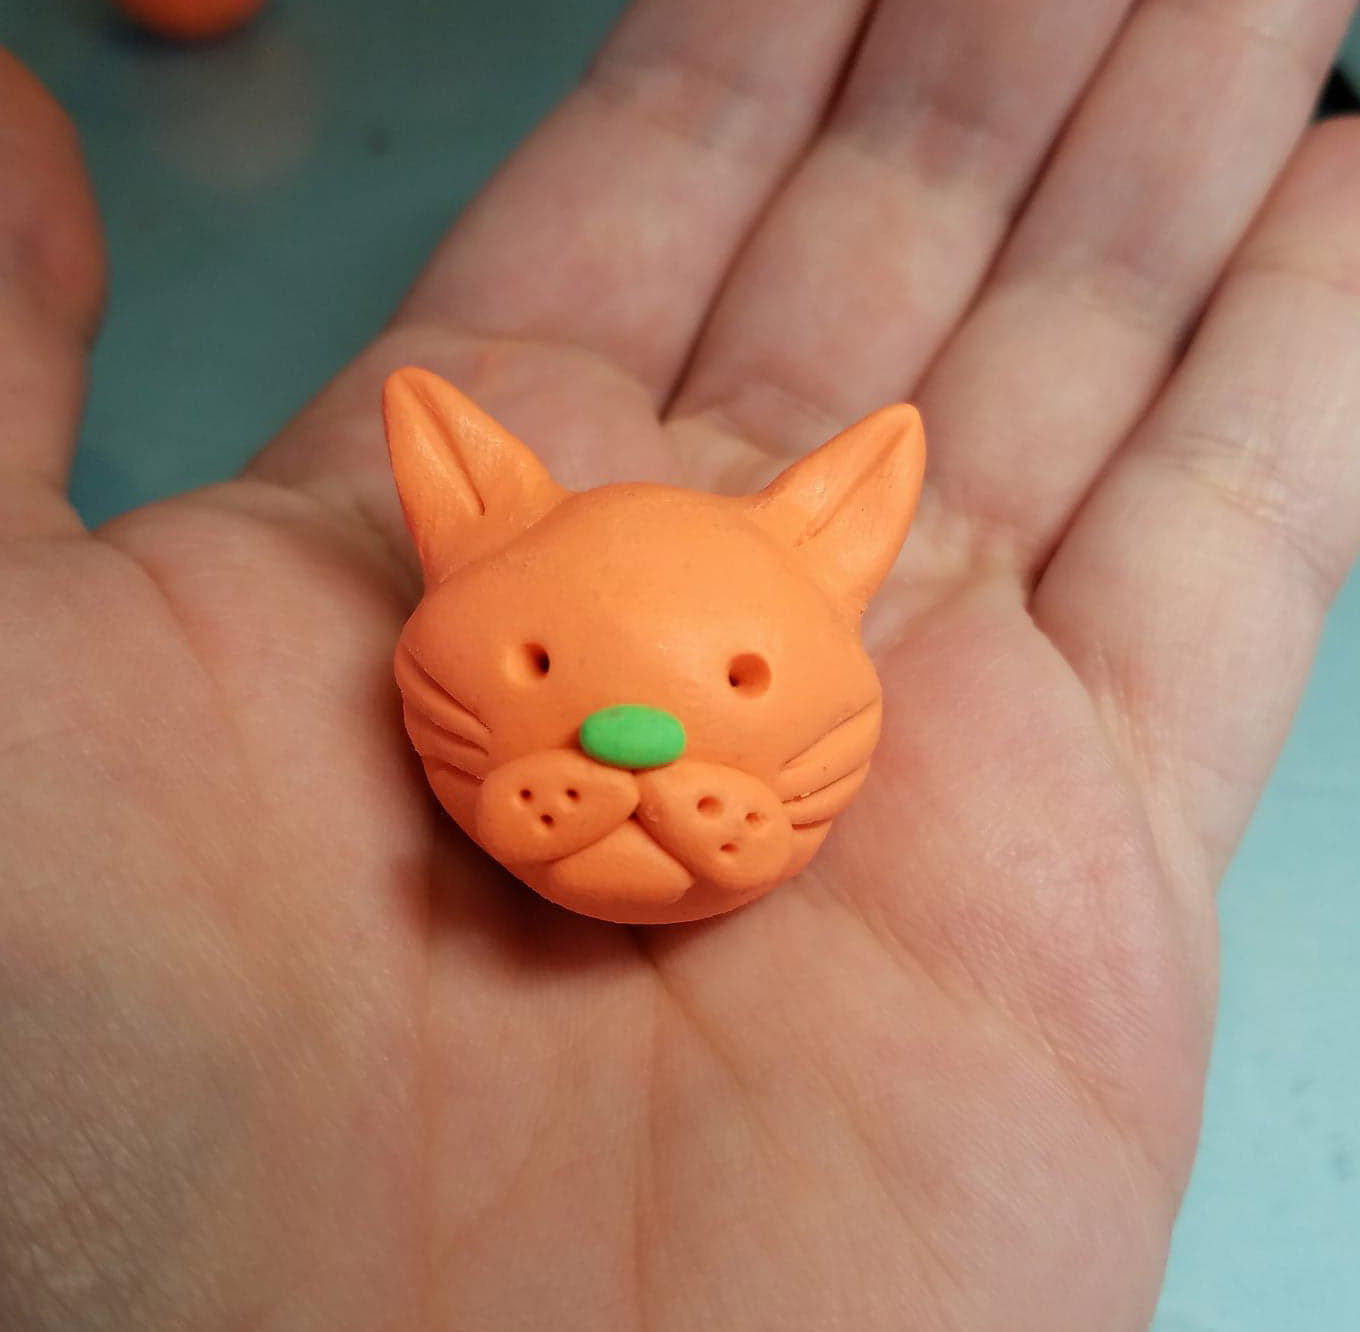
Create some cool erasers for your pencils!
Read Less
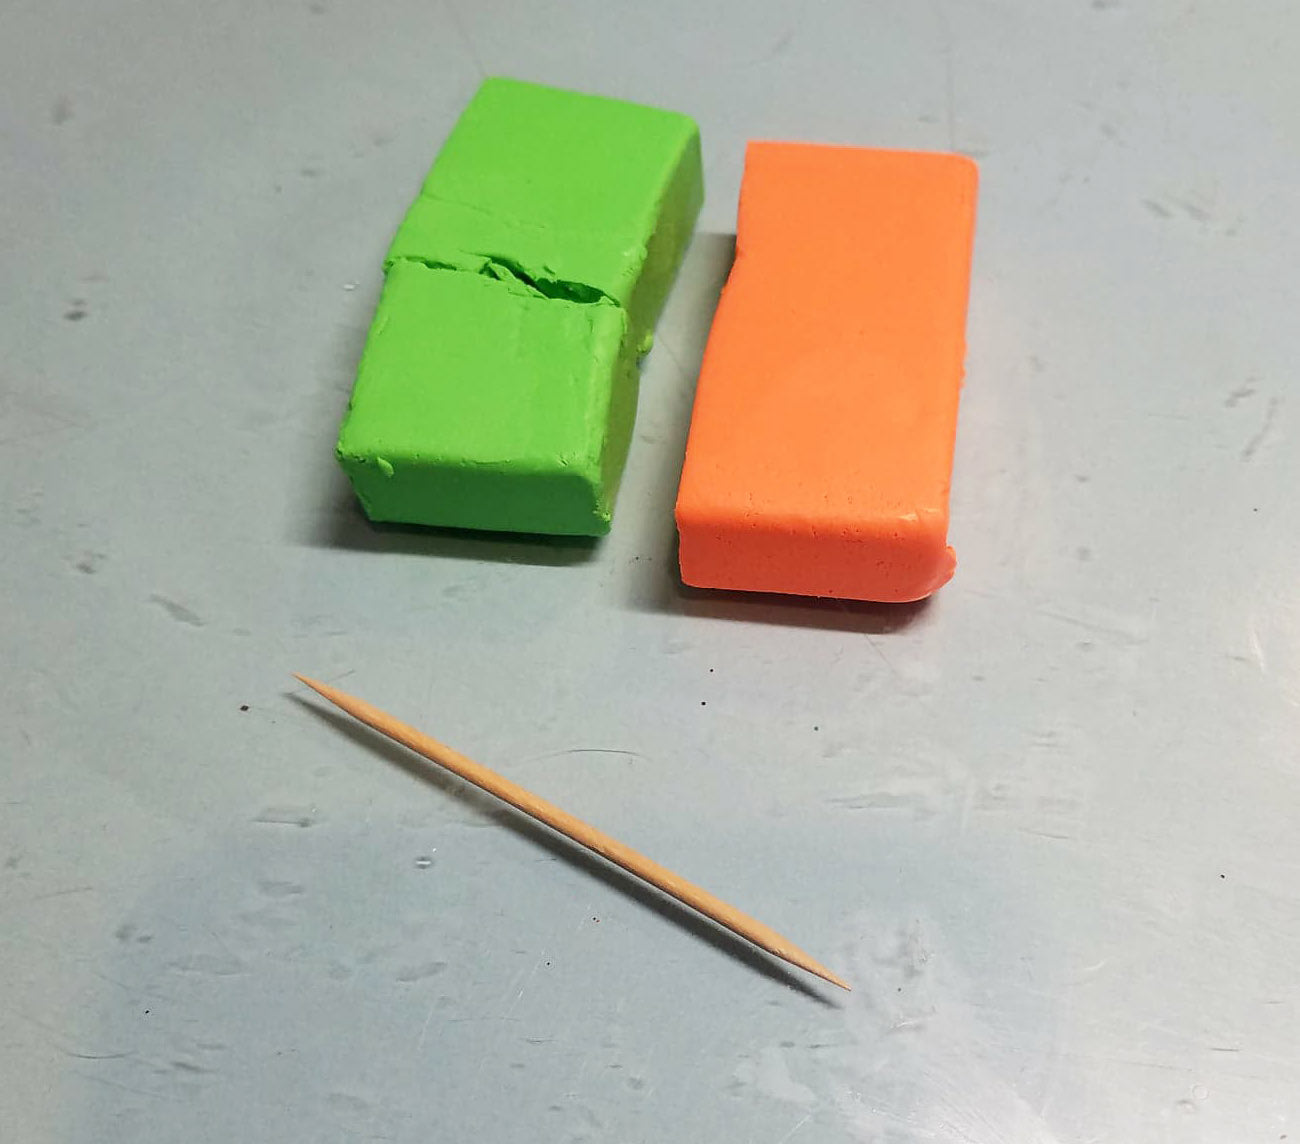
ADDITIONAL SUPPLIES
- Toothpick
- Ruler

Project Instructions
- Getting Started:
Start with clean hands, unwrap and knead clay until soft and smooth, or condition by running clay though a Pasta Machine. We recommend using a designated machine for clay purposes only. When working with multiple colors, clean hands with soap and water or baby wipes (we have found that baby wipes work best) before switching colors. Shape clay, pressing pieces firmly together. Wash hands after use.
- Baking:
Gather a one ounce bar of orange eraser clay, and a one ounce bar of lime eraser clay along with one toothpick and ruler.
Roll a one-inch ball of orange. Remove a bit from that ball to create two smaller orange balls. These will be the ears. Set them aside for a minute. Re-roll the rest of the ball again to make the head.

Taking one of the small “ear” balls, roll one end between the tips of your pointer finger and thumb to make a cone. Repeat with the other small ball.

Press the ears onto your bigger ball. Using your fingers, blend the clay where the ears meet the head all the way around the ears. Press the ears gently between your pointer finger and thumb to flatten them. Pinch at the top if your ears need to be pointier!

With some of your leftover orange, roll another small ball – about the size you made for the ears. Then, separate it into three balls of the same size

Place one of the balls toward the bottom of the head.

With one of the other small balls, make a cone like you did for the ears. Repeat with the last ball.

Press them flat onto the head, above the chin, with the tips of the cones meeting at the middle. Then, using your toothpick, poke three holes into each flattened cone on the face.

Make a very small ball out of the lime clay. Roll it into an oval, and press it flat onto the face above the flattened cones. This is the nose.

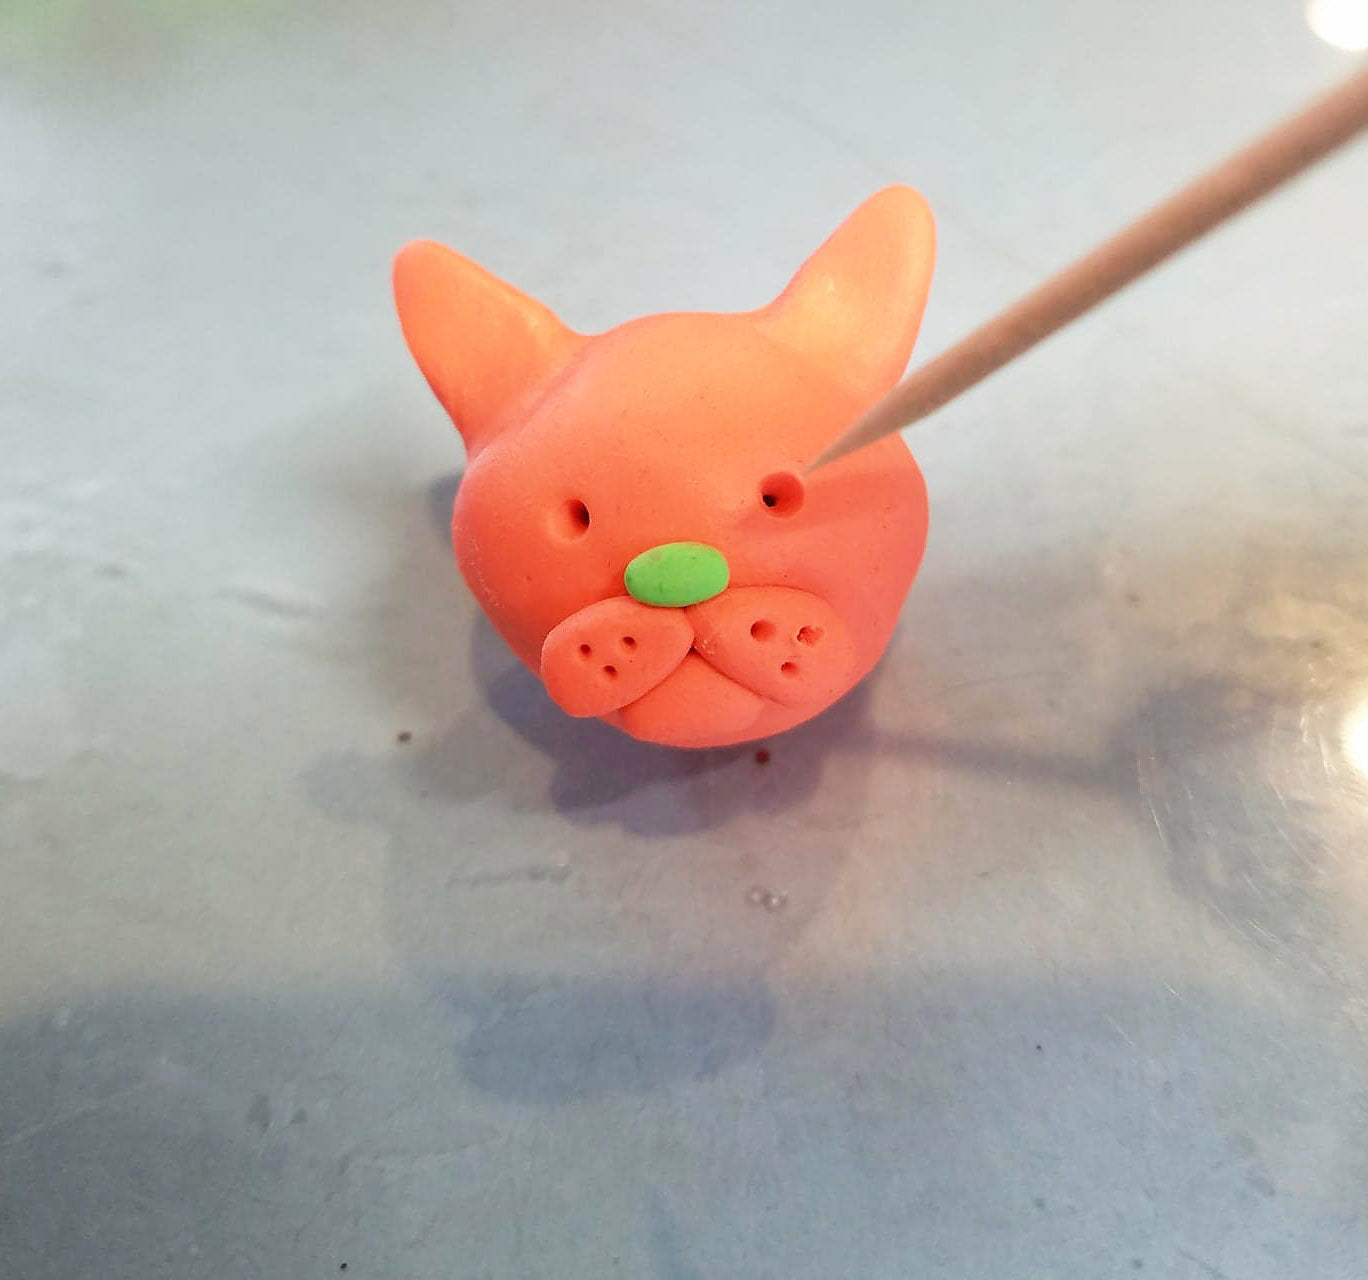
Using your toothpick, poke holes for the eyes. While the toothpick is in the clay, move your hand in little circles. This will make the toothpick create wider holes for the eyes.
Using your toothpick, press the side of it into the side of the head three times on one cheek, and three times on the other. This creates the whiskers

Using your toothpick, press the side of it into the middle of each ear, making creases.

Have an adult help you with this step. Bake according to directions in step 1. Let cool, then enjoy your eraser!