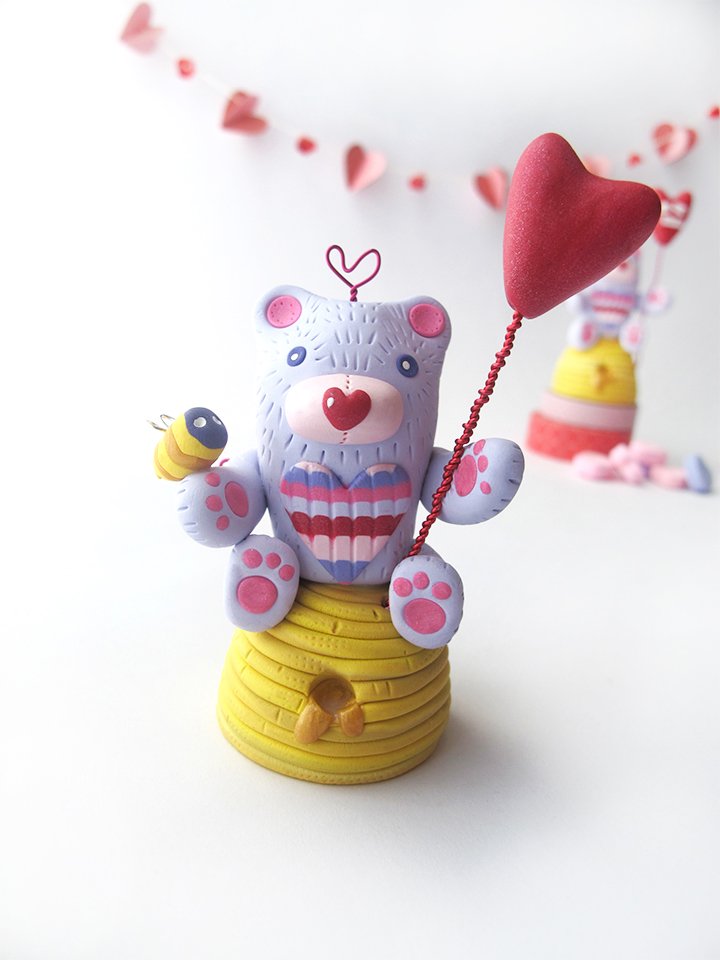
Bee My Honey Bear Figurine
Bee My Honey Bear Figurine
Read More
It's a honey of a project, your valentine will smile with joy when receiving this adorable honey bear.
Created by
Swirly Designs by Lianne and Paul Stoddard
www.swirlydesigns.com
Read Less
ADDITIONAL SUPPLIES
Ceramic tile
Jewelry wire cutter
Long needle nose pliers
20 gauge wire in red
26 gauge wire in Hot Pink and Silver
Toothpicks
Paints: White
Heart cutters sizes: ¾|Ceramic tile
Jewelry wire cutter
Long needle nose pliers
20 gauge wire in red
26 gauge wire in Hot Pink and Silver
Toothpicks
Paints: White
Heart cutters sizes: ¾

Project Instructions
Getting Started: Polymer clay may stain. CLAY MAY DAMAGE UNPROTECTED FURNITURE OR FINISHED SURFACES. DO NOT USE polymer clay on unprotected surfaces. We recommend working on the Sculpey® Clay Mat, wax paper, metal baking sheet, or disposable foil. Start with clean hands and work surface area. Knead clay until soft and smooth. For best results, clean your hands in between colors. Shape clay, pressing pieces together firmly. Bake on oven-proof glass or metal surface at 275°F (130 °C) for 30 minutes per ¼" (6 mm) thickness. For best baking results, use an oven thermometer. DO NOT USE MICROWAVE OVEN. DO NOT EXCEED THE ABOVE TEMPERATURE OR RECOMMENDED BAKING TIME. Wash hands after use. Baking should be completed by an adult. Begin by preheating oven to 275 °F (130 °C). Test temperature with oven thermometer for perfectly cured clay. For best results, condition all clay by running it through the Clay Conditioning Machine for several passes on the widest setting. Fold the clay in half after each pass and insert the fold side into the rollers first.
Making the Beehive base - Gather approximately a 1”ball worth of remnants or scrap pieces of clay. Condition and mold into a gumdrop shape by forming a round ball then flattening the bottom.

Condition a piece of Canary, White and 18K Gold clay. Take out the clay extruder and using a 1/16 disc, add your clay to the extruder and squeeze out a large enough piece to spiral around your gumdrop shape.

Apply some Bake and Bond to the gumdrop shape and start at the bottom and spiral it to the top. If you run out of clay before making it to the top of your piece, not to worry, just fill more clay into your extruder and squeeze another piece and continue to the top. Use your clay tool to create texture and a few lines in your beehive. With your jewelry wire cutter cut a piece of toothpick and apply some bake and bond and insert into the top of the beehive with half sticking out.


Creating Your Bear - Condition a piece of White clay and mix in a small amount of Royalty clay and some Pearl. (Blend enough clay to make the bears body, two arms, and legs) Run it through the clay-conditioning machine on the #3 setting until its blended. (Add small amounts of Royalty clay to the White until you achieve a light shade of Purple)
Roll out and sculpt the bear body to approx. 1” wide by 1 1/2 “ high. With your finger pull on the clay to form two ear shapes and then use a 7mm stylus to create the indentations for ear holes. Roll two small balls out of a mixture of Pearl and So 80’s clay to add to the inside of the bears ear holes. Press in with your 7mm stylus tool to flatten.
Take a piece of White and a hint of Cherry Pie clay and run it through the clay conditioning machine until it’s blended. Sculpt the bears’ snout and attach to the face. Use your 5mm stylus tool to make eyeholes then roll out two small pieces of Royalty clay and insert in the eyeholes.

Sculpt out two arms and two legs for your bear. Make paw print impressions with your 7mm and 5mm stylus tool and fill in the paw impression with So 80’s clay.


Mix a little Pearl and Cherry Pie clay together and sculpt a tiny heart shape nose. Use your needle end pointer tool to create the bears’ fur on the body and arms and legs. Set aside.

With your wire cutter, long needle nose pliers and a 26 gauge hot pink wire, make three wire hearts (for the top of the head and back of each shoulder). Apply some bake and bond to end and insert it on the top of the bears’ head.


Create the mini Bee - Take a small piece of Canary to create a mini oval shaped bee body. Add a Royalty head and 18 K Gold stripes. Make a heart shaped wire heart for the bee wings.

Stripped Belly Heart Condition a piece of White clay and mix in a small amount of Royalty clay and some Pearl. Condition a piece of White clay and mix in a small amount of Cherry Pie clay and some Pearl. Condition a piece of Cherry Pie clay and some Pearl. Condition a piece of Royalty clay and some Pearl.Condition a piece of So 80’s clay and some Pearl.
- Choosing a selection results in a full page refresh.
- Opens in a new window.

