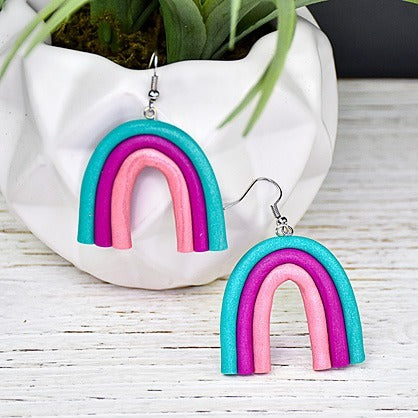
Sculpey III® Rainbow Earrings
Sculpey III® Rainbow Earrings
Designed by Amy Koranek
Read More
Read Less
Create your own rainbow style earrings with this simple and easy project. Mix up the colors to create your own statement accessories.
COMPLETION TIME:
30 Minutes to make and bake.
ADDITIONAL SUPPLIES
- 2” Silver tone head pins (2)
- Silver tone ear wires (2)
- Wire cutters
- Round nose jewelry pliers
- Flat nose jewelry pliers
Project Instructions
- Getting Started:
Start with clean hands, unwrap and knead clay until soft and smooth, or condition by running clay though a Pasta Machine. We recommend using a designated machine for clay purposes only. When working with multiple colors, clean hands with soap and water or baby wipes (we have found that baby wipes work best) before switching colors. Shape clay, pressing pieces firmly together. Wash hands after use.
- Baking:
For the rainbow earrings you will just need 1/16 bar of each of the colors.

Roll each of the pieces of clay into a long thin rope 7.5” - 8” in length.
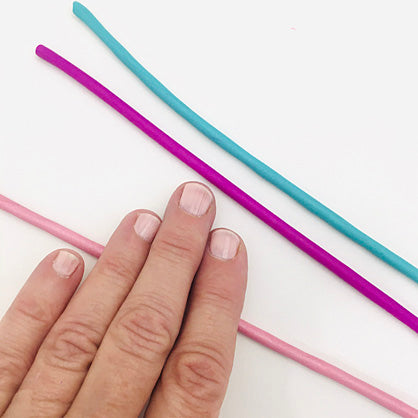
Lay the ropes side by side and carefully pinch them together all the way down their length to make sure they attach to each other. Make sure to use a gentle touch so that the ropes are not deformed or compressed too much.

Cut the ropes in half so that you have two equal length sections approximately 4” each.

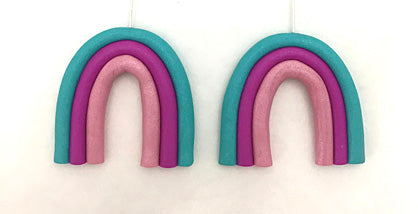
Bend the ropes just slightly to indicate the center of the pieces (top rainbow). Push a head pin into the center going up from the bottom. Push the head pin in all the way and bend the rainbow into its complete arc. Your fingertip will make a good guide in the center of the arc to make a nice smooth bend.
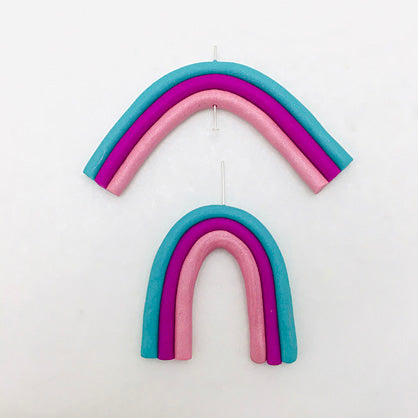
Repeat Step 6 for the second rainbow. Trim across the bottom of each rainbow with the knife tool making them as long or as short as you like.
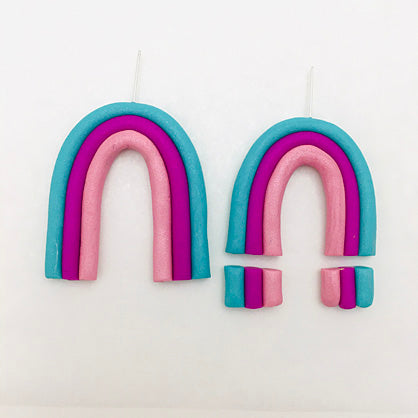
Bake the rainbows following the baking instructions for Sculpey®III. When the earrings are completely cool, trim the tails of the head pins to 3/4”. Curl loops in each of the tails to make a neat little eye at the top of each rainbow. Open ear wire loops with flat nose pliers and attach to the rainbows.