
Skip to product information
1 of 1

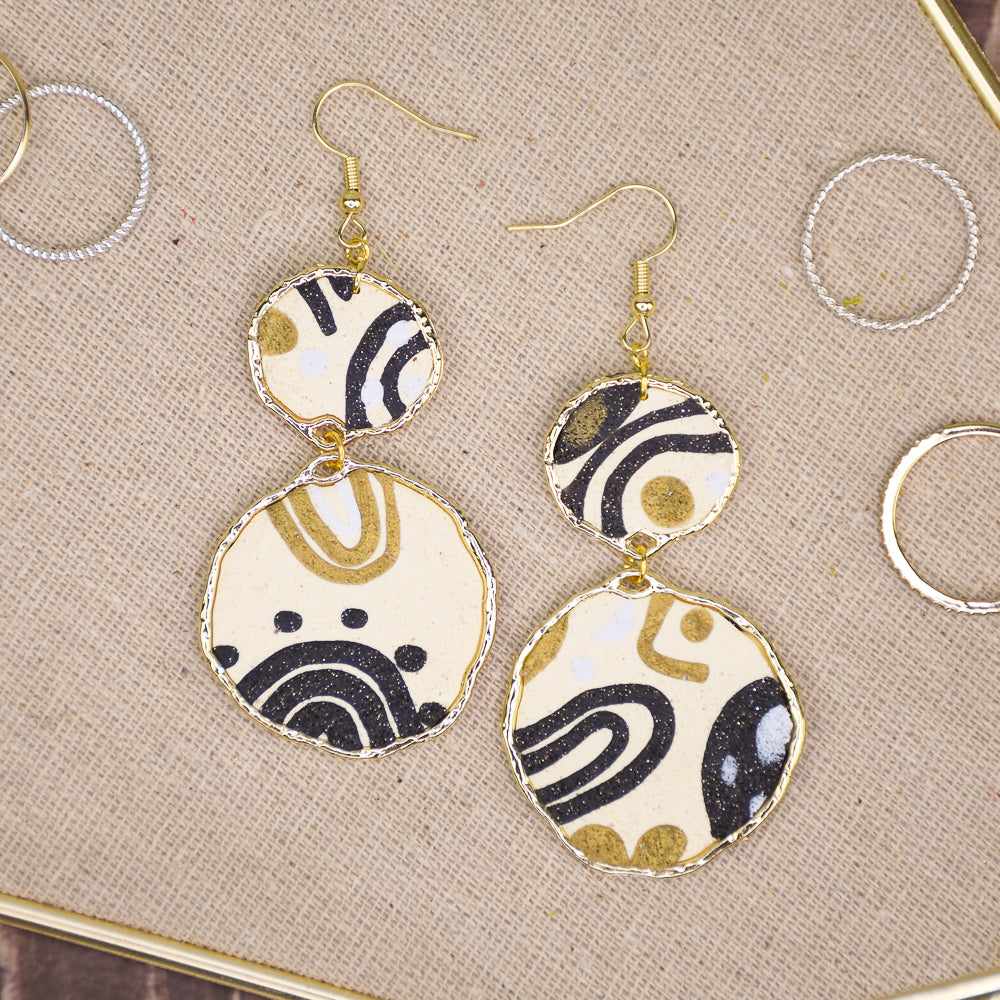
Sculpey Premo™ Mixed Media Earrings

Sculpey Premo™ Mixed Media Earrings

Designed by Precious Nunez
Read More
Combine bold patterns with playful texture with these mixed media earrings, giving you a design that feels both modern and completely one-of-a-kind. TIME TO COMPLETION: About 1 hour
Read Less
ADDITIONAL SUPPLIES
  • Jewelry pliers
    5 mm Gold jump rings
    Earring hooks and posts
    2 Large and 2 small open bezels
    Prickly clay tool (or foil) for texture
View full details
Project Instructions

Step 1

Getting Started:

Please make sure your work area is covered and you are not working on an unprotected surface. We recommend working on the Sculpey® Oven Safe Work Mat, wax paper, metal baking sheet, or disposable foil. Uncured clay may damage unprotected furniture or finished surfaces. Be sure to cover your crafting area appropriately.

Start with clean hands, unwrap and knead clay until soft and smooth, or condition by running clay though a Pasta Machine. We recommend using a designated machine for clay purposes only. When working with multiple colors, clean hands with soap and water or baby wipes (we have found that baby wipes work best) before switching colors. Shape clay, pressing pieces firmly together.  Wash hands after use.

Baking (also called Curing):

Begin by preheating oven to 275 °F (130 °C). After you are done creating; for best results bake clay on an oven-proof surface such as metal, aluminum foil, an index card or the Sculpey® Oven Safe Work Mat at 275°F (130 °C) for 30 minutes per ¼" (6 mm) of thickness according to package directions. Oven safe glass or ceramic surfaces are also acceptable for baking; however please note that the baking times may take longer as the glass or ceramic surfaces take longer to heat up. For best baking results, use an oven thermometer. DO NOT USE MICROWAVE OVEN. DO NOT EXCEED THE ABOVE TEMPERATURE OR RECOMMENDED BAKING TIME.

Step 2

Condition one bar of Butter Yellow clay and roll it through the thickest setting of the clay conditioning machine to form a slab.

Step 2

Step 3

With a small amount of Twinkle Twinkle, shape it into a small stone-like shape, flatten it, and add a simple white clay design on top. Keep the embellishment small so it doesn’t overpower the base. Cut a thin layer off the surface of the design, so it appears to be flattened.

Step 3
Step 3

Step 4

Create a second stone using the same method as Step 3 and Twinkle Twinkle, but decorate this one with a small gold clay design placed horizontally.

Step 4

Step 5

Roll thin snakes of Twinkle Twinkle, White, and Antique Gold clay to create simple linear designs. Arrange these across the slab in any pattern you like. Add small shapes or dots as desired; this is where you can personalize the composition.

Step 5

Step 6

Gently roll over the slab using an acrylic roller to flatten the added pieces into an even surface. Roll slowly to avoid smearing the designs. Then, using a prickly clay tool, add a light textured pattern across the entire slab.

Step 6

Step 7

Place two small and two large bezels onto the slab in your preferred layout. Roll them over with the acrylic roller, so they sink into the clay and create clean cut marks.

Step 7

Step 8

Remove the excess clay from around each bezel shape and smooth any rough edges.
Use a needle tool or craft knife to carefully remove the clay trapped inside the bezel loops. Then, on each small bezel, poke one hole at the top center on the side opposite the existing bezel loop.

Step 8

Step 9

Bake all the pieces in a preheated oven according to Step 1.

Step 9

Step 10

Use jewelry pliers to open jump rings and connect the bezels, small bezels on top, large bezels on the bottom, for both earrings.


Add a jump ring to the top of each small bezel, attach the earring hook, and close securely with pliers.

Step 10

Step 11

Here is a look at my completed earrings!

Step 11