Skip to product information
1 of 1

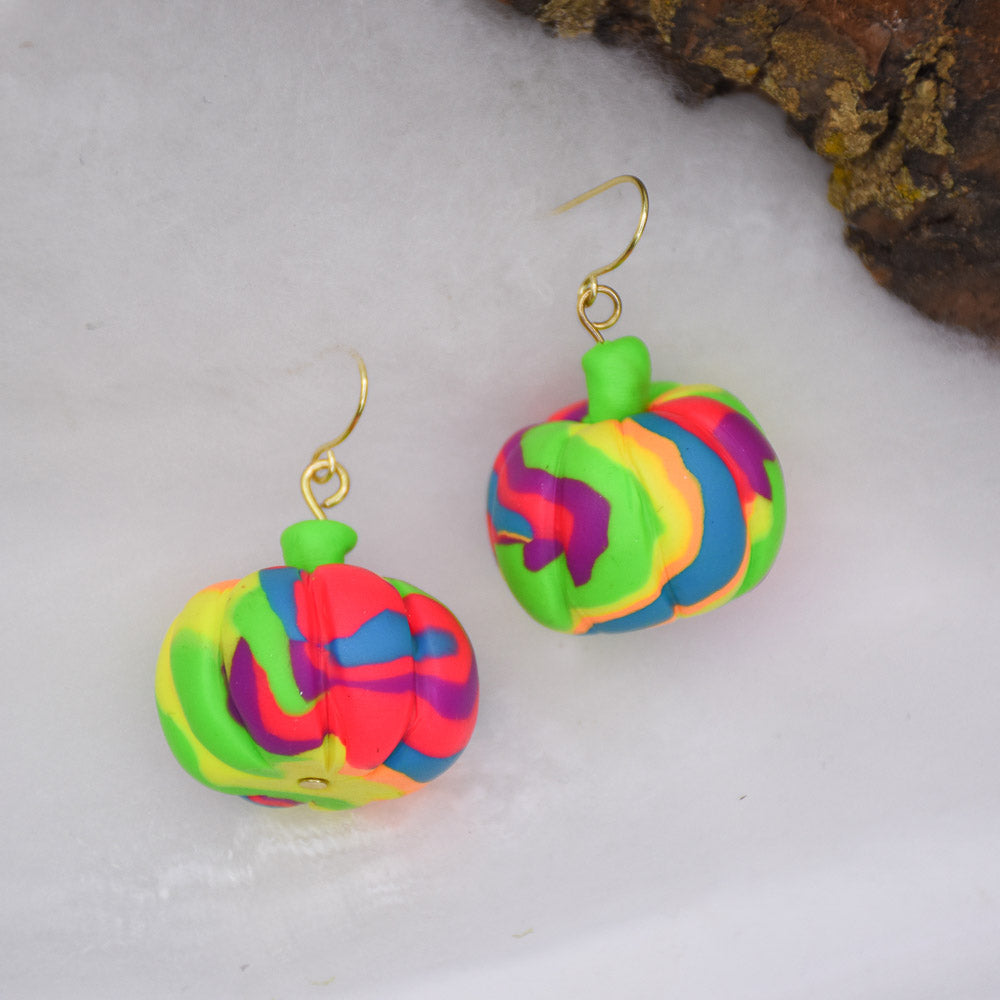
Sculpey Premo™ Dopamine Pumpkin Earrings

Sculpey Premo™ Dopamine Pumpkin Earrings

Designed by Amy Koranek
Read More
Swirls of colors create a wonderful pattern that combine both restful pastels with bright neons to create these incredible pumpkin-shaped earrings. TIME TO COMPLETION: About 60 minutes
Read Less
ADDITIONAL SUPPLIES
  • 2” Gold tone head pins (2)
  • Gold tone ear wires (2)
  • Wire cutters
  • Round nose pliers
View full details
Project Instructions

Step 1

Getting Started:

Please make sure your work area is covered and you are not working on an unprotected surface. We recommend working on the Sculpey® Oven Safe Work Mat, wax paper, metal baking sheet, or disposable foil. Uncured clay may damage unprotected furniture or finished surfaces. Be sure to cover your crafting area
appropriately.

Start with clean hands, unwrap and knead clay until soft and smooth, or condition by running clay though a Pasta Machine. We recommend using a designated machine for clay purposes only. When working with multiple colors, clean hands with soap and water or baby wipes (we have found that baby wipes work best) before switching colors. Shape clay, pressing pieces firmly together.  Wash hands after use.

Baking (also called Curing):

Begin by preheating oven to 275 °F (130 °C). After you are done creating; for best results bake clay on an oven-proof surface such as metal, aluminum foil, an index card or the Sculpey® Oven Safe Work Mat at 275°F (130 °C) for 30 minutes per ¼" (6 mm) of thickness according to package directions. Oven safe glass or ceramic surfaces are also acceptable for baking; however please note that the baking times may take longer as the glass or ceramic surfaces take longer to heat up. For best baking results,
use an oven thermometer. DO NOT USE MICROWAVE OVEN. DO NOT EXCEED THE ABOVE TEMPERATURE OR RECOMMENDED BAKING TIME.

Step 2

For the pumpkins we will use 1/8 bar of each Neon Orange, Neon Purple, Neon Blue, Neon Pink, Neon Yellow, and Neon Green.

Step 2

Step 3

Roll each one into a log about the same size - roughly 2” in length.

Step 3

Step 4

Stack the logs together to create a multi color cane.

Step 4

Step 5

Push the colors together smoothly by gently rolling the cane on your work surface.

Step 5

Step 6

Gently twist the cane.

Step 6

Step 7

Keep twisting as the cane increases in length.

Step 7

Step 8

In order to make the marbling very random and so that it does not look like stripes,
fold the cane into an S shape against itself.

Step 8

Step 9

Cut the S shape in half as shown.

Step 9

Step 10

Roll each half into a log once again.

Step 10

Step 11

Coil the logs up.

Step 11

Step 12

Smooth the coils into balls by rolling them in the palms of your hands.

Step 12

Step 13

Use the back side of the knife tool to score lines in the sides giving the ball lobed
details like a pumpkin has.

Step 13

Step 14

Here’s a look from the top showing the lobe lines that radiate from the top down the
sides to the bottom.

Step 14

Step 15

Poke a hole in the top where the lobes radiate from. This hole will hold the stem.

Step 15

Step 16

Make little Neon Green stems and push them into the holes.

Push head pins up from the bottoms of the pumpkins and through the stems.

Bake according to the directions in Step 1 above.

Step 16

Step 17

Trim the excess tails from the head pins with wire cutters leaving at least 3/8” to curl
an eye in the pins.

Curl eyes in each pin with round nose jewelry pliers.

Attach the ear wires with flat nose pliers to the eyes in the pins.

Step 17