
Sculpey III Day of the Dead Mini Cat
Sculpey III Day of the Dead Mini Cat
Read More
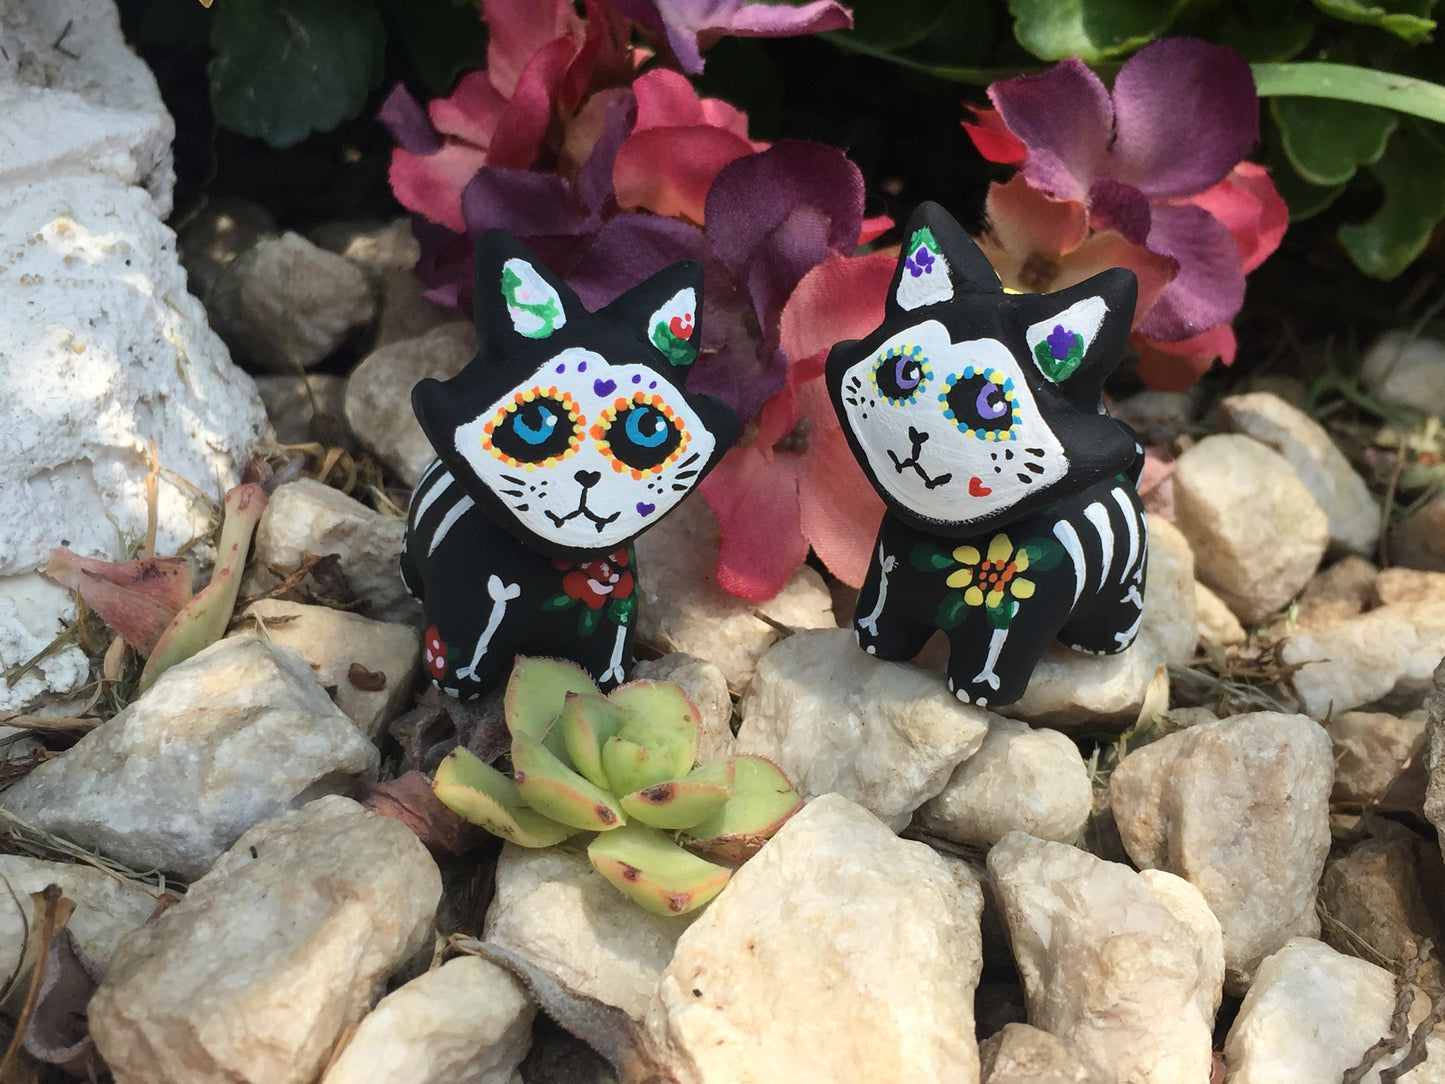
A miniature Day of the Dead Cat Figurine inspired by the Day of the Dead. This figurine can be displayed just about anywhere for you to enjoy.
Designed by: Joanne G. Garcia
Read Less
ADDITIONAL SUPPLIES
Acrylic Paint – white and black, and additional colors purple, red, green, orange, yellow, pink, and blue (you can choose your own colors too)Paint brushes (make sure use a thin fine brush for the small details)
Optional – Krylon Spray Matte Finish (Clear) or clear gloss or matte varnish that you can paint on the figurine. This adds a protective clear coat to protect the paint.
Project Instructions
Please make sure your work area is covered and you are not working on an unprotected surface. We recommend working on the Sculpey® Work ‘n Bake Clay Mat, wax paper, metal baking sheet, or disposable foil. Uncured clay may damage unprotected furniture or finished surfaces. Be sure to cover your crafting area appropriately.
Start with clean hands, unwrap and knead clay until soft and smooth, or condition by running clay though a Pasta Machine. We recommend using a designated machine for clay purposes only. When working with multiple colors, clean hands with soap and water or baby wipes (we have found that baby wipes work best) before switching colors. Shape clay, pressing pieces firmly together. Wash hands after use.
Baking:
Begin by preheating oven to 275 °F (130 °C). After you are done creating; for best results bake clay on an oven-proof surface such metal, aluminum foil, an index card or the Sculpey® Clay Mat at 275°F (130 °C) for 30 minutes per ¼" (6 mm) thickness according to package directions. Oven safe glass or ceramic surfaces are also acceptable for baking; however please note that the baking times may take longer as the glass or ceramic surfaces take longer to heat up. For best baking results, use an oven thermometer. DO NOT USE MICROWAVE OVEN. DO NOT EXCEED THE ABOVE TEMPERATURE OR RECOMMENDED BAKING TIME.
Creating shapes: You will be creating five pieces to form the cat. Start by rolling a ball of clay with your hands approximately 3/4 of an inch in diameter. Roll two smaller balls each measuring 3/8 of an inch in diameter for the ears. Roll a larger ball about 3/4 inch in diameter for the body and 1 inch in length. For the tail, roll a piece of clay into a cylinder about 1/4 of an inch in diameter and 1-1/4 of an inch in length.

Cat head and body: Take the head piece and create a diamond shape with a small pointy tip at the bottom of the head. Take the two small pieces and mold them into triangles for the ears. Take the 1 inch rolled ball and roll it into a cylinder for the body. Next take each ear and place it on the head and gently mold the clay so that the ears become part of the head.


Cat Body Part 1: Take the cylinder, use one the modeling tools closest to a knife and gently cut a cross section on the bottom of the cylinder to form the legs.


Cat Body Part 2:Gently begin to pull each quadrant and use your fingers to mold into tiny legs. You can also use modeling tools to smooth out the areas as you form the legs. Once you have formed the legs place the cylinder on a hard surface (with the legs down) and press down just a little bit so that you flatten the feet.


Cat Body Part 3: Take a modeling tool with a pointy tip and poke two holes into the body, one on each end. The holes should be positioned at the top of the body as they will serve are connections for the head and tail.


Connecting the head and tail to the body:Decide which hole on the top part of the body will be for the head and which hole will be for the tail. Take the head and place the pointy tip of the bottom of the head into one of the holes on the body. Gently smoosh it down and use a modeling tool to kneed the clay between the head and body so that they connect. For the tail, gently place the tip of one end the tail and stick it into the other hole on the body and gently kneed the clay to connect the two pieces. Once the tail is set into place roll the tip of the tail end slightly to give the tail some form. You can even add some details to the bottom of the cat feet using a pointy tool (this is optional). By the end of this step you should have a completed cat ready to bake.


Baking and Painting Part 1(the bones): Refer to Step 1 for baking info and be sure that your mini cat has cooled down before you begin painting. Use white acrylic paint to begin painting the bones on the body of the cat. You can paint pointy stripes along each side of the cat for the rib cage and smaller lines for the bones on the legs. Paint the inside of the ears white and paint the entire face white. More than once coat may be required so its easier to paint the entire face white and then go back with black and define the eyes, nose, mouth, and whiskers. Allow the white paint to dry.


Painting Part 2 (face):Once the white paint has dried and you are happy with the outcome, take a thin fine brush and paint the details for the eyes, nose, mouth and whiskers with black paint. Allow the black paint to dry.

Painting Part 3 (face and body decorations): Now you should have a cat that looks like a skeleton. Add some color for the pupils and a small spot of white for the eye glare. For the last step of painting use different acrylic colors to bring your day of the dead cat to life. Be sure to use a thin fine brush for the face details. Use as many colors as you like to add colorful details to the face and body. Enjoy painting flowers or your own embellishments all over your cat, you can even paint over some of the bones. Have fun and be creative with your designs. Allow the paint to dry and you’re done!


Preserving the paint on your figurine: Once the paint has dried you can paint a clear coat of gloss or matte varnish over your cat or you can use a clear spray gloss or matte finish instead (your choice).
