Skip to product information
1 of 1

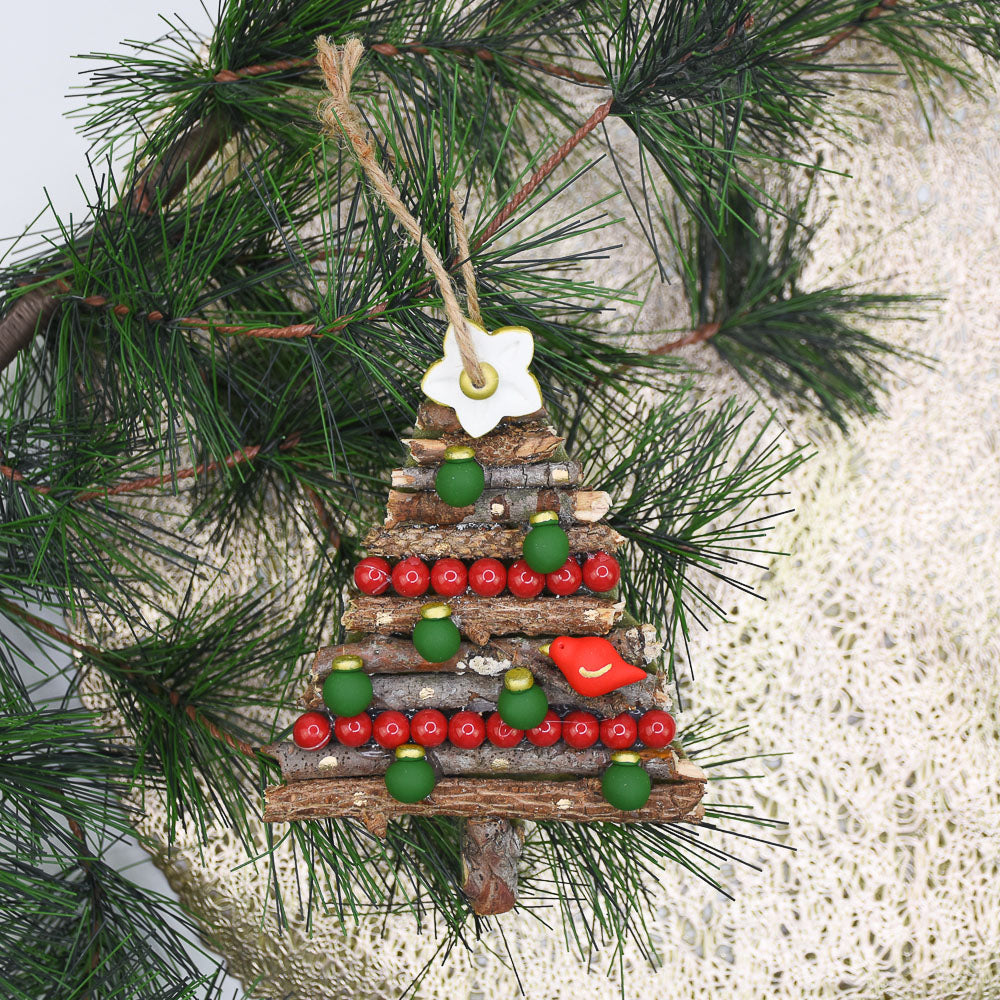
Sculpey III® Nature Tree Ornament

Sculpey III® Nature Tree Ornament

Designed by Amy Koranek
Read More
Add a touch of the outdoors to your holiday tree with this charming and rustic looking ornament. You can even use it as decoration on a gift! COMPLETION TIME: 90 Minutes to make and bake. Some extra time should be allotted for glue to completely dry.
Read Less
ADDITIONAL SUPPLIES
  • Found sticks
  • Hot glue
  • 6 mm Glossy red beads
  • Green felt
  • Scissors
  • Wire cutters or garden shears
  • Gold paint pen
  • 1.5” Star shaped cutter
  • Dremel drill with 1/8” bit
  • 9” Twine
View full details
Project Instructions

Step 1

Getting Started:

Please make sure your work area is covered and you are not working on an unprotected surface. We recommend working on the Sculpey® Oven Safe Work Mat, wax paper, metal baking sheet, or disposable foil. Uncured clay may damage unprotected furniture or finished surfaces. Be sure to cover your crafting area appropriately.

Start with clean hands, unwrap and knead clay until soft and smooth, or condition by running clay though a Pasta Machine. We recommend using a designated machine for clay purposes only. When working with multiple colors, clean hands with soap and
water or baby wipes (we have found that baby wipes work best) before switching colors. Shape clay, pressing pieces firmly together.  Wash hands after use.

Baking ( also called Curing):

Begin by preheating oven to 275 °F (130 °C). After you are done creating; for best results bake clay on an oven-proof surface such as metal, aluminum foil, an index card or the Sculpey® Oven Safe Work Mat at 275°F (130 °C) for 15 minutes per ¼" (6
mm) of thickness according to package directions. Oven safe glass or ceramic
surfaces are also acceptable for baking; however please note that the baking times may take longer as the glass or ceramic surfaces take longer to heat up. For best baking results, use an oven thermometer. DO NOT USE MICROWAVE OVEN. DO NOT
EXCEED THE ABOVE TEMPERATURE OR RECOMMENDED BAKING TIME.

Step 2

Have some fun exploring nature to collect sticks. I collected sticks in a variety of shapes, textures, and colors. Assemble the sticks and trim them to mimic the shape of a Christmas tree. Sticks can be trimmed with heavy scissors, or wire cutters, or garden shears.

Step 2

Step 3

Once you like your layout, glue the sticks with hot glue to a felt backing to hold them all together. I wanted the look of garland, so I took two of the sticks out and replaced them with pre-strung beads. I left the string through the beads and glued the beads directly to the felt. I also added a short thick stick for a trunk.

Step 3

Step 4

Allow the glue to set before trimming away the excess felt with scissors. Also carefully cut the bead strands. The beads should stay in place since they were glued to the felt with hot glue.

Step 4

Step 5

Next roll a rope of Leaf Green to 1/4” thick. Then section the 1/4” rope into 1/4” pieces to make sure each piece is the same volume.

Step 5

Step 6

Roll these into balls.

Step 6

Step 7

Roll another rope of Leaf Green to 1/8” thick. Cut off 1/8” sections. You will need one for each of the balls from Step 6.

Step 7

Step 8

Push one of the smaller disks onto each ball for an ornament cap.

Step 8

Step 9

Here’s how the ornaments will look later on the tree. Just make sure you have enough to fill up your tree. Set the ornaments aside for baking.

Step 9

Step 10

Roll a bit of white 1/8” thick. Use a star shaped cutter to cut out a star.

Step 10

Step 11

Use a tool to add texture to the star.

Step 11

Step 12

Add a ball to the center of the star and poke a hole in the middle. Later we will drill a hole here to make a hanger. Set the star aside for baking.

Step 12

Step 13

For a little Cardinal, make a fat teardrop shape from Red Hot Red. Make sure the size of the body coordinates with the size of your tree and ornaments.

Step 13

Step 14

Pinch up a little bird head. Add a tiny bit of the red for a beak. Poke a hole for an eye with a Needle Tool.

Bake the star, green ornaments, and little cardinal (do not bake the sticks) following the baking instructions for Sculpey III® in Step 1 above . Allow to cool completely.

Step 14

Step 15

Glue the clay pieces to the tree using hot glue. Ordinarily I do not use hot glue to secure clay pieces since clay pieces have a tendency to release from hot glue. However, in this project, since the background is very textured, the hot glue will hold well enough and is the easiest way to secure the pieces exactly where you want them.

Step 15

Step 16

Once the glue is set, use a gold paint pen to add details to the ornament caps, bird
beak, star, and branches.

Step 16

Step 17

Drill a hole through the star, sticks, and felt backing with a Dremel drill.

Step 17

Step 18

Add twine for a hanger.

Step 18