Skip to product information
1 of 1

Sculpey Air-Dry™ Porcelain Disco Snail

Sculpey Air-Dry™ Porcelain Disco Snail

Designed by Precious Nunez
Read More
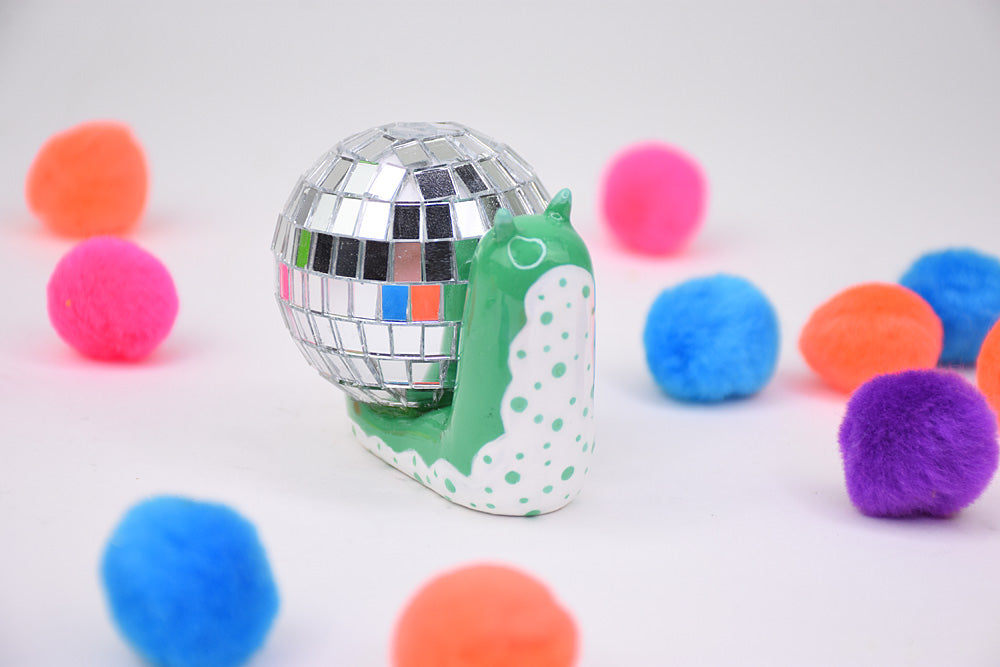
Craft a unique disco-inspired snail figurine with Sculpey’s Air-Dry Porcelain Clay, perfect as a desk accessory, paperweight, or stylish decoration. TIME TO COMPLETION: Sculpting time approximately 30 minutes, and 30 minutes to paint
Read Less
ADDITIONAL SUPPLIES
  • Glaze
  • Super glue
  • X-acto knife
  • Acrylic paint
  • Dotting tools
  • Paint brushes
  • 2-inch Disco ball
View full details
Project Instructions

Step 1

Getting started with Sculpey Air-Dry clay:

  • Plan to work with a nonporous, smooth and well-cleaned surface.
  • Try to use only the amount of clay you need at a certain time, and leave the rest sealed and stored away.
  • Knead your Sculpey Air-Dry™ Porcelain Clay before you begin shaping it for your creations.
  • Use your hands, different crafting tools and various multimedia materials to shape your clay into the design you desire. You can also incorporate mixed media elements and unique patterns and textures with air-dry porcelain clay.
  • Stand or lay your Sculpey Air-Dry™ Porcelain Clay projects on a nonporous surface with a smooth, clean finish in an area with low humidity. Ensure the clay remains undisturbed and untouched for approximately 24 hours to make sure it completely hardens.

Step 2

Remove any unnecessary parts from the disco ball, such as thread or loops.


Step 3

Roll a tapered log of porcelain clay around 6 inches long. Bend the log into the shape of a snail.

Step 4

Slightly flatten the bottom side of the snail so it can stand. Place the disco ball on the back of the snow, making sure it’s in a secure position. Place two small antennae on the head of the snail.


Step 5

Let the clay dry according to Step 1.


Step 6

Remove the disco ball and paint the whole snail green.


Step 7

Paint the underbelly of the snail white as shown in the photo.

Next, paint a scalloped design to mimic a slime pattern.


Step 8

Mix white paint into the remainder of the to paint to create a lighter color. Use three different-sized dotting tools to randomly paint polka dots all over the white underbelly areas.


Step 9

You can apply gloss or varnish to the painted layers of the snail, ensuring the disco ball is excluded during this process. Superglue the disco ball onto the back of the snail.