
Sculpey Soufflé™ Wildflower Bouquet Earrings
Sculpey Soufflé™ Wildflower Bouquet Earrings
Designed by Amy Koranek
Read More
The natural colors of Sculpey Soufflé™ are perfect for this rich floral slab used for these gorgeous earrings! COMPLETION TIME: 65 Minutes to make, bake, and assemble
Read Less
ADDITIONAL SUPPLIES
- Organic shaped clay cutter
- 8 mm Silver tone jump rings (2)
- Silver tone ear wires (2)
- 6 mm Silver tone jump rings (2)
- 4 mm Silver tone jump rings (2)
- Flat nose pliers
Project Instructions
- Getting Started:
Start with clean hands, unwrap and knead clay until soft and smooth, or condition by running clay though a Pasta Machine. We recommend using a designated machine for clay purposes only. When working with multiple colors, clean hands with soap and water or baby wipes (we have found that baby wipes work best) before switching colors. Shape clay, pressing pieces firmly together. Wash hands after use.
- Baking (also called Curing):
Roll a 1/8” thick sheet from 1/2 bar of Midnight.
Cut out two organic circle shapes.
Cut out two organic circle shapes.

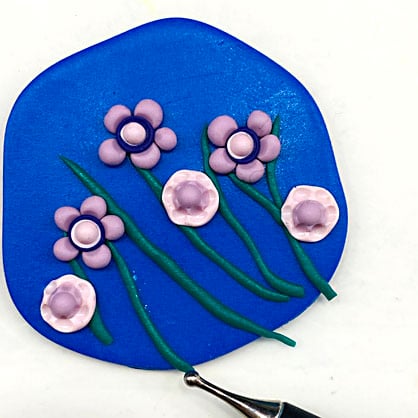
Make very thin ropes of Forest Green and place them at angles from the bottom of the shapes moving upward.
Whatever we add to the left earring we will also add to the right in mirror image style.
Whatever we add to the left earring we will also add to the right in mirror image style.

Add five tiny balls of Lilac Mist to three of the stems.

Flatten the centers of the balls with the 6 mm Ball Tool.

Add a little ball of Royalty to the center of each pink flower and set it in place with the 6 mm Ball Tool.

Add round balls of Light Pink and set them in place in the middle of the Royalty center with the Small Etch ‘n’Pearl.
Position three Light Pink balls lower down along the stems.
Set them in place with the 6mm Ball Tool.
Position three Light Pink balls lower down along the stems.
Set them in place with the 6mm Ball Tool.

Add little Lilac Mist centers with the Small Etch ‘n’ Pearl.

Use the 2 mm Ball Tool to add texture to the edges of the pink flowers.
Add teardrop shapes in Light Pink along stems and press them into place with the tip of the Medium Etch ‘n’ Pearl

Repeat Step 10 with Royalty leaves.

Flatten Lilac Mist strips and roll 1” lengths tightly into roses.
Set the roses in place by poking down through the centers with the Large Etch ‘n’ Pearl.
Twist together some Royalty and some Lilac Mist to make a little blended rope.
Set the roses in place by poking down through the centers with the Large Etch ‘n’ Pearl.
Twist together some Royalty and some Lilac Mist to make a little blended rope.

Make tiny balls from the blended rope. Position them along stems in tall clusters with the 2 mm Ball Tool.

Add teeny tiny bits of Citron around the design. Pierce each one with the tip of the Large Etch ‘n’ Pearl.
From 1/2” balls of Lilac Mist, make two organic shaped little patties with your fingers.
Flatten them to the work surface as shown.
From 1/2” balls of Lilac Mist, make two organic shaped little patties with your fingers.
Flatten them to the work surface as shown.

Poke holes in the clay pieces to accommodate the jump rings after baking.
Bake following the baking instructions for Sculpey Soufflé™.
Allow to cool completely before handling.
Bake following the baking instructions for Sculpey Soufflé™.
Allow to cool completely before handling.
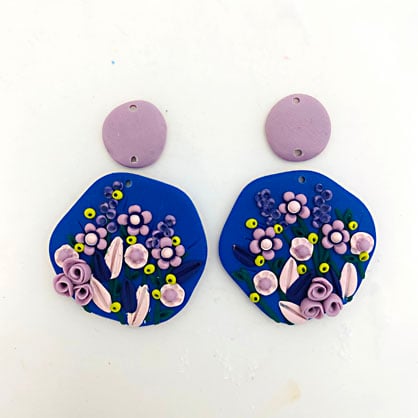
This is the layout for the earring assembly.

Use flat nose pliers to open and close the 8 mm jump rings connecting the clay pieces together.
Use flat nose pliers to open and close the 6 mm jump rings connecting the top clay pieces to the 4 mm jump rings.
Use flat nose pliers to add the ear wires
Use flat nose pliers to open and close the 6 mm jump rings connecting the top clay pieces to the 4 mm jump rings.
Use flat nose pliers to add the ear wires

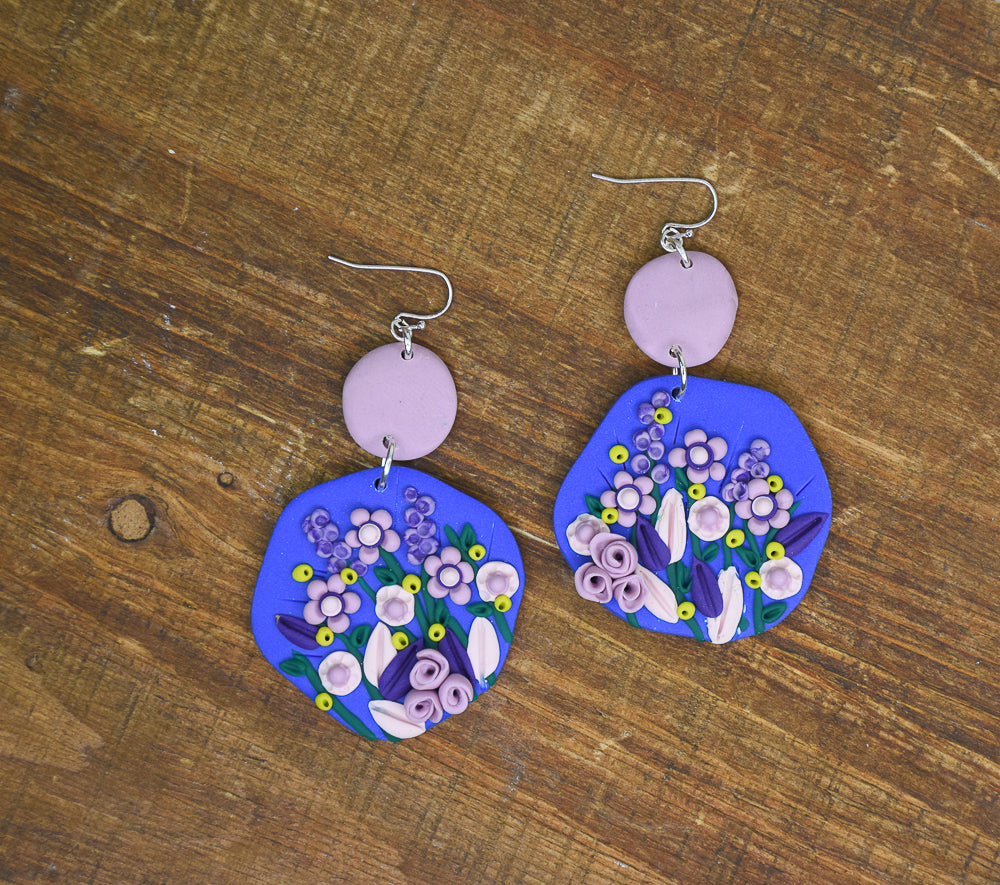
Finished earrings!

- Choosing a selection results in a full page refresh.
- Opens in a new window.