
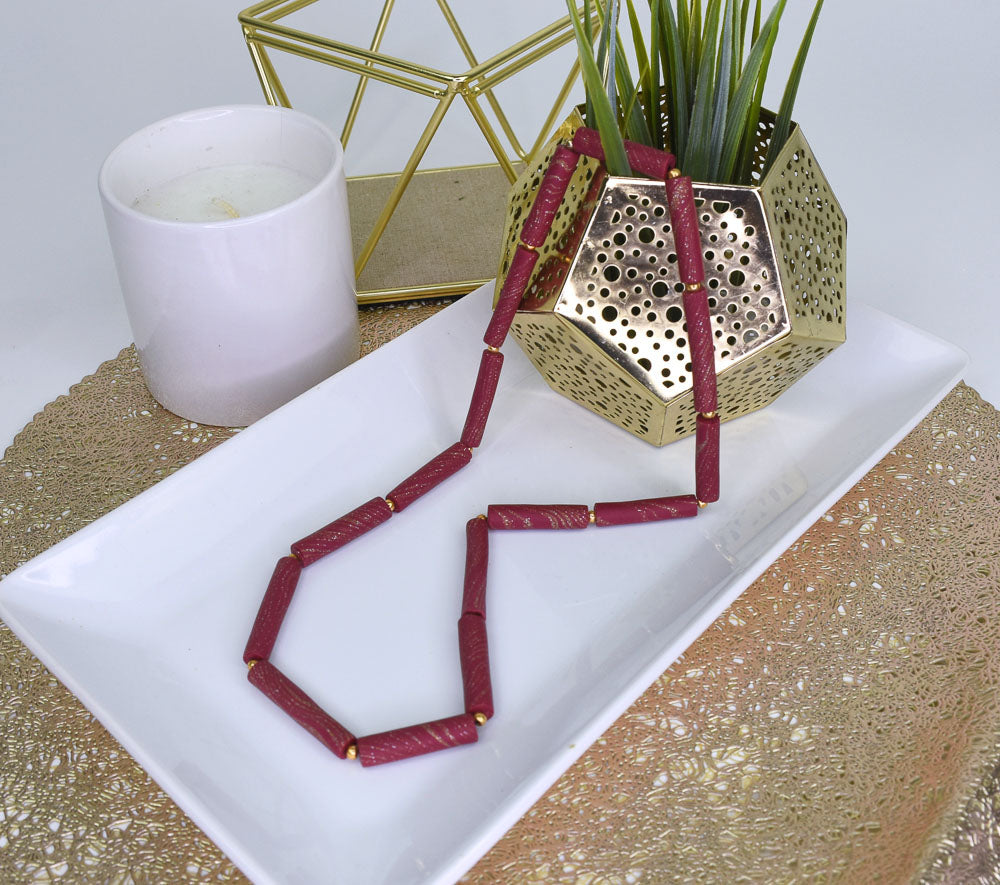
Sculpey Soufflé™ Tube Bead Necklace
Sculpey Soufflé™ Tube Bead Necklace
Designed by Amy Koranek
Read More
Create this gorgeous tube bead necklace, featuring the very on trend color, Cabernet, in just about an hour
COMPLETION TIME: 60 Minutes to make, bake, and assemble
Read Less
ADDITIONAL SUPPLIES
- Corn starch
- 36” stretchy bead cord
- Scissors
- Gold spacer beads (16)
Project Instructions
- Getting Started:
Start with clean hands, unwrap and knead clay until soft and smooth, or condition by running clay though a Pasta Machine. We recommend using a designated machine for clay purposes only. When working with multiple colors, clean hands with soap and water or baby wipes (we have found that baby wipes work best) before switching colors. Shape clay, pressing pieces firmly together. Wash hands after use.
- Baking (also called Curing):
From 1/2 bar of Cabernet, make a thick log. Border it with four thin strings of Yellow Gold Glitter.

Roll and twist the rope to a 10” rope.

Fold the rope in half and then in half again.

Roll and twist again to 10”.

Fold in half and in half again.

Roll the log to 8” long.

Divide the log into four 2” sections.

Rub a very thin layer of corn starch on the Small Etch ‘n’ Pearl. The corn starch will help keep the clay from sticking.
Poke a hole through one of the 2” sections of clay, piercing it all the way through end to end.
Poke a hole through one of the 2” sections of clay, piercing it all the way through end to end.

While the clay is still on the Etch ‘n’ Pearl. Roll it on the work surface to thin it and make it longer to 8”.

Using a rolling cut. Slice through the clay until the Blade touches the metal rod. If you roll the clay while cutting, you will cut perfectly through to the rod.

Divide the 8” piece into four 2” pieces with the rolling cut.

Repeat for the three remaining pieces to make a total of 16 beads.
Put the beads on the skewers of the Bead Baking Rack and bake following the baking instructions for Sculpey Soufflé™.
Allow to cool completely before removing them from the skewers.
Put the beads on the skewers of the Bead Baking Rack and bake following the baking instructions for Sculpey Soufflé™.
Allow to cool completely before removing them from the skewers.

String the tube beads alternating with gold spacer beads on stretchy bead cord.
Tie an overhand knot to finish and trim the tails with scissors.
Tie an overhand knot to finish and trim the tails with scissors.
