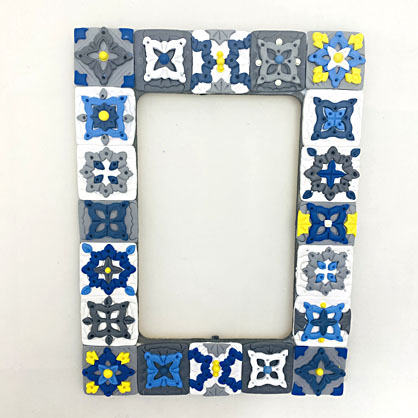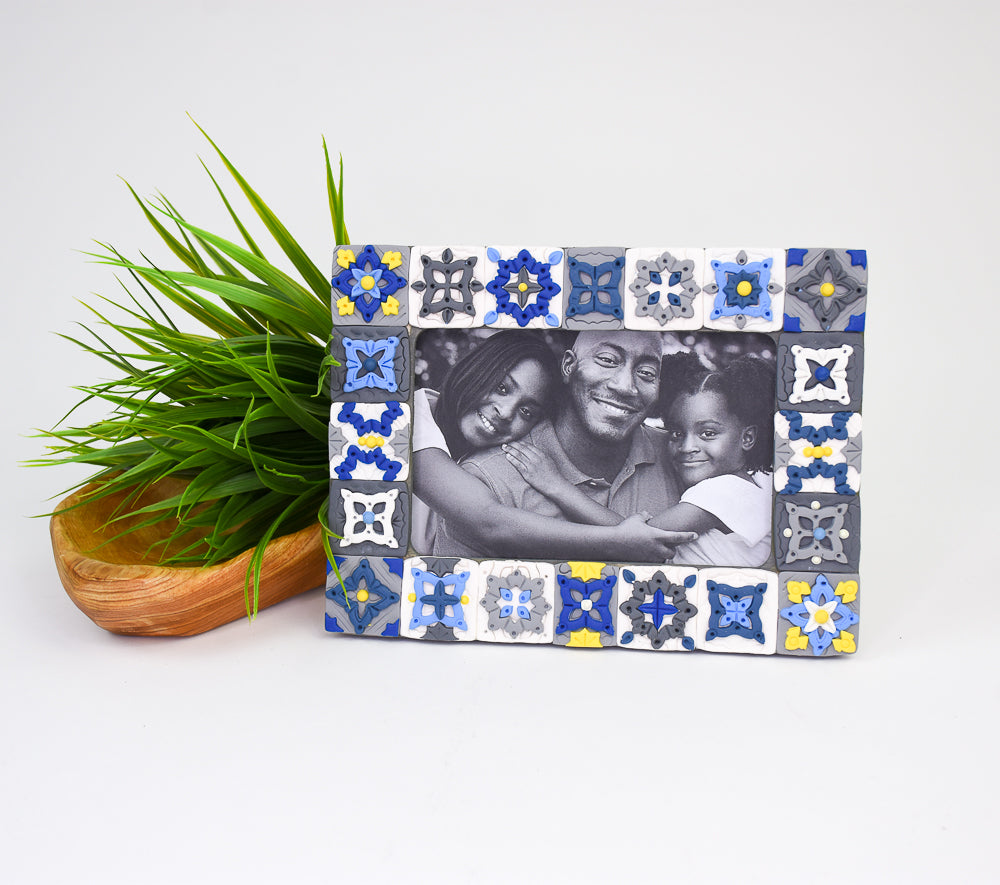
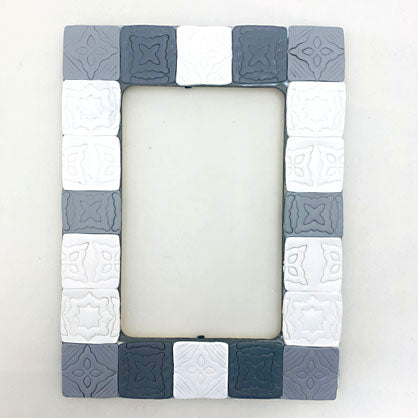
Sculpey Soufflé™ Portofino Tile Picture Frame
Sculpey Soufflé™ Portofino Tile Picture Frame
Designed by Amy Koranek
Read More
The Sculpey Soufflé™ Portofino Tile Picture Frame will surely wow all those that see it! The polymer clay is securely attached to a wooden frame, using Sculpey® Oven Bake Clay Adhesive. Sculpey® Oven Bake Clay Adhesive is the perfect medium for attaching uncurled oven bake clays to porous surfaces like wood.COMPLETION TIME:
2 Hours to make and bake
Read Less
ADDITIONAL SUPPLIES
- 4X6 Wood photo frame
- 300 Grit sandpaper
- Coordinating gray acrylic paint
- Paintbrush
- Geometric cutters - the cutters used in this tutorial are inspired by Mediterranean tiles and have both outer cutting edges and inner cutting edges that give multiple cutting options. There are 3 different patterns.

Project Instructions
- Getting Started:
Start with clean hands, unwrap and knead clay until soft and smooth, or condition by running clay though a Pasta Machine. We recommend using a designated machine for clay purposes only. When working with multiple colors, clean hands with soap and water or baby wipes (we have found that baby wipes work best) before switching colors. Shape clay, pressing pieces firmly together. Wash hands after use.
- Baking (also called Curing):
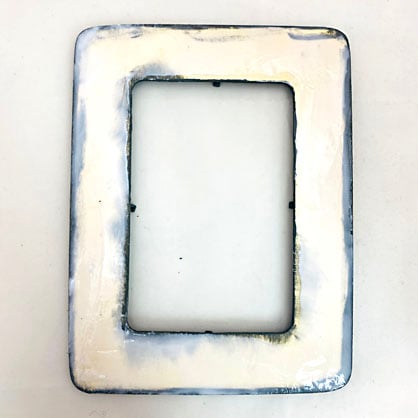
Begin by preparing the frame. Sand rough edges with sandpaper as needed.
Paint the back and all edges of the frame where clay will not be applied with coordinating gray acrylic paint. Allow the paint to dry completely.
Paint the back and all edges of the frame where clay will not be applied with coordinating gray acrylic paint. Allow the paint to dry completely.

Add a thin layer of Sculpey® Oven Bake Clay Adhesive to the front surface of the frame where clay will be attached.
You can squirt a bead of the adhesive directly onto the frame and then spread it with fingertips to an even thin layer. You should be able to see the color of the wood and the paint through this thin layer.
Set the frame aside and allow the adhesive to soak into the grain creating a tacky surface.
You can squirt a bead of the adhesive directly onto the frame and then spread it with fingertips to an even thin layer. You should be able to see the color of the wood and the paint through this thin layer.
Set the frame aside and allow the adhesive to soak into the grain creating a tacky surface.
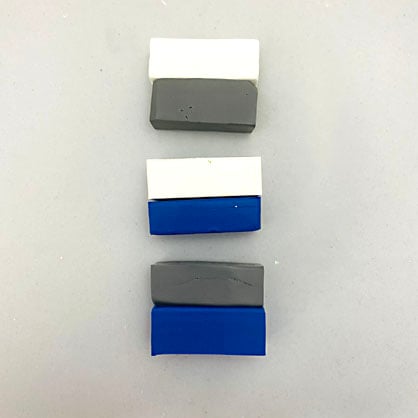
Next mix custom colors for the tiles of the frame:
1/4 bar Igloo + 1/4 bar Midnight Blue = Light Midnight Blue;
1/4 bar Igloo + 1/4 bar Slate = Light Slate;
1/4 bar Midnight Blue + 1/4 bar Slate = Deep Slate
1/4 bar Igloo + 1/4 bar Midnight Blue = Light Midnight Blue;
1/4 bar Igloo + 1/4 bar Slate = Light Slate;
1/4 bar Midnight Blue + 1/4 bar Slate = Deep Slate
Sheet each color (except for Canary), including the unmixed original colors to sheets 1/8” thick using the Acrylic Clay Roller or a pasta machine on the thickest setting. You should have six color sheets.

Using the 1.25” square cutters, cut squares from the Igloo, Slate, and Light Slate for the background tiles. You can see that on the vertical sides, I trimmed the two middle tiles with the Clay Blade to fit my frame.

Now emboss patterns from the geometric cutters into the clay tiles but do not cut all the way through, creating a texture on each tile. I mixed things up by sometimes turning the cutters on the diagonal. Other times I embossed just half of the cutter twice on a tile leaving blank space down the center. I used the cutters in various different ways to achieve more patterns.

I added even more decorative details by creating textured accents with my tools.
Sheet all the remaining colors (except for Canary) into thinner sheets with the Acrylic Clay Roller or the pasta machine on the 4th thickest setting.
Use the tile cutters to cut out shapes and place them as desired on top of the tiles.
Further decorate the tiles with details using Clay Tools.
Use the tile cutters to cut out shapes and place them as desired on top of the tiles.
Further decorate the tiles with details using Clay Tools.

Close ups of details added with tools.

More close ups of details added with tools.

Finally add dots of Canary to the designs using the small and medium Etch n Pearl Tools.
Bake the frame following the baking instructions for Sculpey Soufflé™. Allow to cool completely before handling.
Bake the frame following the baking instructions for Sculpey Soufflé™. Allow to cool completely before handling.