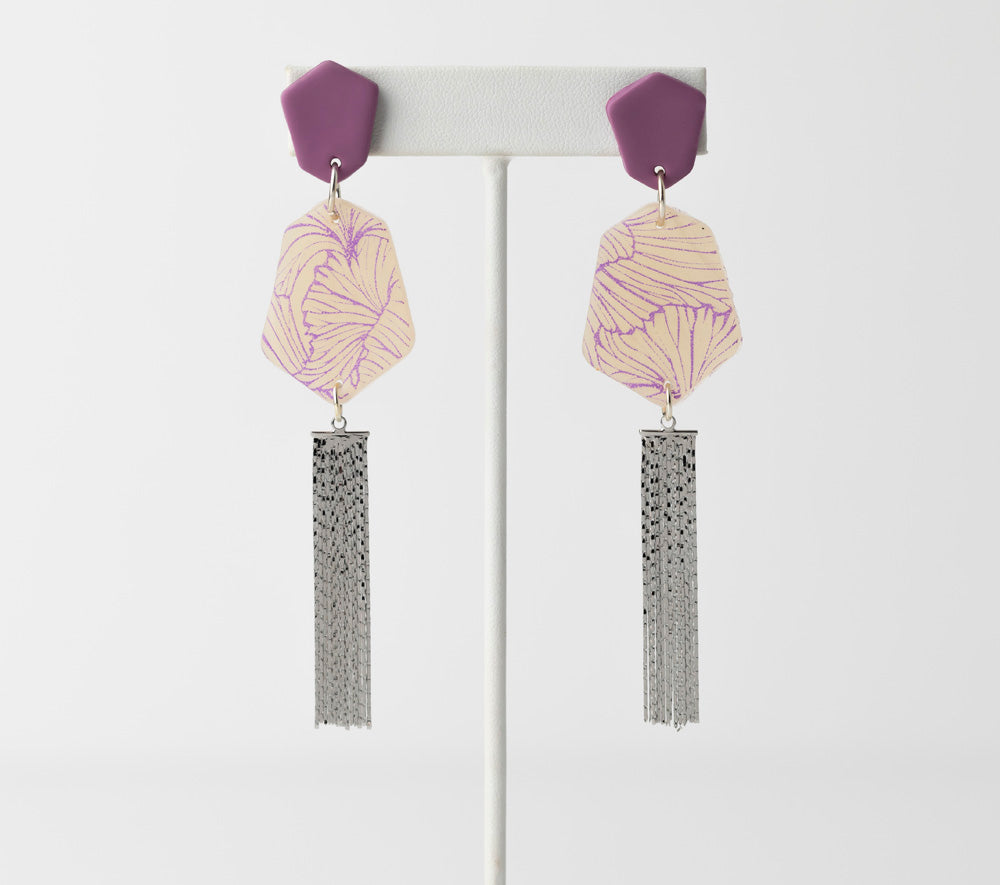

Sculpey Premo™ Translucent Silk Screen Earrings
Sculpey Premo™ Translucent Silk Screen Earrings
Designed by Amy Koranek
Read More
Sculpey Premo™ Translucent is a great clay to silkscreen on – the light come through the clay when worn and really shows off the silkscreened pattern. The Translucent clay is teamed with
Sculpey Premo™ Mauve to help create a softer look for these earrings.
COMPLETION TIME:
60 Minutes to make, bake, and assemble
Read Less
ADDITIONAL SUPPLIES
- Water basin
- Coordinating acrylic mauve paint
- Maiden hair silk screen and squeegee - if a squeegee is not available with your silk screen you can use an expired credit card or hotel card
- Geometric shaped cutters in 2 sizes
- Silver tone tassel dangle charms
- 8 mm Silver tone ear posts and backs (2)
- 8 mm Silver tone jump rings (2)
- 4 mm Silver tone jump rings (2)
- Flat nose pliers
- Silicone glue or instant drying glue

Project Instructions
- Getting Started:
Start with clean hands, unwrap and knead clay until soft and smooth, or condition by running clay though a Pasta Machine. We recommend using a designated machine for clay purposes only. When working with multiple colors, clean hands with soap and water or baby wipes (we have found that baby wipes work best) before switching colors. Shape clay, pressing pieces firmly together. Wash hands after use.
- Baking (also called Curing):
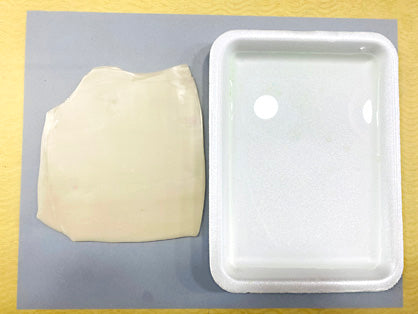
Sheet Translucent Premo™ to 1/8” thick with the Acrylic Clay Roller. Make sure your Translucent clay is conditioned really well. Translucent has a tendency to show mooning and bubbles more than opaque clays, but you can avoid these issues with well-conditioned clay.
Position the clay close to your water basin
Burnish the silk screen emulsion side down on top of the clay sheet.

Apply a bead of paint across the top edge of the silk screen.
Hold the squeegee or card at a 45-degree angle touching the paint. Drag the paint firmly across the silk screen.
As soon as possible, place the squeegee into the water basin.
Hold the squeegee or card at a 45-degree angle touching the paint. Drag the paint firmly across the silk screen.
As soon as possible, place the squeegee into the water basin.

Carefully pull the silk screen back away from the clay.

Immediately place the silk screen into the water until you can clean it completely under running water.
Allow the paint to dry on the clay sheet while you work on the next steps.
Allow the paint to dry on the clay sheet while you work on the next steps.

Sheet Mauve to 1/8” thick.
Cut out two of the smaller geometric shapes.
Cut out two of the smaller geometric shapes.

As soon as the screened clay is dry, cut out two of the larger geometric shapes.
Position the shapes as you will assemble them.
Poke holes in the tops of the larger shapes and the bottoms of the smaller shapes so they can be assembled with jump rings after baking.
Bake the pieces following the baking instructions for Premo™ Sculpey.
Position the shapes as you will assemble them.
Poke holes in the tops of the larger shapes and the bottoms of the smaller shapes so they can be assembled with jump rings after baking.
Bake the pieces following the baking instructions for Premo™ Sculpey.

Once the pieces are cool, lay them out with the findings and dangle charm tassels.

Assemble the pieces as shown using flat nose pliers to open and close the jump rings.

Glue the posts to the backs of the earrings as shown and allow the glue to dry completely.

- Choosing a selection results in a full page refresh.
- Opens in a new window.