
Sculpey Premo™ Animal Print Earrings
Sculpey Premo™ Animal Print Earrings
Designed by Khyrstyne Dunaway
Read More
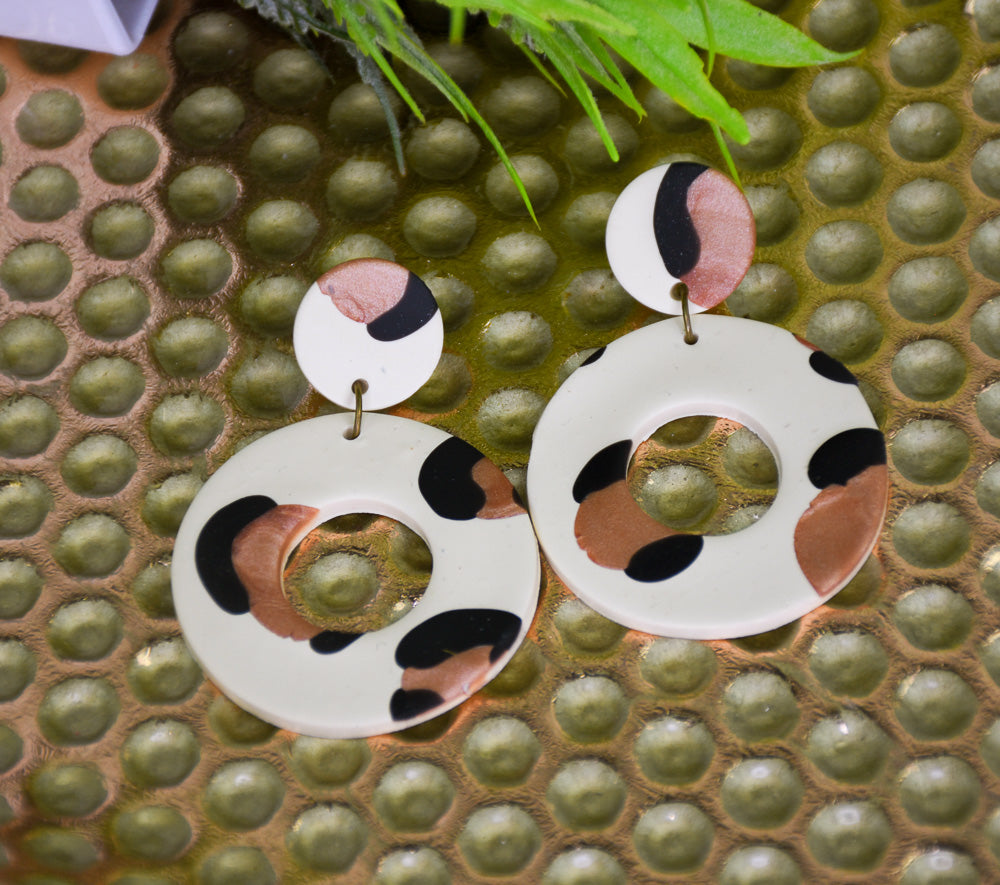
This quick project creates a nice and classic style of earrings while also giving a pop of metallic color, thanks to Sculpey Premo™ Copper!
TIME TO COMPLETION: 20 minutes to make/ 30 minutes to bake
Read Less
ADDITIONAL SUPPLIES
- Earring findings
- Toothpick
- Jump rings
- E6000 glue
Project Instructions
- Getting Started:
Start with clean hands, unwrap and knead clay until soft and smooth, or condition by running clay though a Pasta Machine. We recommend using a designated machine for clay purposes only. When working with multiple colors, clean hands with soap and water or baby wipes (we have found that baby wipes work best) before switching colors. Shape clay, pressing pieces firmly together. Wash hands after use.
- Baking (also called Curing):
Take your conditioned Butter Yellow clay and run it through your clay machine or pasta machine on a #2 setting. Lay it flat on your baking mat.

Roll a small amount of the Copper clay into small balls and ovals. Press it into your Butter Yellow slab.

Now take your black clay and make small balls and ovals. Randomly press them into the clay slab on the outside edges of the copper ovals. Use your acrylic roller to roll the entire slab flat and even.

Use your clay cutters to cut 2 large circles and 2 small circles.

Use the medium clay cutter and cut 2 medium circles within the large circles. Make small holes with a toothpick at the tops of each circle.

You are now ready to bake! Once baking is complete, add 2 jump rings to connect your large and small clay pieces. Use 2 earring stud findings and glue them to the small circles at the very top. Wait 30 minutes to dry completely. All done!

- Choosing a selection results in a full page refresh.
- Opens in a new window.