
Sculpey III® Tube Bead Bracelet
Sculpey III® Tube Bead Bracelet
Designed by Amy Koranek
Read More
Read Less
This project can easily be adapted to a single bracelet, stacked bracelets, wrap bracelet, or necklace by making more or less beads. COMPLETION TIME:60 Minutes to make, bake, and assemble
ADDITIONAL SUPPLIES
- 20” Stretchy bead floss in black
- Scissors
- 10” Bead needle
Project Instructions
Step 1
- Getting Started:
Start with clean hands, unwrap and knead clay until soft and smooth, or condition by running clay though a Pasta Machine. We recommend using a designated machine for clay purposes only. When working with multiple colors, clean hands with soap and water or baby wipes (we have found that baby wipes work best) before switching colors. Shape clay, pressing pieces firmly together. Wash hands after use.
- Baking (also called Curing):
Step 2
You can make as many beads as you like for the size and style of bracelets that you want to make. Working with 1/4 bar of Berry at a time, make a series of equal size cylinders - about 3/8” thick and 1.25” long.
Step 3
Place one of the clay cylinders on the smallest Etch ‘n’ Pearl. Because the Etch ‘n’ Pearl tools are designed for making consistent size holes, they are the perfect tool for making tube beads.
Step 4
While the clay is on the tool, carefully and evenly roll the clay on the work surface with your hand. The clay will stretch along the tool creating a long tube with a hole all the way through it.
Step 5
Leave the tube of clay on the tool, and carefully slice it into beads. Do this by holding a Clay Blade perpendicular to the clay and roll the clay on the tool with the Blade. The Blade will cut through the clay as you roll it. Stop when the Blade touches the tool all the way around.Repeat until you have several same size beads 1/2” - 3/4” in length. Section off the scrap ends and save for later use.

Step 6
Repeat Steps 3-5 to make as many beads as you would like.Place the Bead Baking Rack on a baking sheet.
String the beads onto the Bead Baking Skewers and prop them up on the rack.

Step 7
Next make some contrasting striped spacer beads.Start with 1/4 bar of White making it into a log shape.
Make a tiny string of Black.

Step 8
Press tiny strings of Black lengthwise to the sides of the White log.
Step 9
Roll the striped logs into thinner ropes that are about 1/4” diameter.
Step 10
Carefully slice the striped ropes into 1/4” sections with the Clay Blade
Step 11
Gently roll each bead in your hands to make them round.Pierce the striped beads with the Bead Baking Skewers and prop them on the Baking Rack.
Bake the beads following the baking instructions for Sculpey III®.
Allow to cool completely before handling.

Step 12
The Bead Baking Skewers are also useful for auditioning the pattern of your beads.I made a set of longer Berry beads as well for one of my inspiration ideas.

Step 13
I enjoy using an 8” or 10” Beadalon Bead Stringing Needle. Slide the pattern of beads onto the needle. Cut thin stretchy bead floss to double the bracelet length plus 2”.Thread the hook in the long needle at the middle of the floss so the floss is doubled.

Step 14
Pull the beads toward the floss, carefully move the beads over the threaded hook and completely onto the floss. Carefully remove the floss from the hook.
Step 15
Tie your favorite bead knot to secure.
Step 16
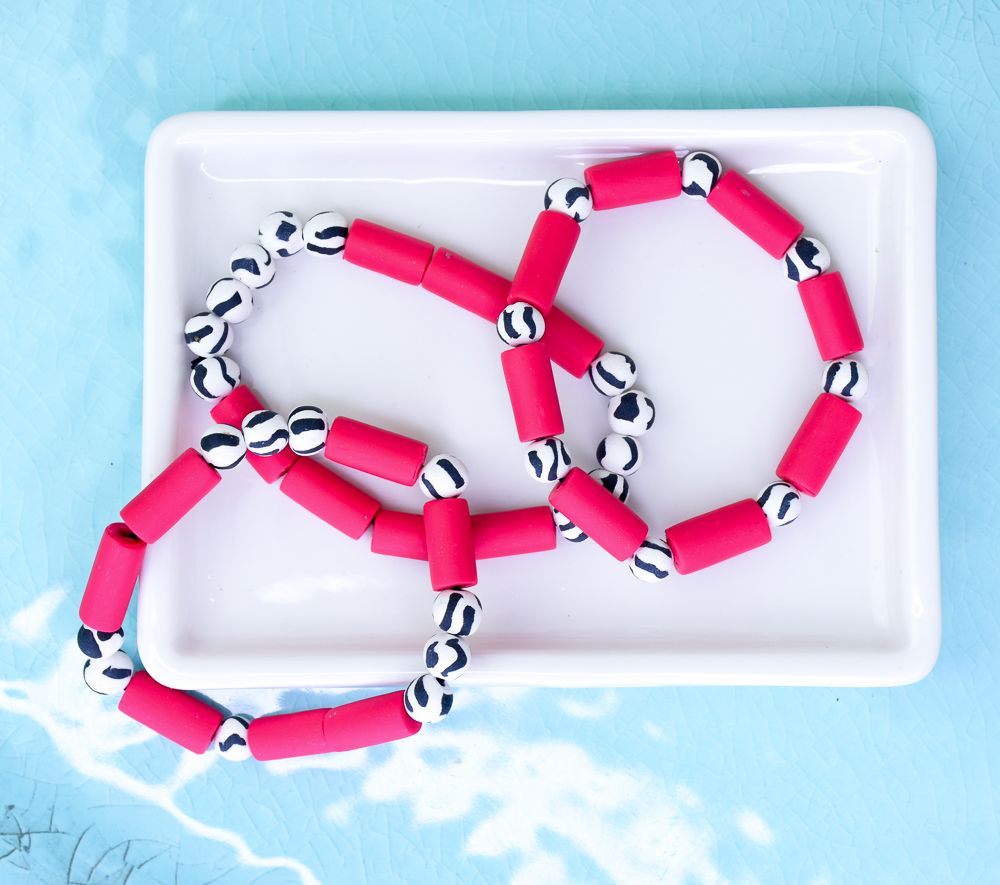
Here’s a look at several different styles for inspiration.