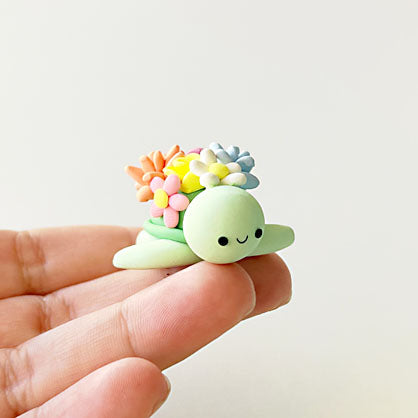
Sculpey III® Kawaii Floral Turtle
Sculpey III® Kawaii Floral Turtle
Designed by Precious Nunez
Read More
Read Less
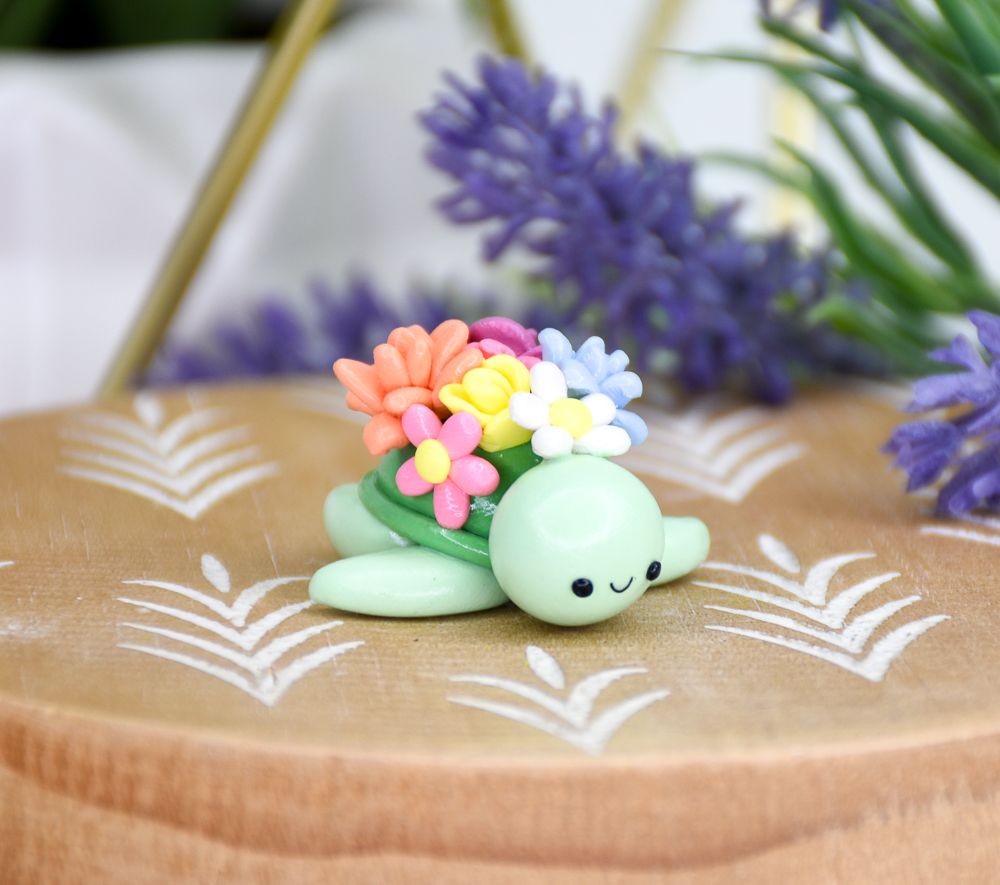
This flower filled turtle is a great way to start the Spring season with a touch of colorful flowers and succulents on top of a friendly turtle! Add this piece to your space or make it a gift for a friend!Time to completion: Sculpting time approximately 40-50 minutes Baking 15 minutes
ADDITIONAL SUPPLIES
- X-Acto Knife
- Small paint brush
Project Instructions
Step 1
- Getting Started:
Start with clean hands, unwrap and knead clay until soft and smooth, or condition by running clay though a Pasta Machine. We recommend using a designated machine for clay purposes only. When working with multiple colors, clean hands with soap and water or baby wipes (we have found that baby wipes work best) before switching colors. Shape clay, pressing pieces firmly together. Wash hands after use.
- Baking (also called Curing):
Step 2
Mix equal parts of blue and yellow to get a dark green color, mix in small bits of white to get a slightly lighter but dark shade of green for the shell. Mix small bits of blue with yellow and mix into a larger amount of white to get a light green color
Step 3
Take the dark green clay and roll into a rounded oval and flatten the bottom to make a shell. Roll out a small amount of dark green into a snake and wrap around the bottom of the shell, trim off any excess.
Step 4
Take 4 equal parts of the light green clay and roll into a ball to make the arms and legs. Form each ball into a curved tear drop and slightly flatten as shown in the photo.
Step 5
Place the arms and legs accordingly as shown in the photo. Feel free to blend in the parts to the shell to secure the pieces.
Step 6
Roll a medium size ball of light green clay, this will be the head. Place it on the shell above the middle of both arms and slightly press against the shell to secure the head.
Step 7
Roll out a very thin snake of black clay and trim off a piece with the X-acto knife, then curl into a “U” shape to make the smile. Cut off two bits of clay and roll into mini balls and place between the smile to make a set of eyes.
Step 8
To make new colors, mix the following:Red + White = Pink
Red + Yellow + White = Orange
Red + Blue + White = Purple
Blue + White = Light Blue

Step 9
Roll very small amounts of pink clay into thin circles and curl to form a rose.Take more flattened circles and stack on the sides on the initial base.
Repeat this process multiple times comparing to the photo till you get your desired look.
Make a few more in various colors.

Step 10
Take the orange clay and shape small bits into flattened tear drops, this will be a succulent.Place each piece next to each other and add on to get your desired look. Refer to the photo to form the succulent.
Feel free to make another succulent in a color of your choice.

Step 11
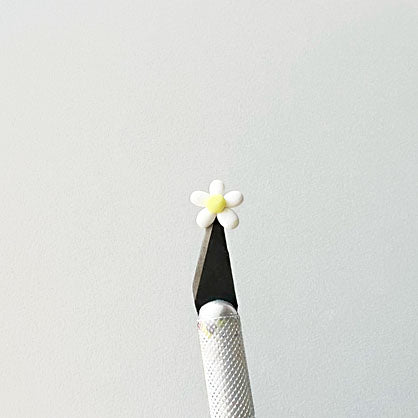
Roll five small balls of white clay and shape into tear drops, this will be the daisy.Flatten each tear drop and place each petal with each point facing the middle.
Add a small yellow ball in the center to finish the flower.
Make a few more in various colors.
Step 12
Place each flower on the shell according to your preference or use the layout shown in the photo (rose in the middle and on the sides, succulents on two sides, and daisies on the sides on the shell to hide the bottoms of the previous flowers).
Step 13
Bake according to Step 1 and Glaze if you wish!