
Sculpey III Enchanted Fairy Door
Sculpey III Enchanted Fairy Door
Read More
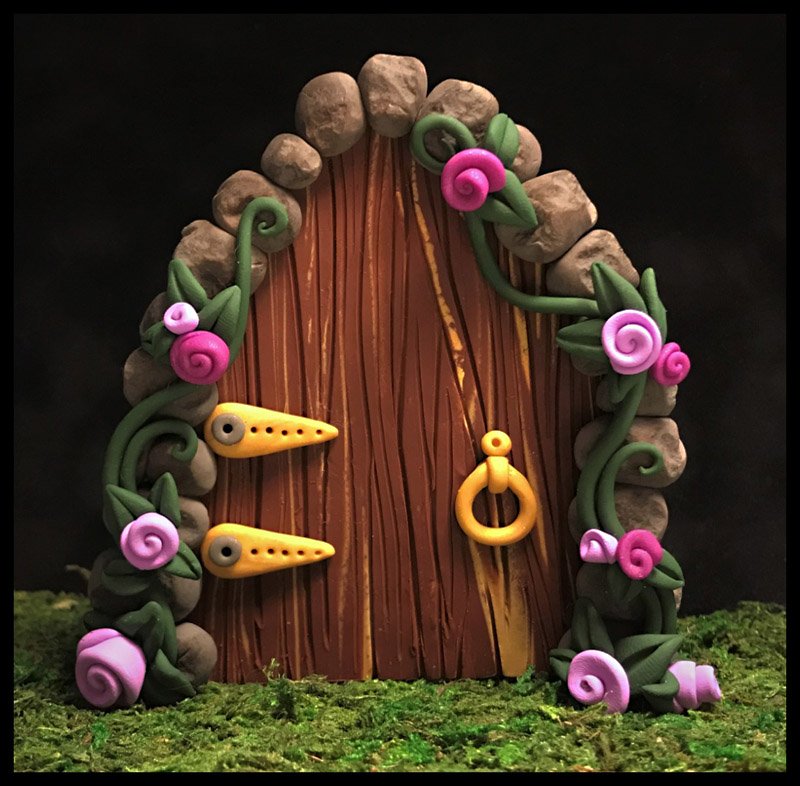
Magical fairy doors are wonderfully fun and easy to make! Fairy Doors look lovely placed above a light switch cover, on a baseboard, or over a picture frame. Charming on a bookshelf or desk, in the corner of a mirror, or on a windowsill, each door will bring a sense of whimsy wherever it's placed. So grab a few supplies and take a walk through your own polymer clay enchanted fairy door!
Design by Jenny Sorensen
Read Less
ADDITIONAL SUPPLIES
Toothpicks;Supplies to make a template: cardstock, paper, pencil; Craft Knife; Pebble or Small Rock; Brown and Black Chalks; Paintbrush
Project Instructions
Your workspace:
Please make sure your work area is covered and you are not working on an unprotected surface. We recommend working on the Sculpey® Work ‘n Bake Clay Mat, wax paper, metal baking sheet, or disposable foil. Uncured clay may damage unprotected furniture or finished surfaces. Be sure to cover your crafting area appropriately.
Getting Started:
Start with clean hands, unwrap and knead clay until soft and smooth, or condition by running clay though a Pasta Machine. We recommend using a designated machine for clay purposes only. When working with multiple colors, clean hands with soap and water or baby wipe before switching colors.Shape clay, pressing pieces firmly together. Wash hands after use.
Baking:
Begin by preheating oven to 275 °F (130 °C). After you are done creating; for best results bake clay on an oven-proof surface such metal, aluminum foil, an index card or the Sculpey® Clay Mat at 275°F (130 °C) for 15 minutes per ¼" (6 mm) thickness according to package directions. Oven safe glass or ceramic surfaces are also acceptable for baking; however please note that the baking times may take longer as the glass or ceramic surfaces take longer to heat up. For best baking results, use an oven thermometer. DO NOT USE MICROWAVE OVEN. DO NOT EXCEED THE ABOVE TEMPERATURE OR RECOMMENDED BAKING TIME.
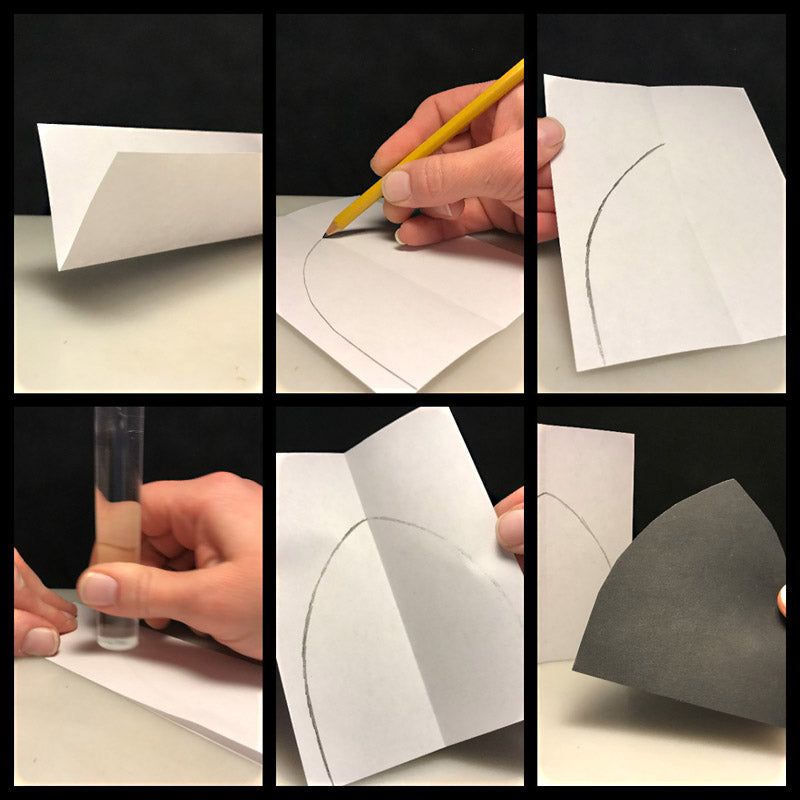
Fold a small piece of computer paper in half. With a pencil draw a thick outline of one half of the door on one half of the piece of paper. Fold the paper in half, and burnish with a roller or other hard material. When the paper is unfolded a mirror image will be visible. Cut out the symmetrical door to use as a template. The template shown is about 4 inches tall by 3 inches wide. ***TIP*** Cut out the door shape on a piece of cardstock to have a stronger template you can re-use.
Use the craft blade (with adult supervision) to cut each of the 2 oz. blocks of clay into 12 manageable squares. Squares will be referenced as a form of measurement for each part of the project. Slice through the three perforations, then cut twice more the opposite direction.

Condition (mix) three squares of Chocolate into a sphere then flatten into a pancake. Create 3 pancakes of 3 squares of Chocolate, and 2 pancakes of 1 square each of Jewelry Gold. Stack the Chocolate and Gold pancakes and compress together to make one, flat mass of clay. These will be marbled together to create the wood of the fairy door.

Lengthen and flatten the mass and tear down the middle lengthways. Stack the halves on top of each other to join together.

Twist and roll into a long snake, fold in half, twist, and repeat until variations and marbling occur.

Using the craft blade (with adult supervision) cut the snake in half lengthwise. Opening the clay will reveal a new marbling pattern. Press the clay together and roll out with a roller or pasta machine on the thickest setting. The thickness should be about ⅛”.

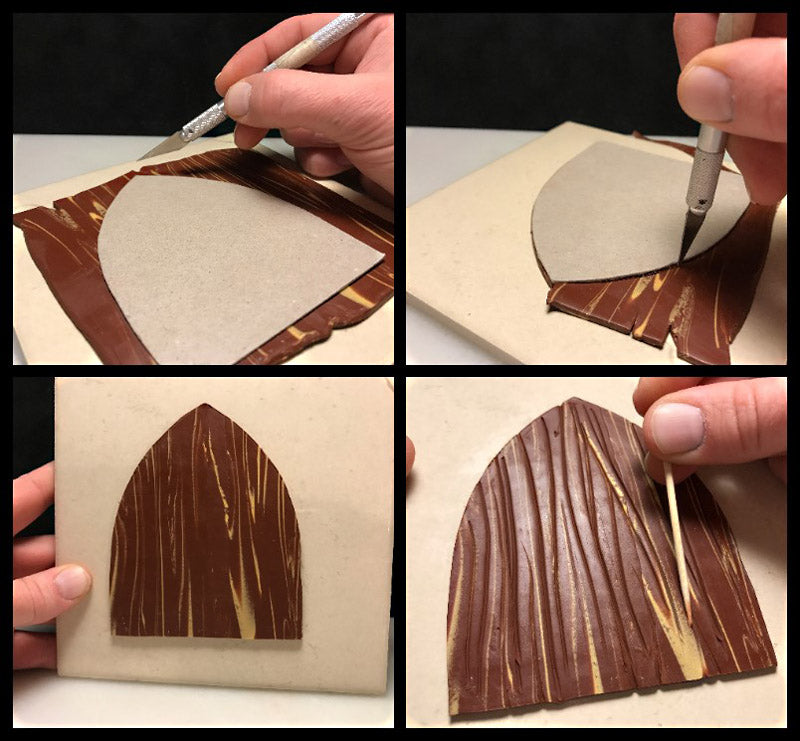
Make sure the mass is large enough to accommodate the door template you created. If the mass is too long and skinny, cut it in half, and lay the two pieces side-by-side and join together to create a wider piece.

Holding the Craft Knife straight up and down, cut around the template to create the shape of the fairy door. Using a toothpick, create lines and indents along the door mimicking wood grain. ***TIP***Try to stay along the natural variation lines that were created from the marbling.
Using a total of 7 Elephant Grey squares, roll out various sizes of round spheres and distort them just a bit to resemble stones. Lay the stones around the outside of the door, lightly pressing to join. ***TIP*** To create the look of real rocks, use a real rock! Lightly texture to make even more life-like stones

Apply some brown and black chalk to a piece of computer paper. Pick up the powder with a soft paintbrush and apply around the stones to create depth and shadows.

Time for hinges! Roll three pea sized pieces (or ⅛ square) of Jewelry Gold into spheres. Elongate two into teardrops and flatten slightly

Lay the two flattened gold teardrops on the left side of the door, and lightly press to join. Add details with a toothpick, and add tiny spheres of Elephant Grey for nails.

For the knocker, roll the remaining gold sphere (or ⅛ square) into a thin snake. Roll a loop and trim

Attach the loop to the door. With the leftover snake lay a thin strip across the seam to hide it. Trim. Make a tiny ball of gold clay and attach to the top to finish it up.

Roll 2 squares of Leaf Green into a few snakes for vines. Taper one end of a snake to a point, curl, then place along the stones.

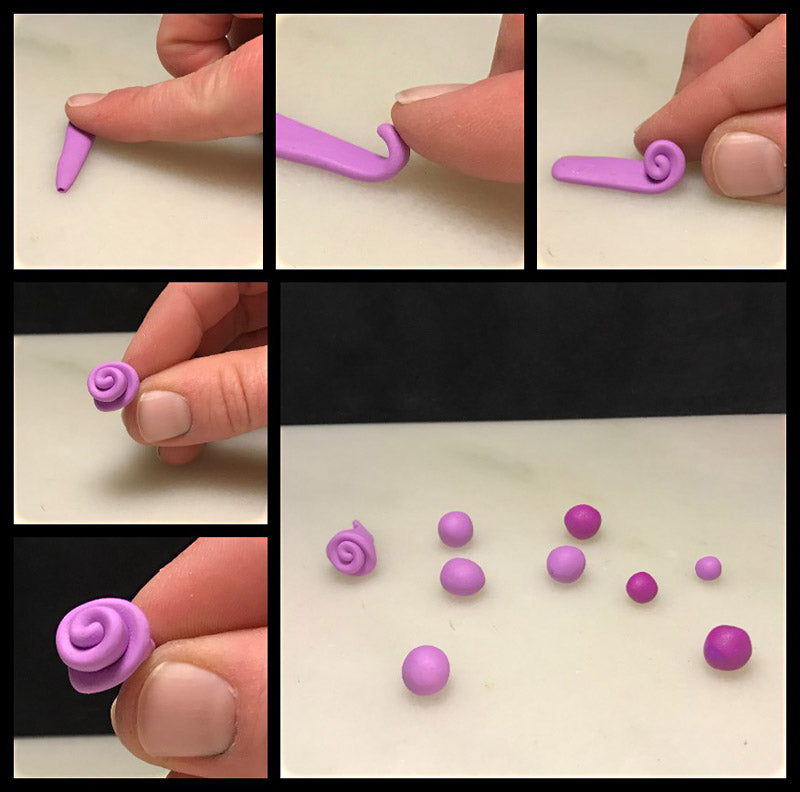
For the roses mix 1 square of white and 1 square of Violet together to create a light pink. Roll some pea sized pieces and roll into flat teardrops, just like with the door hinges.

Starting at the point, curl the flattened teardrop into itself to create a rose shape. Twist the bottom/end slightly, creating a tail.
For leaves, roll out a few pea sized spheres of Leaf Green. Taper into short teardrop shapes, and flatten slightly. With a toothpick create an indent, or vein, down the middle of the leaf. Attach a leaf to the underside of a rose and twist together slightly at the bottom to join, lengthening the tail. Once a few leaves are added and twisted into the tail, it can be pinched or trimmed off.

Carefully pick up each leaf/rose bunch and place around the vines, pressing very slightly to join. ***TIP*** Using a drop of Translucent Liquid Sculpey may be helpful to create an even stronger bond between the flowers and the stones.

Now the fairy door is ready to be cured. BAKE AS DIRECTED ABOVE. ***TIP***No sealers are necessary, but a coat of Sculpey Glaze will add a nice shine. ***EXTRA TIP*** Mount the fairy door to any flat surface with a bit of sticky tack, or poster putty.
