
Sculpey Bake Shop® Eraser Clay Sushi Friends Charms
Sculpey Bake Shop® Eraser Clay Sushi Friends Charms
Designed by Precious Nunez
Read More
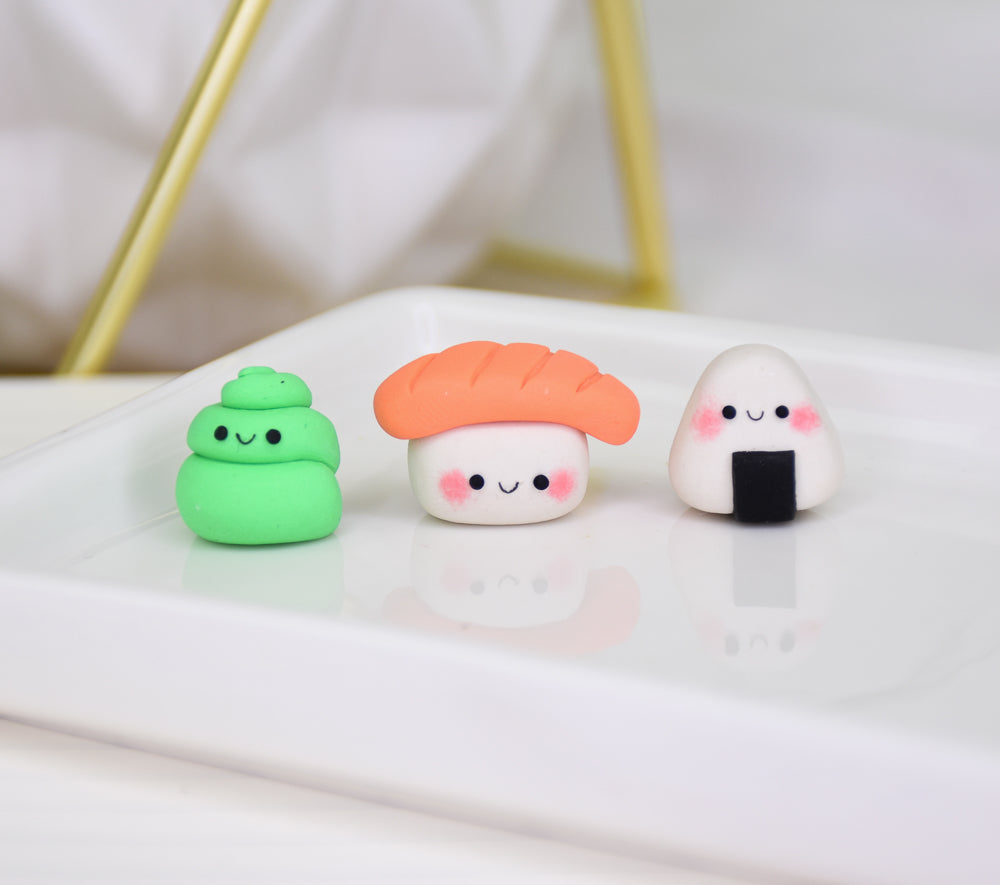
These mini sushi friends make an awesome addition to your desk, collectibles, dollhouse, crayon box, or whatever you desire! So simple yet so cute, you can make your own sushi friend erasers for you or a friend!
TIME TO COMPLETION:Sculpting time approximately 30-40 minutes - Baking time about 20 minutes
Read Less
ADDITIONAL SUPPLIES
- X-Acto Knife
- Pink Chalk Pastels (optional)
- Small paint brush (optional)
Project Instructions
Getting Started with Sculpey Bake Shop® clays:
• Bake at 250 °F (121 °C), 20 minutes per 1/4 inch (6 mm) thickness.
• DO NOT MICROWAVE.
• DO NOT EXCEED THE ABOVE TEMPERATURE OR RECOMMENDED BAKING TIME.
Please make sure your work area is covered and you are not working on an unprotected surface. We recommend working on the Sculpey Tools™ Oven-Safe Work Mat, wax paper, metal baking sheet, or disposable foil. Uncured clay may damage unprotected furniture or finished surfaces. Be sure to cover your crafting area appropriately.
Roll a medium sized ball of white clay and form into a rounded rectangular shape, this will be the rice base. Slightly flatten the side to make a flat surface as shown in the photo.

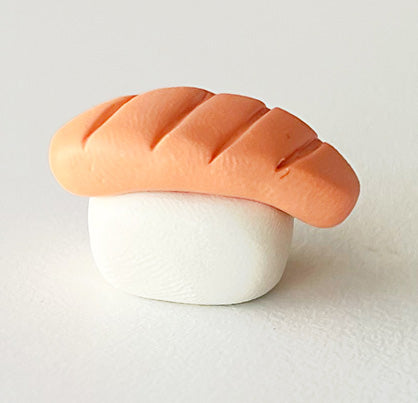
Take small bits of white and red clay then mix into a larger portion of orange to get a salmon color as shown.

Roll the salmon clay into a ball and shape into a chubby teardrop shape without making the end too pointy. Slightly flatten the surface on your work mat and place on top of your rice base from Step 2. The salmon should slightly overhang. Take your needle tool and make line indents across the salmon clay to give it texture.
Take some black clay and roll it into a snake making one side thin. Cut and bend to form a smile as shown in the photo. Cut out two small balls of black clay for the eyes.

Place the face on the rice base with your needle tool for precision. If you’d like to add some blush cheeks, lightly dust on some pink chalk pastels with a small paint brush.

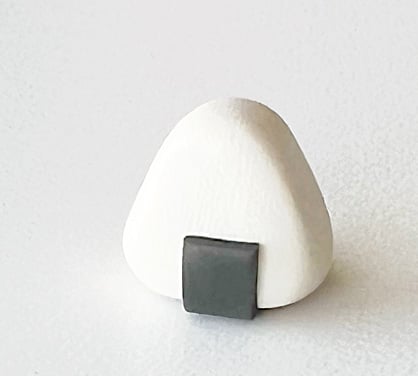
Roll out a medium sized ball of white clay and shape into a rounded triangle, this will be the rice base for the Onigiri.

Take a small amount of black clay and roll out a thin sheet. Cut out a strip and place on the bottom center of the rice base, this will be the seaweed
Repeat Step 5 and place the face above the seaweed. Add blush cheeks if you like.

Roll out a medium sized ball of green clay and add bits of white clay to get a lighter green shade that you desire. Roll this into a chubby snake and make the end thinner than the rest of the snake.

Roll the snake into a coil starting with the chubbiest side and the thinner side on the top to mimic a Wasabi dollop.

Repeat Step 5 to add a face onto the wasabi, place where you desire, Bake according to Step 1.

Here’s the Big Reveal of my Sushi Friends!
