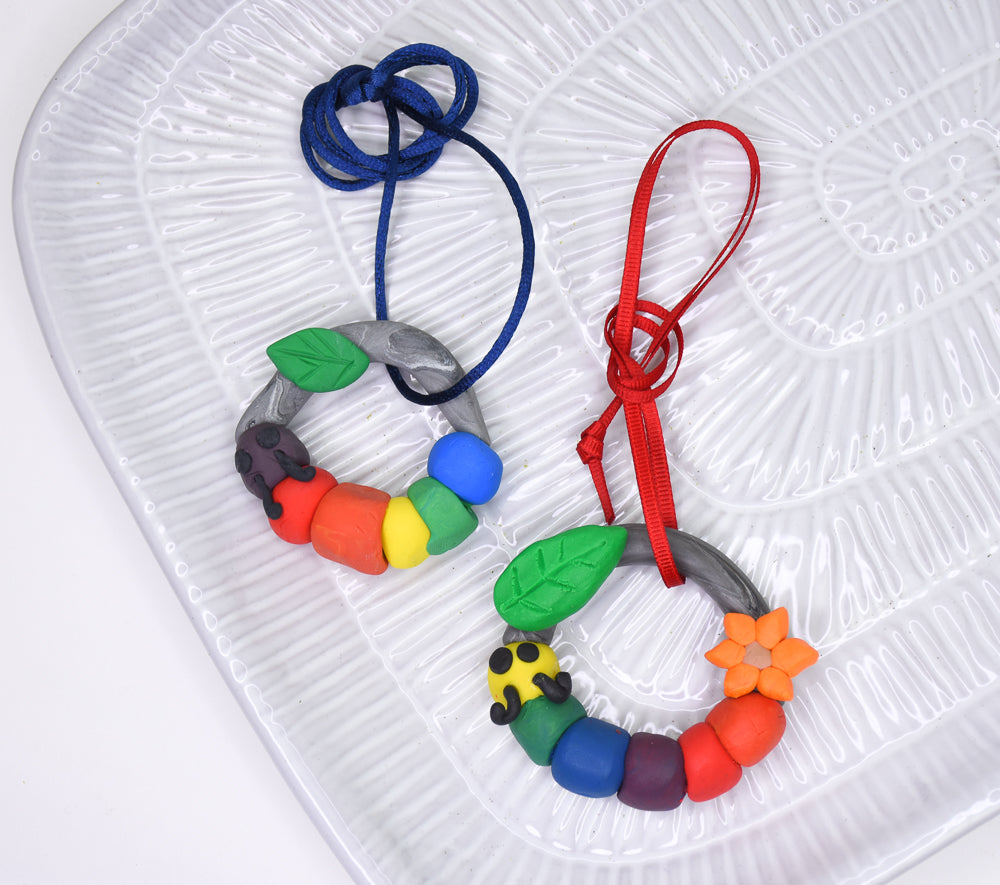
Sculpey Bake Shop® Caterpillar Color Wheel Pendants
Sculpey Bake Shop® Caterpillar Color Wheel Pendants
Designed by Sarah K Swanson
Read More
Combine a great lesson in color mixing with the creation of a super cute pendant that your students can wear or give as a gift!
TIME TO COMPLETION: About one hour with baking
Read Less
ADDITIONAL SUPPLIES
- 50’ for 20 or 2-1/2 ft of yarn or ribbon per student
- scissors
- oven or toaster oven with baking sheet

Project Instructions
Getting Started with Sculpey Bake Shop® clays:
• Bake at 275 °F (121 °C), 15 minutes per 1/4 inch (6 mm) thickness.
• DO NOT MICROWAVE.
• DO NOT EXCEED THE ABOVE TEMPERATURE OR RECOMMENDED BAKING TIME.
Please make sure your work area is covered and you are not working on an unprotected surface. We recommend working on the Sculpey Tools™ Oven-Safe Work Mat, wax paper, metal baking sheet, or disposable foil. Uncured clay may damage unprotected furniture or finished surfaces. Be sure to cover your crafting area appropriately.
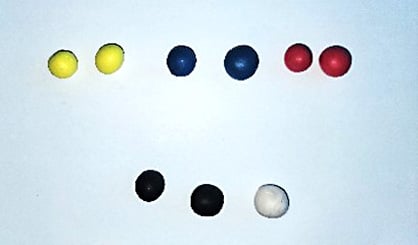
Prepare the materials. The teacher should divide the blocks of yellow, blue, red, black and white clay into 10 equal pieces each for 1 oz blocks or 20 equal pieces for 2 oz bars. Each student should be given 2 pieces each of yellow, blue, red and black clay and 1 piece each of white.
(Teacher tip: If you think all the clay at once is too tempting for your students, pass out the pieces as you go.)
(Teacher tip: If you think all the clay at once is too tempting for your students, pass out the pieces as you go.)

Wedge/condition the clay. Have students kneed and roll each piece of clay into a separate ball.
Cut the clay. Have the students cut in half one yellow ball of clay, one blue ball of clay and one red ball of clay.

Color mixing. Have the students mix 1/2 yellow ball with 1/2 blue ball, 1.2 blue ball with 1/2 red ball and 1/2 red ball with 1/2 yellow ball. Once the colors are fully mixed, they should be re-rolled into balls.

Arrange the colors. Have students arrange the colors into the color wheel. Then open the wheel up to form an attached line.
(Teacher tip: This is a great place to add some art vocabulary in and talk about primary, and secondary colors.)
(Teacher tip: This is a great place to add some art vocabulary in and talk about primary, and secondary colors.)

Mix gray. Have the students take one ball of black clay and one ball of white clay and mix them together reforming a ball when complete.
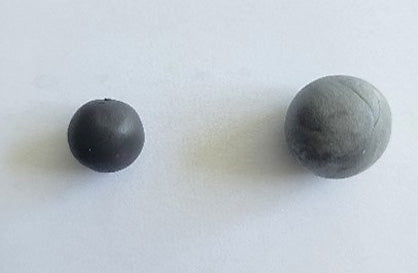
Roll. Have the students use their hands to roll the gray ball of clay into a cylinder approximately 1/4 inch thick.

Form a pendent. Have students gently curve their color line upwards and their gray cylinder downwards then attach to create a circle.

Create antennae and eyes. Take the last black clay ball and roll 2 very small cylinders to create antennae and two very small balls for eyes.
(Teacher tip: If this step is too difficult for your students it can be prepared ahead of time for them.)
(Teacher tip: If this step is too difficult for your students it can be prepared ahead of time for them.)

Attach antennae and eyes. Have students use their modeling tools to poke holes and insert the eyes and antennae.
(Teacher tip: to reduce the likelihood of breaking, press the antennas against the caterpillar to avoid them sticking up.)
(Teacher tip: to reduce the likelihood of breaking, press the antennas against the caterpillar to avoid them sticking up.)

(optional): Extras. Have the students use the unused colors to create additional items for their pendent such as leaves, and flowers.

Bake the Pendants. Place the pendants on the Oven-Safe Work Mat on a baking sheet and bake for approximately 15 minutes at 275 F. Allow to cool and wash hands after use.

Finishing up. Hang pendants from a ribbon or yarn that can be worn around the neck. Encourage students to share with others how they mixed colors and created their pendent.
