

Sculpey Air Dry Pencil Cup Cat
Sculpey Air Dry Pencil Cup Cat
Designed by Amy Koranek
Read More
Read Less
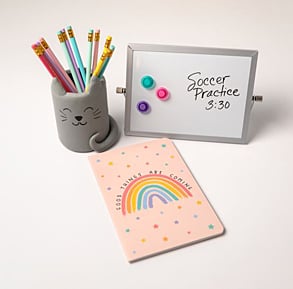
Create this clever pencil cup for your desk (or your best friends desk), using Sculpey Air Dry clay and an empty canned food can!
TIME TO COMPLETION: 45 minutes plus air drying time
ADDITIONAL SUPPLIES
- Clean empty vegetable can with label removed
- Water basin
- 2” Metal circle cutter
- Gray acrylic paint
- Paintbrush
- Pencil
- Black paint marker or permanent marker

Project Instructions
Surface: For the best results in sculpting and crafting with air dry clay, plan to work with a smooth, well-cleaned, non-porous surface.
Amount: Because the clay is made to air-dry, try to open only what you need at the time and leave the rest still wrapped or sealed and stored. Pinch or cut off the amount you need and take more out as you go, even for larger projects.
Working: Knead your clay before you begin shaping it for your creations. Our polymer clay is already soft and pliable, but warming the clay with your hands is a good practice to spread the substance, condition the material and get a feel for what you’re working with.
Shaping: You can use a combination of your hands, crafting tools and multimedia materials to shape your clay into the design you desire, create unique patterns and textures and incorporate mixed media elements. Remember: you can create anything you can imagine! Just make sure the finished product is exactly what you want before allowing it to dry.
Drying: Lay or stand your air dry clay projects on a nonporous surface with a clean and smooth finish in an area with low humidity. Let the projects remain untouched and undisturbed for about 24 hours to ensure complete hardening.
Roll out the entire bar of Sculpey Air Dry clay to a sheet that is large enough to wrap around the can and between 1/8” and 1/4” thick. Trim one end of the sheet straight and make this the lead edge on the side of the can.

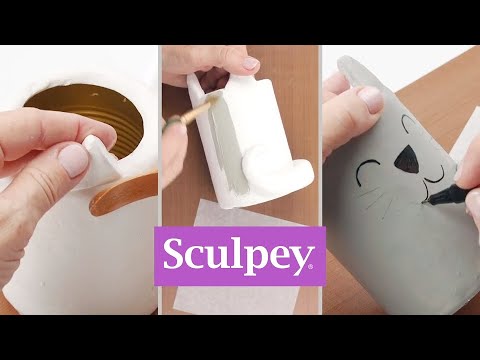
Lay the can down on the sheet of clay and roll the can up. Trim the second straight edge so you have a neat seam. Work the seam closed with your fingertips as tightly as you can. Use the sponge dipped in water to help smooth the seam closed.

Trim away excess clay from the bottom of the can with the metal scraper tool. Smooth the edges of the clay around the bottom edge of the can.

Trim away the excess clay from the top of the can with the metal scraper tool.

Very carefully smooth the edge of the clay over the lip of the can. Be careful not to cut your finger on the sharp edge of the can. Use the metal scraper tool to remove excess clay away from the lip as needed.

From the scraps of clay, form two triangle shaped ears about 1.5” tall and 1.25” wide.

Dampen the top edge of the can where the ears will sit. Position the ears as you would like them.

Use the wooden smoothing tool dipped into water to help smooth the seams between the ears and the edge of the can.

Use the sponge dipped in water to smooth the entire body and to even out fingerprints.

From more of the scrap clays, form a long skinny tapered piece for a tail.

Press the thick part of the taper to the back of the can and curl the tail upward as shown. Allow the can to dry sitting flat until it is dry to the touch. Once, it’s dry enough to pick up, you can prop it up on a smaller cookie cutter to allow the bottom of the can to dry as well. The drying for a project this large will take around 24 hours.

Paint the entire can gray. Allow the paint to dry and then sketch a face with a pencil.

Draw in the sketched face with a black paint marker or permanent marker. Fill with your favorite office supplies.

- Choosing a selection results in a full page refresh.
- Opens in a new window.