
Premo! Cat Sculptures
Premo! Cat Sculptures
Read More
Designs by Lucy Stopes
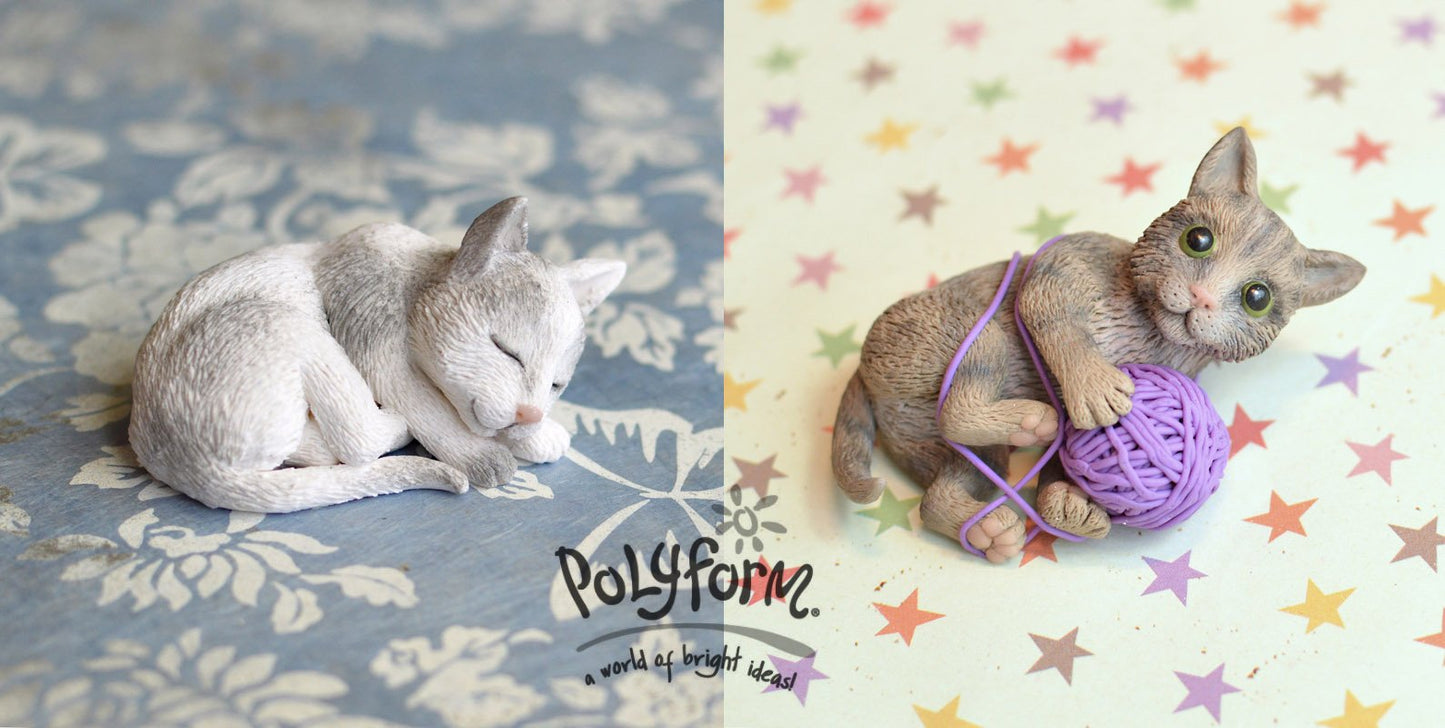
These amazing cats seem to come to life in your hands as you sculpt them. Check out our polymer clay cat tutorial below.
Read Less
ADDITIONAL SUPPLIES
small brush, larger soft brush, small blade tool, Awl/needle tool, clay extruder, chalk pastels|small brush, larger soft brush, small blade tool, Awl/needle tool, clay extruder, chalk pastels
Project Instructions
Getting StartedPolymer clay may stain. CLAY MAY DAMAGE UNPROTECTED FURNITURE OR FINISHED SURFACES. DO NOT USE polymer clay on unprotected surfaces. We recommend working on the Sculpey clay mat, wax paper, metal baking sheet, or disposable foil. Start with clean hands and work surface area. Knead clay until soft and smooth. For best results, clean your hands in between colors. Shape clay, pressing pieces together firmly. Bake on oven-proof glass or metal surface at 275°F (130 °C) for 30 minutes per ¼" (6 mm) thickness. For best baking results, use an oven thermometer. DO NOT USE MICROWAVE OVEN. DO NOT EXCEED THE ABOVE TEMPERATURE OR RECOMMENDED BAKING TIME. Wash hands after use. Baking should be completed by an adult.Begin by preheating oven to 275 °F (130 °C). Test temperature with oven thermometer for perfectly cured clay. For best results, condition all clay by running it through the Clay Conditioning Machine for several passes on the widest setting. Fold the clay in half after each pass and insert the fold side into the rollers first.
I recommend about half a 57g/2 oz block of clay per cat in whatever color you choose (for my first cat I used Rhino grey). 2.It may also be necessary to leech your clay if it’s very soft to make sure it’s firm enough to work with. If you feel happy with the firmness of your clay then you can skip this step. To make clay firmer you can leech out some of its oils by rolling it out and placing it between two sheets of paper. You can then either press it with a rolling pin, or you can leave it for a while (maybe 1-2 hours) weighed down by something flat and heavy. My clay was very soft, so I did both!
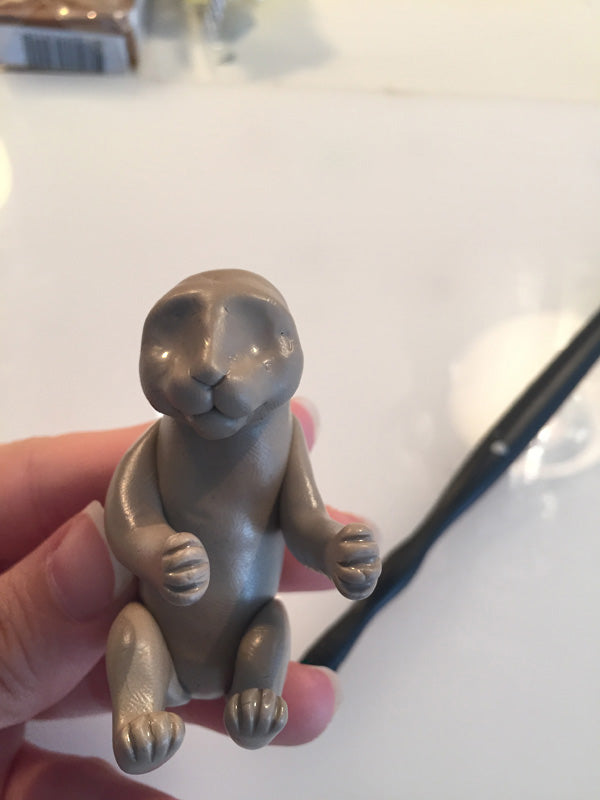
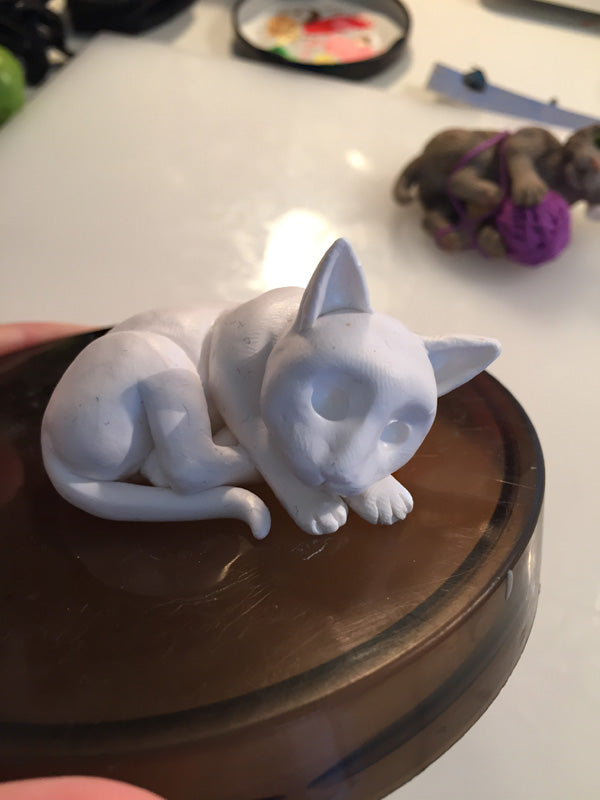
The next thing is to make your basic cat body shape. First roll the clay into a sausage shape. Then cut out about a third to be used for ears and legs etc. Take the larger piece, round it off at the end and then use a finger to roll over the place where the cat's neck should be to create its head. Keep shaping till it looks something like this.

Next roll out your unused third of clay into a long sausage, and cut it into 4 roughly leg-lengthed pieces. The left over piece will be for making the tail, ears, and facial features.

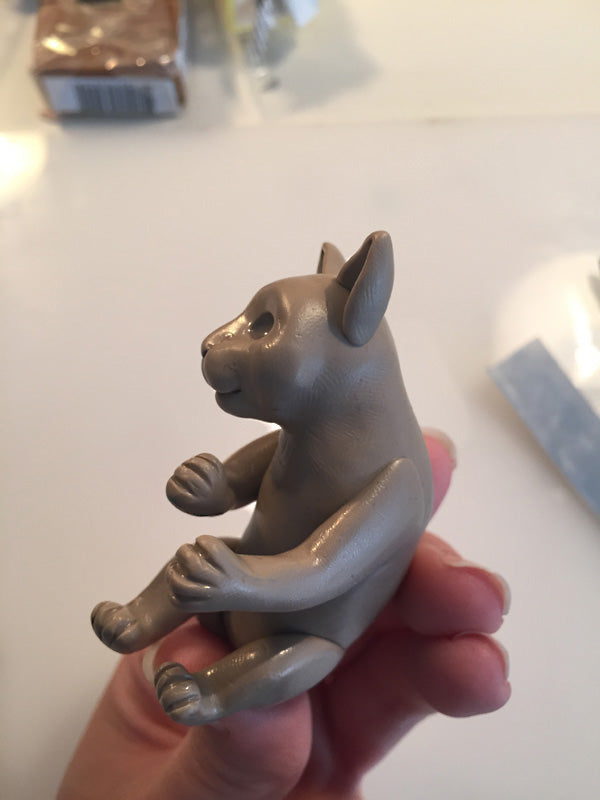
Next you need to roughly shape your leg pieces. They should be thinner towards the toe end and wider and flatter where they join onto the body. Use the pictures as a guide for shape. The two front legs won't need to be as thick at the top as the back legs so cut out a small amount of the clay to make them thinner.


To create the toes you can use a needle tool to press into the toe gaps. This will shorten the feet, so pull them out a little to make sure they are long and thin enough.

You can now attach the legs by pressing them into place. You may prefer to save this step until after you have sculpted the face if you are concerned about squishing the body out of shape.


To structure the cat's face, make three small balls and one small sausage to create the cat’s muzzle. Then add another two slightly flattened balls for the cheeks, and two more small sausages for the brow bones.


Press the shapes down into the face so they begin to merge together and using a ball tool or rubber blending tool, smooth over the joins until they are entirely erased leaving only the join lines that create the cat's mouth and nose. Once that’s done use a large ball tool to create eye sockets. Use a finger to get everything properly smoothed out. You’ll probably need to fiddle around for while to get a face structure you are happy with; it can help to look at a picture of a cat's face for reference!

Next you need to add the ears. Take two pea-sized balls of clay and make them into little triangle shapes. Use a tool with a soft pointed end and mould the ears around it. Using a blade cutter, take a small angled slice out of the bottom of each ear, making sure the ears are the mirror image of each other.


Place the ears at the back of the head, making sure the bottom corner of each ear is roughly in line with the bottom edge of each eye. You’ll probably want about 1 cm of forehead between the eyes and ears.
Next roll out the tail giving it a pointed end and press it into place. You can now smooth over all your joining lines. A ball-ended tool works well to do this. The aim is to erase all the join lines at the base of the legs, tail and ears, but still retain the shape of protruding haunches and shoulders.

Before taking the next step it may be necessary to clean your cat. Especially if you’re working with a light coloured clay. A great way to clean clay is to wipe it down with a make-up remover wipe; specifically you want wipes that have some alcohol content. Rubbing alcohol is also good if you have it.
So the next step is to texture the fur. This bit will take a while! Before starting it can help to place your cat onto some small flat surface that you can hold while you work, this is so you can avoid handling the cat too much and flattening your fur texture. Texturing is very simple; just use a small blade tool to scratch little dashes into the clay. Cover the whole cat, making the texture rougher over furrier parts like the tummy. Around the mouth make shorter shallower dashes so the fur appears finer and shorter. Pay attention to the direction your lines go in, so the fur appears to be growing in the right direction

When that’s done use a needle tool to make little dots on the muzzle where the cats whiskers would be.

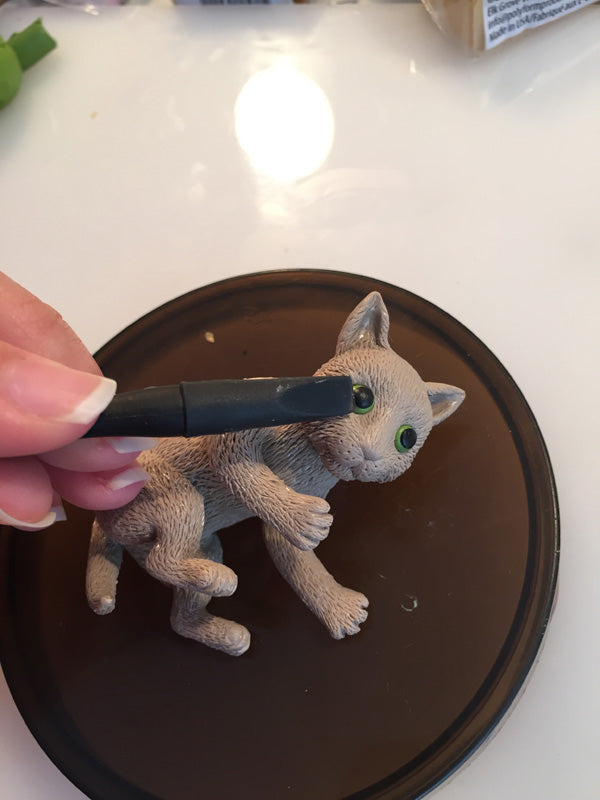
To make the eyes simply roll out two little balls of green (or whatever eye color you choose) – make sure to keep both eyes the same size – and then gently press the eyeball into the eye hole.

Then make two much smaller balls of black for the pupils. Press them into the centre of the eyes. If you want you can then use a rubber blending tool to gently smooth out the joining lines so the eyes have a smoother, more spherical shape.
Next step is to make the paw pads. I used the beige colour for this. I find a good way of getting evenly sized pieces for the paw pads is to roll a thin sausage shape and then cut four small and one larger piece per paw. Roll these pieces into little balls and press them in place.


Next step is to make the paw pads. I used the beige colour for this. I find a good way of getting evenly sized pieces for the paw pads is to roll a thin sausage shape and then cut four small and one larger piece per paw. Roll these pieces into little balls and press them in place.


Next add your cat’s markings using powdered chalk pastels applied with a brush. This can be done however you like. I chose to use black and white pastels to create a grey tabby cat effect. You can also use a touch of pink to brighten the color of the nose and paw pads.

The last thing to do is to make your ball of yarn. Roll out ball of clay using your chosen colour. This will be the core of your ball. Next, using a clay extruder with its smallest extruding hole, make a long length of clay. Begin at one end of the length and roll it around the ball as evenly as you can. Roll the ball very gently between your palms to get a more evenly spherical shape. Then place the ball of yarn between the cat’s front paws, and wrap another short length of clay around the cat’s body so it appears to have tangled itself up in the yarn. Make any necessary adjustments to the positioning of the cats legs and paws, and then you’re done!


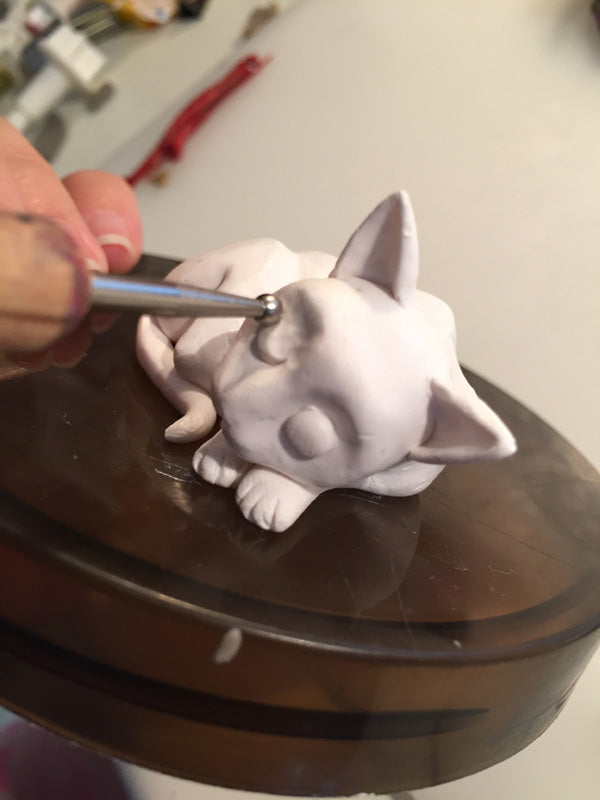
TO MAKE THE SLEEPING CAT:If you want to make the sleeping cat then all the stages are the same up until the point that you have your basic cat shape with legs attached. To pose your cat as if it is sleeping, twist the head slightly to one side and tuck the paws up under the cats chin

Then curl the cat's back and tuck the feet together under its front legs. Press your cat down into your work tile so that it appears to be properly grounded.


Once you’ve got this curled up shape, use a ball tool to blend the join lines. With this pose it is especially important that you emphasize the structure of the cat’s body so it doesn’t look too much like a lump. Add definition by using a ball tool to press indentations around the haunches and shoulders, indicated by the joining lines. Make sure to do this to the joins on its underside as well. Add another indentation between the shoulder blades. Use a finger to smooth over the shape.


To create sleeping eyes for your cat place two eyeball sized balls of clay over the place where its eyes would be and flatten them slightly. Then using a ball tool, smooth out the join lines the whole way round. Use a finger to smooth out the eye area, leaving a very slight bulge where the eyeball would be

Next use a needle tool to create slightly slanting slit across the lower half of the bulge. Make the slit slant downwards slightly at the inner corner and upwards at the outer corner. After this the rest of the stages are all the same!

