
Sculpey Premo™ Terra Cotta Southwestern Bowl
Sculpey Premo™ Terra Cotta Southwestern Bowl
Designed by Cindi McGee
Read More
Read Less
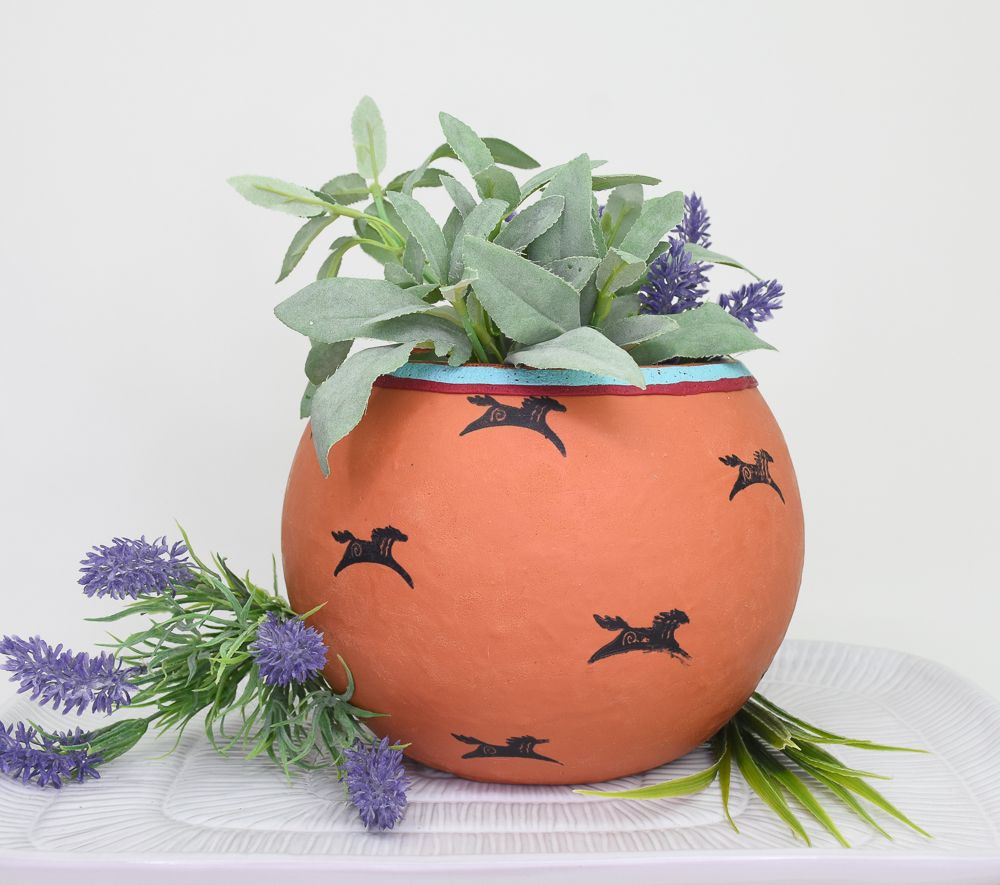
Create this cool little bowl with a Southwestern flair in an afternoon. Add an artificial plant or air plant and you have a new star in your décor!
Note: The amount of Terra Cotta clay required is dependent on the size of the glass bowl you wish to cover. Clean the glass bowl well and let dry thoroughly.
Time to Completion:
Approximately 3 hours to make
30-40 minutes to bake/cure
Note: The amount of Terra Cotta clay required is dependent on the size of the glass bowl you wish to cover. Clean the glass bowl well and let dry thoroughly.
Time to Completion:
Approximately 3 hours to make
30-40 minutes to bake/cure
ADDITIONAL SUPPLIES
- Premo! Sculpey® - Terra Cotta, Turquoise Granite, Cabernet
- Clay blade
- Clay roller
- Fine and course sandpaper
- Border silkscreen
- Black acrylic paint
- Glass bowl to cover
Rubber stamp - Permanent black ink pad
- Parchment paper
Project Instructions
Step 1
- Getting Started:
Start with clean hands, unwrap and knead clay until soft and smooth, or condition by running clay though a Pasta Machine. We recommend using a designated machine for clay purposes only. When working with multiple colors, clean hands with soap and water or baby wipes (we have found that baby wipes work best) before switching colors. Shape clay, pressing pieces firmly together. Wash hands after use.
- Baking (also called Curing):
Step 2
Roll a thin, long sheet of Terra Cotta clay. Use blade to cut strips about 1-1/2” wide.
Step 3
Start at the top of the bowl. Place the first strip so one long half is above the rim and one long half is below.Add an additional strip adjacent to it if needed to cover the distance around the rim.
Fold the top of the clay strip down over the rim to the inside of the bowl and press in place.

Step 4
Add a second row of strips beneath the first, placing them with the seams as tight as possible.Continue adding strips until you reach the base of the bowl.

Step 5
Place a piece of parchment paper against each seam. Use your fingers to press and smooth away the seam, joining the clay pieces together.
Step 6
Use a small, irregular piece of fine sandpaper to press against the clay and add texture to the entire surface.
Step 7
Ink your selected stamp with permanent black ink. Gently press against clay to transfer image. Repeat to create a random scattered pattern of images.
Step 8
Roll a sheet of Terra Cotta clay wide enough for the border silkscreen.Place the silkscreen against the clay (following the silkscreen manufacturer’s instructions – which vary).
I am using only a portion of this screen, so I will only apply the paint to the area I want it.
Wash the screen immediately and let the paint dry on the clay.
Use blade to cut out the border.
Repeat until you have enough to cover the top rim of the bowl.

Step 9
Place the border pieces around the top rim and gently press to adhere. Use your fingers to smooth the edges/seams where each border meets.
Step 10
Roll Turquoise Granite clay to create a long sheet.Use clay blade to cut a strip about 1/4” wide.
Add it to the top of the bowl right beneath the silkscreened border pieces.
Continue adding until you have the entire top of the bowl encircled. Smooth the seams.

Step 11
Roll Cabernet clay to create a long sheet.Use clay blade to cut a strip ab out 1/8” wide.
Add it to the top of the bowl right beneath the Turquoise Granite clay.
Continue adding until you have the entire top of the bowl encircled. Smooth the seams.

Step 12
Use course sandpaper to texture the Turquoise Granite and Cabernet strips.Step 13
Bake as directed in Step 1 above, let cool completely in the oven if possible (that glass will be HOT!).