Original Sculpey® Letter Clips
Original Sculpey® Letter Clips
Designed by Laura Kelly Walters
Read More
Read Less
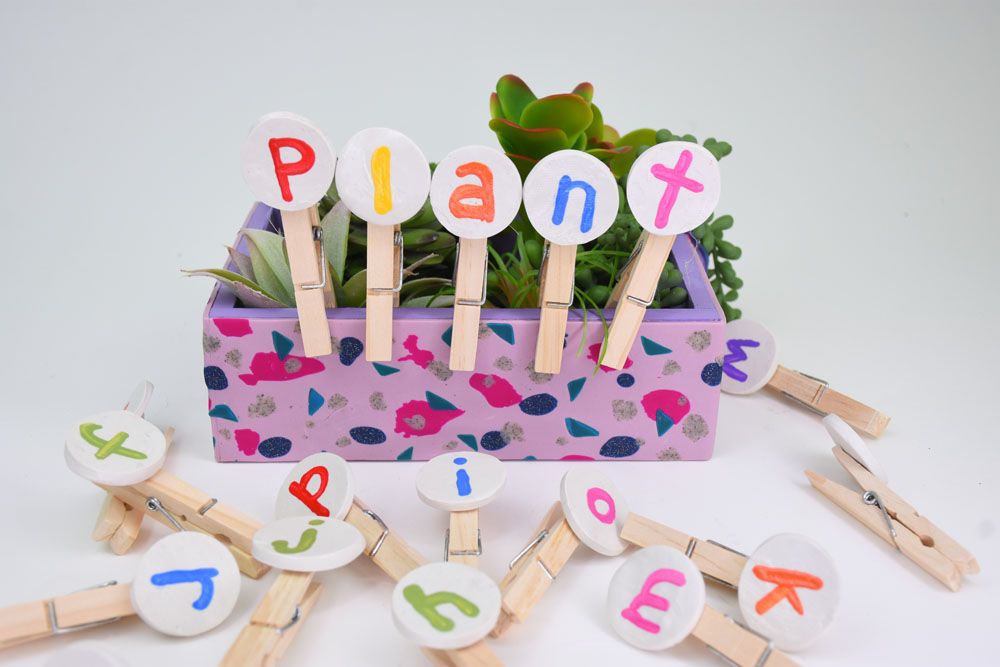
This project creates a tool for letter recognition as well as making words and learning sounds. It can be used across grade levels as a tool individually as well as in a learning center or small group.
Additional Uses:
The letters can be used to clip to laminated cards that have objects that start with the sounds.
Put the letters in alphabetical order.
NOTE TO TEACHERS: All the items can be added to a "Build Your Own Classroom Pack" from Sculpey.
Additional Uses:
The letters can be used to clip to laminated cards that have objects that start with the sounds.
Put the letters in alphabetical order.
NOTE TO TEACHERS: All the items can be added to a "Build Your Own Classroom Pack" from Sculpey.
ADDITIONAL SUPPLIES
- Acrylic Paint in assorted colors
- Paintbrush
- Loctite super Glue
- Wood Clothespins
- 1 inch circle cutter

Project Instructions
Step 1
- Getting Started:
Start with clean hands, unwrap and knead clay until soft and smooth, or condition by running clay though a Pasta Machine. We recommend using a designated machine for clay purposes only. When working with multiple colors, clean hands with soap and water or baby wipes (we have found that baby wipes work best) before switching colors. Shape clay, pressing pieces firmly together. Wash hands after use.
- Baking (also called Curing):
Step 2
Condition the clay and roll into a “sausage” roll.
Step 3
Use the roller make a flat sheet 1/8 inch thick.
Step 4
Cut circles from the clay slab with a 1-inch round cutter.Repeat these steps as many times as necessary to make the quantity of letter pieces desired.
Bake at 275 degrees for 15 minutes. Once removed from oven, let cool completely.

Step 5
Once cool, use acrylic paint to add letters to the bakes round pieces.
Step 6
Add a layer of glaze to protect the letters for chipping or damage.
Step 7
Glue the round clay pieces with the letters to the tops of clothespins.
Step 8
Use the letters to make words.