
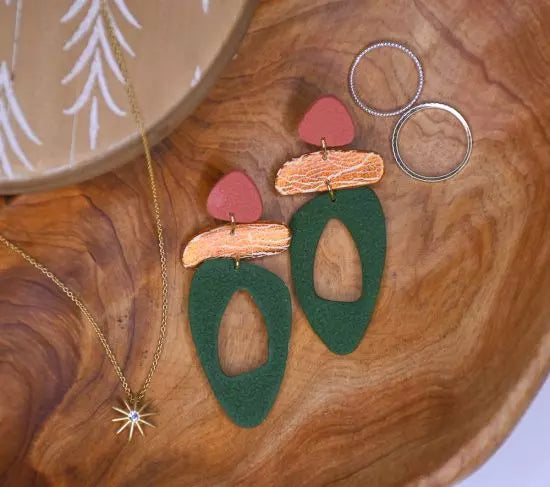
Sculpey Soufflé™ Retro Geometric Earrings
Sculpey Soufflé™ Retro Geometric Earrings
Designed by syndee holt
Read More
Read Less
In MY opinion, Sculpey Soufflé™ is the perfect clay to enhance the cool retro vibe with its unique surface and super cool colors! I’ve added a splash of sparkle with copper foils as well.TIME TO COMPLETION: 40 minutes to make 30 minutes to bake/cure
ADDITIONAL SUPPLIES
• Copper-toned foil
• Rough sandpaper or stair tred tape is what I use!
• Small spray bottle of water
• Plastic geometric cutter set (Etsy-search “retro geometric cutters”)
• Gold-toned jump rings – mine are oval jump ring 6x8 18 (or 20) gauge (4)
• Earring posts or ear wires
• Pliers
• Small brush for the glaze
Project Instructions
Step 1
- Getting Started:
Start with clean hands, unwrap and knead clay until soft and smooth, or condition by running clay though a Pasta Machine. We recommend using a designated machine for clay purposes only. When working with multiple colors, clean hands with soap and water or baby wipes (we have found that baby wipes work best) before switching colors. Shape clay, pressing pieces firmly together. Wash hands after use.
- Baking (also called Curing):
Step 2
Condition and sheet out a small piece of the Soufflé™ Sedona clay on a medium setting. Lightly spray your texture with water and emboss it into the clay. Allow the clay to dry.Artist tip: I put my sheet of clay between a sheet of folded paper, with the texture on top of the clay. Then I put it on the ground and step on it. If you have a heavily patterned shoe sole, you can put a piece of cardboard on top first.

Step 3
Use the smallest cutter to cut out the top of the earrings. I usually cut several-just in case!Set aside for now.

Step 4
Condition and sheet of a small piece of the Soufflé™ Racing Green on a medium setting and texture it as well. Don’t forget to lightly spray the texture!
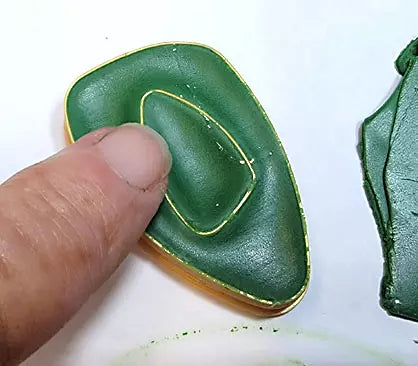
Step 5
Use the largest of cutter to cut out a piece from this textured sheet of clay. When a cutter has a cutout shape inside the exterior lines like this cutter, I like to flip it over and use my finger (and finger nail) to gently rub that inside edge for a clean cut!Since this cutter is a directional cutter, we need to flip the sheet of clay over to cut out the second piece from the back to make a facing pair. NOTE: You *may* need to retexture the outside edges of the finished cutout.
Step 6
Condition and sheet out a small piece of the Soufflé™ Ivory on a medium setting and gently rub a small sheet of the Copper foil onto the surface of the clay.
Step 7
Run the clay back through the clay conditioning machine to lightly crackle the foil.
Step 8
Use the middle cutter to cut out a couple of pieces. I like to use the rubber chisel end of my Dual End Styling tool to gently nudge the clay out of the cutter. Cut at least 2 pieces.NOTE: This is also a cutter that would normally need to have a facing piece cut out from the back. You can try it with your piece after you have safely cut out two. Sometimes the foil doesn’t look so nice when you cut from the back!

Step 9
Use your needle tool to make holes for assembling the pieces after baking. I like to using graphing paper to help me lay out my pieces along a center line and put my assembly holes in!
Step 10
Since I decided to make these posts, I’m using one of my favorite ways to secure the post hardware to the clay.Gently push the post into the center of the LS dot and let it sit about 10 minutes. The LS will creep up to the post and cover the entire post back. Now they are read to bake.
The post on the back is already baked/cured so you can see clean and secure a mount this makes!

Step 11
Bake/cure all the pieces as directed in Step 1 above. Once the clay has cooled, you can assemble the earrings as shown.You can elect to put a thin coat of Sculpey Satin glaze on the foiled covered pieces to help secure and protect the foil.

Step 12
Here is a look at my finished earrings!