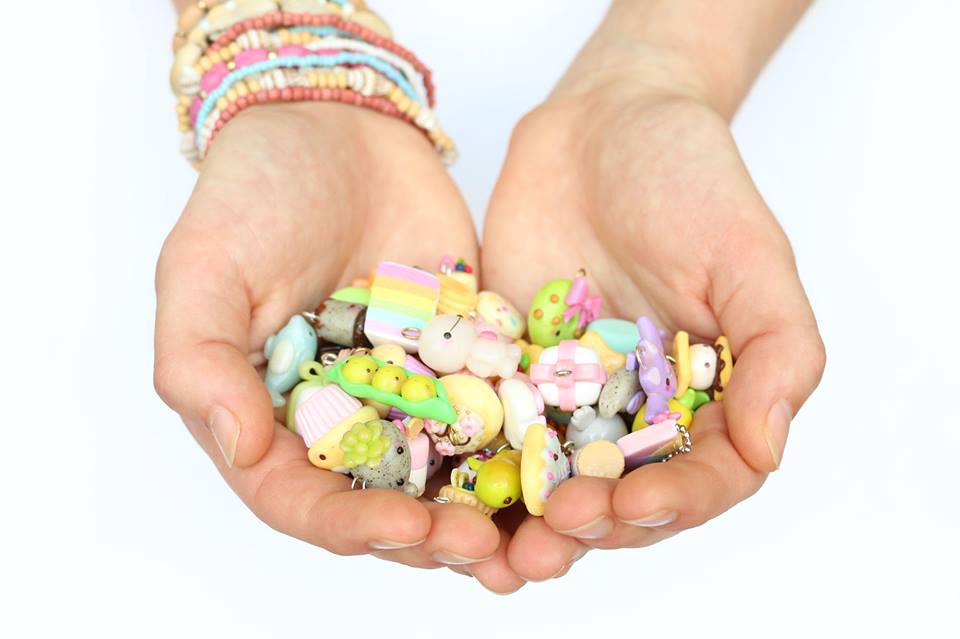
This guide is for you if you are wanting to get into making cute clay charms out of polymer clay or have already started and consider yourself a beginner. I have been making kawaii style charms since I first picked up my first blocks of clay in 2012 and have learnt lots along the way, so I hope you get something out of this blog. I will be taking you through the basics of how to make a simple kawaii charm.
Firstly, choose your clay. I started off Sculpey III when I was first beginning and I would definitely recommend it! It has a large range of colours available, which of course you can also mix. Sculpey III is also much softer to work with than some other brands, yet not too soft. You can pretty much work with it straight out of the packaging without needing to condition it too much.
Secondly, have a clean workspace. This step is vital if you want to avoid dust and lint covering your cute creation. Here I’m using the Sculpey Work n Bake Clay Mat on my work surface. It is a silicone mat that protects your work surface and can also be placed in the oven when you are ready to bake!

Next, you may want to consider using some sculpting tools to help you create, blend and add texture to your charm. There are a huge range of tools available depending one what you need. My essentials would have to be a blade, a needle tool, a dotting tool and a rolling pin. As well as the bought sculpting tools, items you have around the house can also work just as well, including paperclips, toothpicks and balls of foils which I like to keep handy.
 While making your charm, be sure to take your time particularly if you are a new beginner. If something doesn’t quite go right or look how you originally pictured it, that’s okay because there will always be a way to fix it. If you need to take a break from your creation then that is perfectly fine too!
  Because polymer clay needs to be oven-baked, it won’t air-dry so you can leave a creation and come back to it when to are ready. Just be sure to cover it to avoid the lint in the air landing on it.
 Once you have made your creation you can add in an eyepin to turn it into a charm. Then it’s time to bake the polymer clay in an oven so that it can harden. Place your charm on a baking tray that is lined with some parchment paper (or the Sculpey Work n Bake Clay Mat) to avoid it sitting directly on the tray and be at risk of burning. It’s also a great idea to create a little “tent” with some foil. This stops the heat of the oven going directly onto the charm and instead helps to circulate the flow of air around evenly. Check the baking temperature and recommended baking times on your clay packaging.
After baking, take the tray out of the oven and allow the clay to cool back down. Avoid handling your charm straight after pulling it out of the oven, as it will be at its most decimate stage and their is a risk that small details could break off.
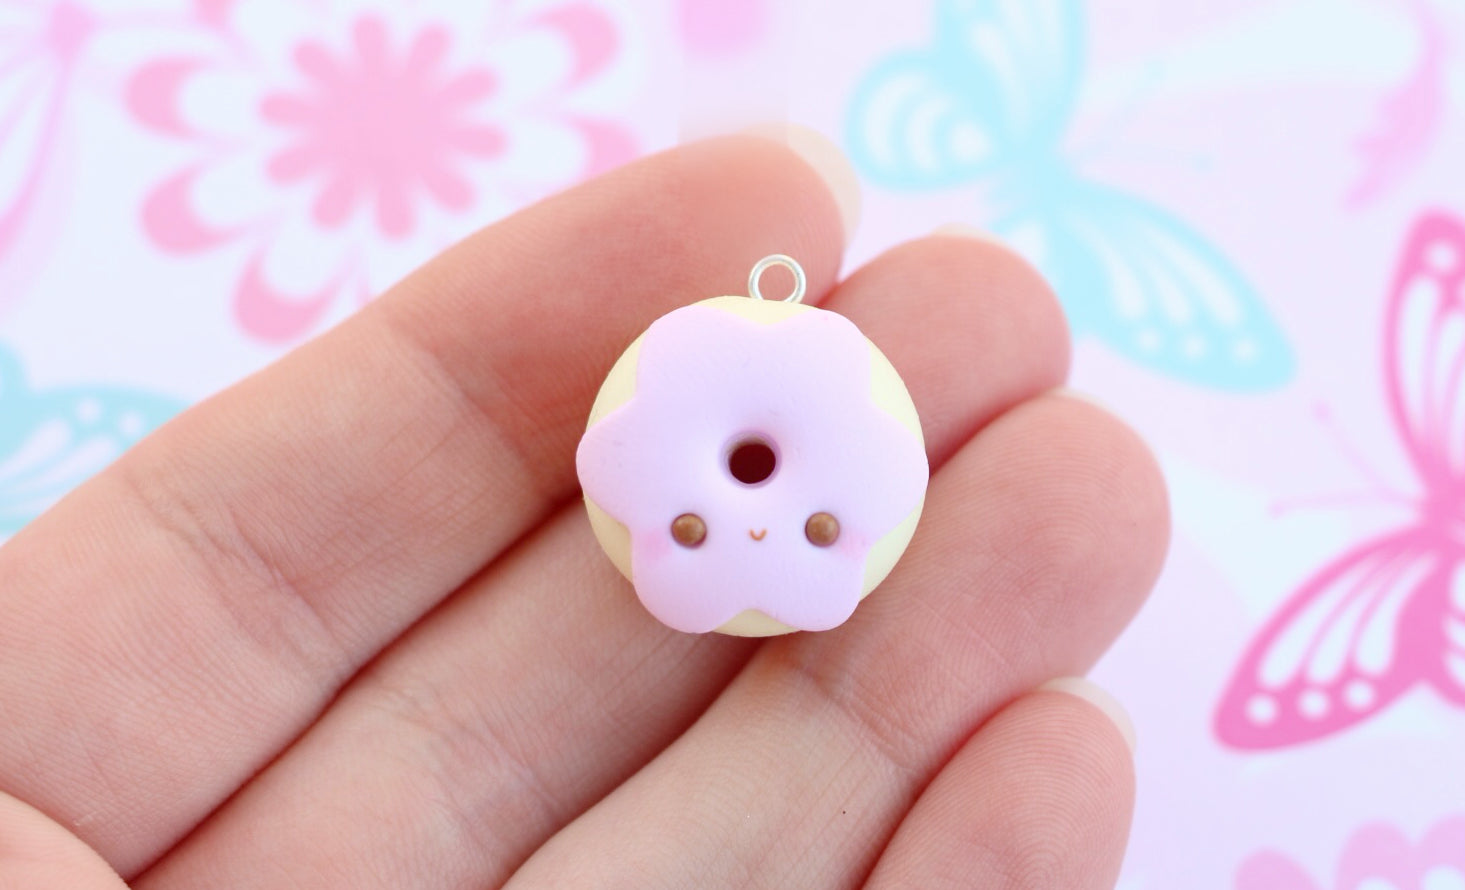
Once the charm has cool, I usually add some superglue to the eyepin and then place it back into the charm. This help to keep it nice a secure. Optionally you can also add some glaze of your choice to your charm, but otherwise, that is it!
How to Use UV Resin on Polymer Clay Charms
UV resin is an incredibly versatile and popular tool among crafters, and for good reason. It can be used to create a variety of different effects such as water or maple syrup, or used as a sealant to protect fine details and painted creations. It’s often used as a substitute for epoxy resin as it does not require measuring or stirring and boasts a much faster cure time.
As the name suggests, this resin cures under UV light, which can come from a UV nail lamp or direct sunlight. It takes anywhere from 5-30 minutes to fully cure, depending on the size of your project and the strength of the UV light.
Before we dive into how to use this great medium, I must warn you of some of its downsides:
- Usually more expensive than epoxy resin
- Smells extremely pungent, especially while it is curing
- Difficult to clean off surfaces
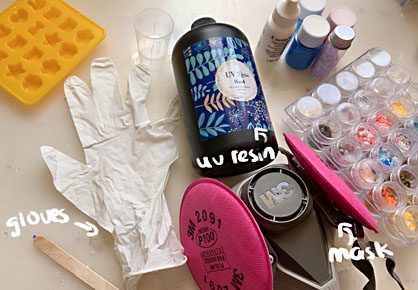
You must practice the same precautions to stay safe as you would when working with epoxy resin:
- Work in a well-ventilated area with a big open window
- Wear gloves and a mask
- Keep away from pets and children
- Do not let resin have direct contact with your skin, eyes, or clothes
- Wash your hands with soap right after using the resin
- Follow all safety instructions on the packaging

Side note, it also comes in a variety of hardnesses and consistencies such as hard, soft, thin, and thick types. The best one to buy for beginners and general use is hard and thin, so it will be a thinner consistency to work with and more brittle when it is cured.
To use UV resin, firstly squeeze your desired amount into a mixing cup. Disposable plastic cups work fine, but I recommend silicone cups such as the Sculpey Mixing Set that are more durable and better for the environment.
Add any glitter or pigment you would like and stir until fully incorporated. My go-to stirring tool is a wooden popsicle stick! I wipe it clean with a paper towel and cure it under a UV lamp after each session so that I can reuse it.

Pour your resin mixture into a mold and cure it under your UV lamp or leave it outside. I recommend using a lamp that is 100W or higher or putting it under direct sunlight on a sunny day for best results.
After it’s dry, it should not be sticky to the touch, and your resin creation is finished!
Now that you’re ready to craft, here are some great ways to incorporate UV resin into your polymer clay projects!
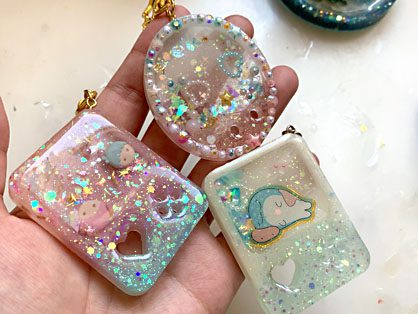
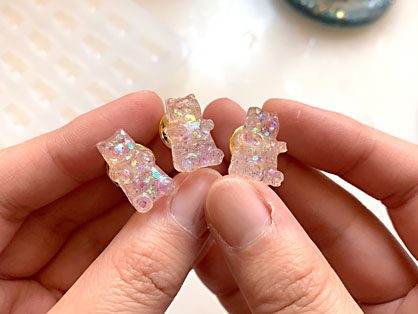
Glazing
Glazing is possibly the most common use for UV resin nowadays. It gives your creation a beautiful shine and is the most durable glaze on the market. For this, you require your unglazed creation, a paint brush, a cup, pliers, and a piece of aluminum foil.


Hold your charm with pliers, dip your brush into the cup of resin, and brush on a thin layer. If you want a thick coating of resin, build it up one layer at a time and cure fully between each one.
If you spot any air bubbles, pop them by running a heat gun along the surface before you cure your piece.
Hold it under your UV lamp for at least 30-60 seconds before putting it down and drying it for the full time.
When you’re done, wipe off the excess resin from your brush and wrap it in aluminum foil to prevent it from drying or getting dirty. This eliminates the need to buy a new paint brush every session! Be sure to also clean your work area and cure any leftover resin before disposing of it.
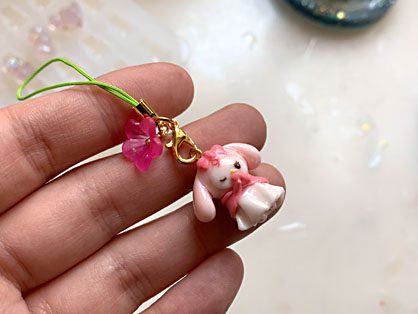
Water Effect
The reason you might use UV resin over epoxy resin is that the fast cure time helps the water maintain its shape. It’s perfect for waterfalls, waves, splashing effects, and water droplets.
For this demonstration, I will be adding water drops to the leaf onto this figurine to represent morning dew.
Use a toothpick or needle tool to precisely pick up small amounts of resin and apply it to your creation. I recommend curing it between every few drops to prevent the resin from spreading out into a puddle!
Add as many as you would like, making sure to vary them in size and spacing them out sporadically. The less uniform the water pattern is, the more natural it looks.

I hope these tips were insightful and help you feel more confident incorporating UV resin into your clay crafts! It is certainly a tricky medium to master, but it bears incredible results and will be sure to take your creations to the next level.
