Skip to product information
1 of 1

Sculpey Soufflé™ Marble Metallic Earrings

Sculpey Soufflé™ Marble Metallic Earrings

Designed by Abigail Shaeffer
Read More
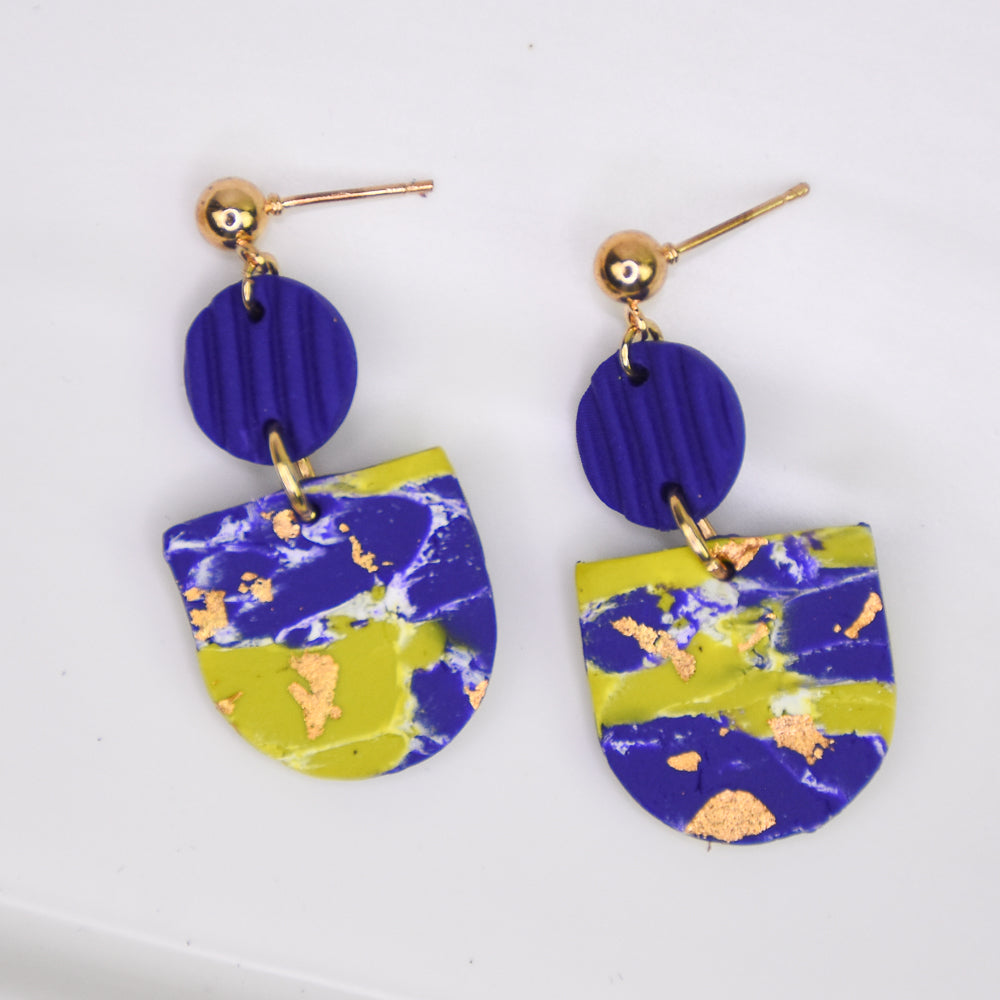
This design features classic polymer clay marbling with bold Citron and deep Mulberry purple colors intertwined. Small gold flakes are added through, giving the piece subtle sparkle and richness. The result is a handcrafted earring that combines striking color contrast with a touch of understated elegance. TIME TO COMPLETION: 1.4 hours
Read Less
ADDITIONAL SUPPLIES
  • Tile
  • Craft knife (like Exacto)
  • Pliers (flathead/needle nose)
  • Ribbed roller
  •  Gold flake
  • White acrylic paint
  • (2) Gold ball post
  • (4) 6 mm gold jump rings
  • NOTE: This project gets messy so gloves, while not necessary, may be preferred
View full details
Project Instructions

Step 1

Getting Started:

Please make sure your work area is covered and you are not

working on an unprotected surface. We recommend working on the Sculpey® Oven
Safe Work Mat, wax paper, metal baking sheet, or disposable foil. Uncured clay may damage unprotected furniture or finished surfaces. Be sure to cover your crafting area appropriately.

Start with clean hands, unwrap and knead clay until soft and smooth, or condition by running clay though a Pasta Machine. We recommend using a designated machine for clay purposes only. When working with multiple colors, clean hands with soap and
water or baby wipes (we have found that baby wipes work best) before switching
colors. Shape clay, pressing pieces firmly together.  Wash hands after use.

Baking (also called Curing):

Begin by preheating oven to 275 °F (130 °C). After you are done creating; for best results bake clay on an oven-proof surface such as metal, aluminum foil, an index card
or the Sculpey® Oven Safe Work Mat at 275°F (130 °C) for 30 minutes per ¼"
(6 mm) of thickness according to package directions. Oven safe glass or ceramic
surfaces are also acceptable for baking; however please note that the baking times may take longer as the glass or ceramic surfaces take longer to heat up. For best baking results, use an oven thermometer. DO NOT USE MICROWAVE OVEN. DO NOT EXCEED THE ABOVE TEMPERATURE OR RECOMMENDED BAKING TIME.

Step 2

Cut equal parts of Midnight Mulberry and Citron.


Step 3

Using the rigid clay blade, chop Souffle Midnight Mulberry into fairly small and medium-sized pieces. Repeat with citron, keeping the colors separate.


Step 4

Add about two teaspoons of white acrylic paint to both piles of clay.

Step 5

Thoroughly coat both piles. Let the paint dry slightly, about 5 minutes. Tip: The amount of clay and paint is suggested, based on the amount of clay I used.


Step 6

Add about a teaspoon of Oven-Bake Adhesive (OBA) and mix the colors together. Again, the amount of OBA needed is based on the clay amounts.


Step 7

Compress the clay together until it feels compact. Shape into a cube.

Tip 1: You want the clay to be tightly packed, with minimal spaces or cracks.

Tip 2: Pop the clay in the fridge for a few minutes to speed up setting and prevent smearing.


Step 8

Slice clay ¼ thick.


Step 9

Lay pieces flat, then use the acrylic roller in the Bake Shop Modeling Tools pack to even out the clay. Aim for about 1/8 inch thickness.


Step 10

Lay the elongated semi-circle template on the clay, lining it up with the desired section for your earring. Cut (2) pieces with the craft knife.


Step 11

Add small pieces of gold flake for embellishment. Add holes on the top with the needle tool.

Step 12

Roll out 1/5 part Midnight Mulberry to 1/6 inch and roll the ribbed roller over it to add texture. The width should be about the same for the ribbed piece and the marbled piece. Tip: Use a needle tool or toothpick to replicate the lines.


Step 13

Roll out 1/5 part Midnight Mulberry to 1/6 inch and roll the ribbed roller over it to add texture. The width should be about the same for the ribbed piece and the marbled piece.

Tip: Use a needle tool or toothpick to replicate the lines.


Step 14

Open a 6 mm jump ring and loop the marbled piece and one of the small circles through
it. Close jump ring.


Step 15

Open a 6 mm jump ring and loop the other end of the circle and a gold post through it. Close jump ring. Repeat Steps 15-16 with other earring.