Skip to product information
1 of 1

Sculpey Soufflé™ and Sculpey Premo™ Faux Granny Square Magnets

Sculpey Soufflé™ and Sculpey Premo™ Faux Granny Square Magnets

Designed by Abigail Shaeffer
Read More
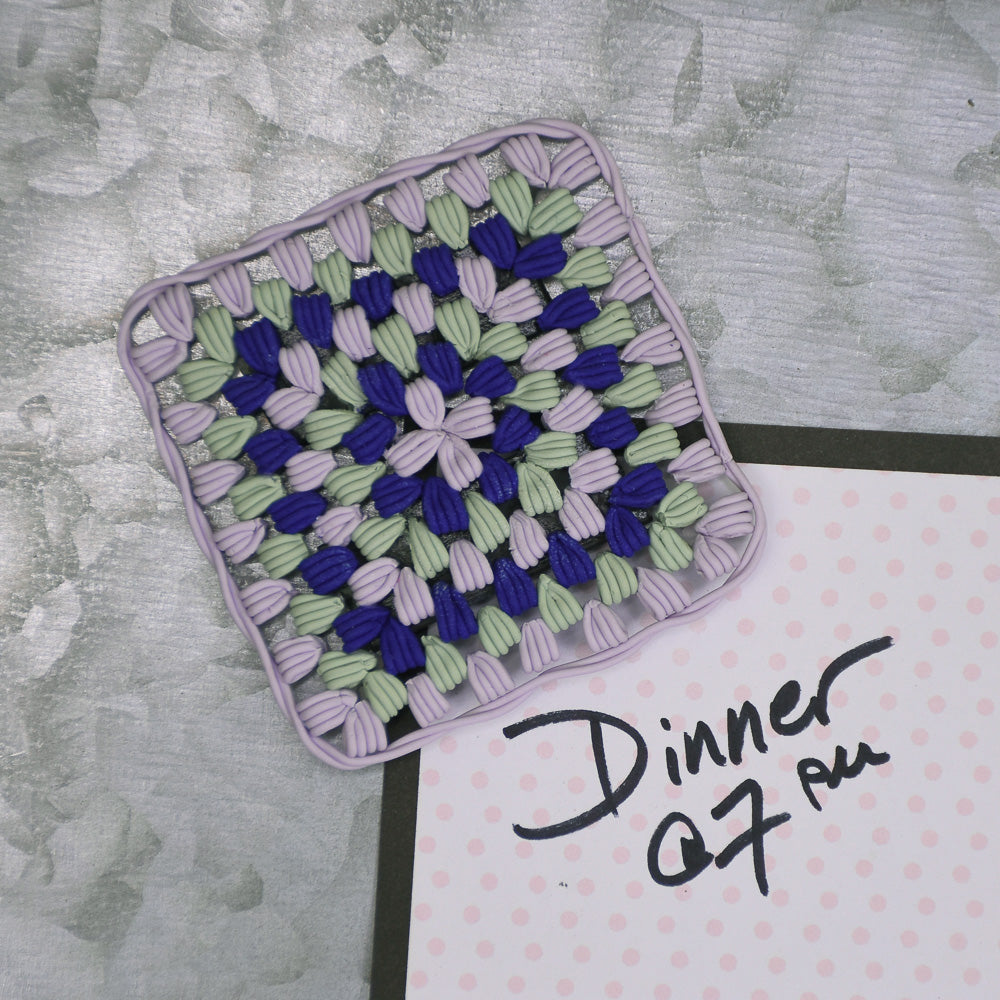
This polymer clay granny square magnet is inspired by the cozy feel of classic crocheted blankets. I loved recreating that textured, colorful look using clay, giving it a fresh, fun twist. It’s lightweight and perfect for adding a bit of handmade charm to your fridge or any magnetic surface. A little pop of warmth and creativity wherever you stick it! TIME TO COMPLETION: 90 minutes to create, 30 minutes to bake, 5 minutes to assemble
Read Less
ADDITIONAL SUPPLIES
  • Tile
  • Exacto knife
  • Extruder with small circle die
  • Toothpick
  • (2) 1-inch magnetic strip
  • Scissors
  • Super glue (optional)
View full details
Project Instructions

Step 1

Getting Started:

Please make sure your work area is covered and you are not working on an unprotected surface. We recommend working on the Sculpey® Oven Safe Work Mat, wax paper, metal baking sheet, or disposable foil. Uncured clay may damage unprotected furniture or finished surfaces. Be sure to cover your crafting area appropriately.

Start with clean hands, unwrap and knead clay until soft and smooth, or condition by running clay though a Pasta Machine. We recommend using a designated machine for clay purposes only. When working with multiple colors, clean hands with soap and
water or baby wipes (we have found that baby wipes work best) before switching
colors. Shape clay, pressing pieces firmly together.  Wash hands after use.

Baking (also called Curing):

Begin by preheating oven to 275 °F (130 °C). After you are done creating; for best results bake clay on an oven-proof surface such as metal, aluminum foil, an index card
or the Sculpey® Oven Safe Work Mat at 275°F (130 °C) for 30 minutes per ¼"
(6 mm) of thickness according to package directions. Oven safe glass or ceramic
surfaces are also acceptable for baking; however please note that the baking
times may take longer as the glass or ceramic surfaces take longer to heat up. For best baking results, use an oven thermometer. DO NOT USE MICROWAVE OVEN. DO NOT EXCEED THE ABOVE TEMPERATURE OR RECOMMENDED BAKING TIME.

Step 2

Load extruder with Sculpey Premo Sage to get a pile of thin clay strand. Repeat with Midnight Mulberry and Lavender. Tip: Use a larger circle die to create bigger sections for your granny square to make a chunkier look.


Step 3

Cut a section of the clay rope about 8 inches long and lay it in half.


Step 4

Fold the ends over about a ¼-inch and cut. Repeat this step a second time.


Step 5

Take the two folded pieces and gently press them together at the top, then pinch them at the bottom to form one knitted section. Make 72 sections in Sage.

Repeat Steps 3–5 with Premo Lavender and Soufflé Midnight Mulberry, making 96 sections of Lavender and 56 sections of Midnight Mulberry.

Tip: To make this step easier, break it up, working layer by layer—each layer requires an additional 8 sections.


Step 6

Take four sections of the Lavender and form into a cross.


Step 7

Apply a small dab of oven-bake adhesive to one side of a lavender section, then press a Midnight Mulberry section next to it.

Repeat this process on all sides of each lavender section.


Step 8

Apply a small dab of oven-bake adhesive to each side of the piece. Then, place a single Sage section in the middle of each side and two Sage sections at each corner.

Step 9

Repeat Step 8, alternating colors until you reach your desired size, making sure to place two knitted sections at each corner and one on each side. I chose to make my granny square just over 2” x 2”, which includes three layers of Lavender and two layers each of Midnight Mulberry and Sage.


Step 10

Twist two pieces of Lavender rope together and place them around the edge of the square. Use a small amount of oven-bake adhesive to secure the rope in place.

Bake/cure according to Step 1.

Step 11

Cut (2) pieces of self-adhesive magnetic strip 1” long.


Step 12

For additional strength, apply a little super glue to the adhesive back on the magnet strips, then gently press onto the back of the granny square.


Step 13

Here is a look at my completed magnet.