Skip to product information
1 of 1

Sculpey Premo™ Terrazzo Lemon Necklace

Sculpey Premo™ Terrazzo Lemon Necklace

Designed by Precious Nunez
Read More
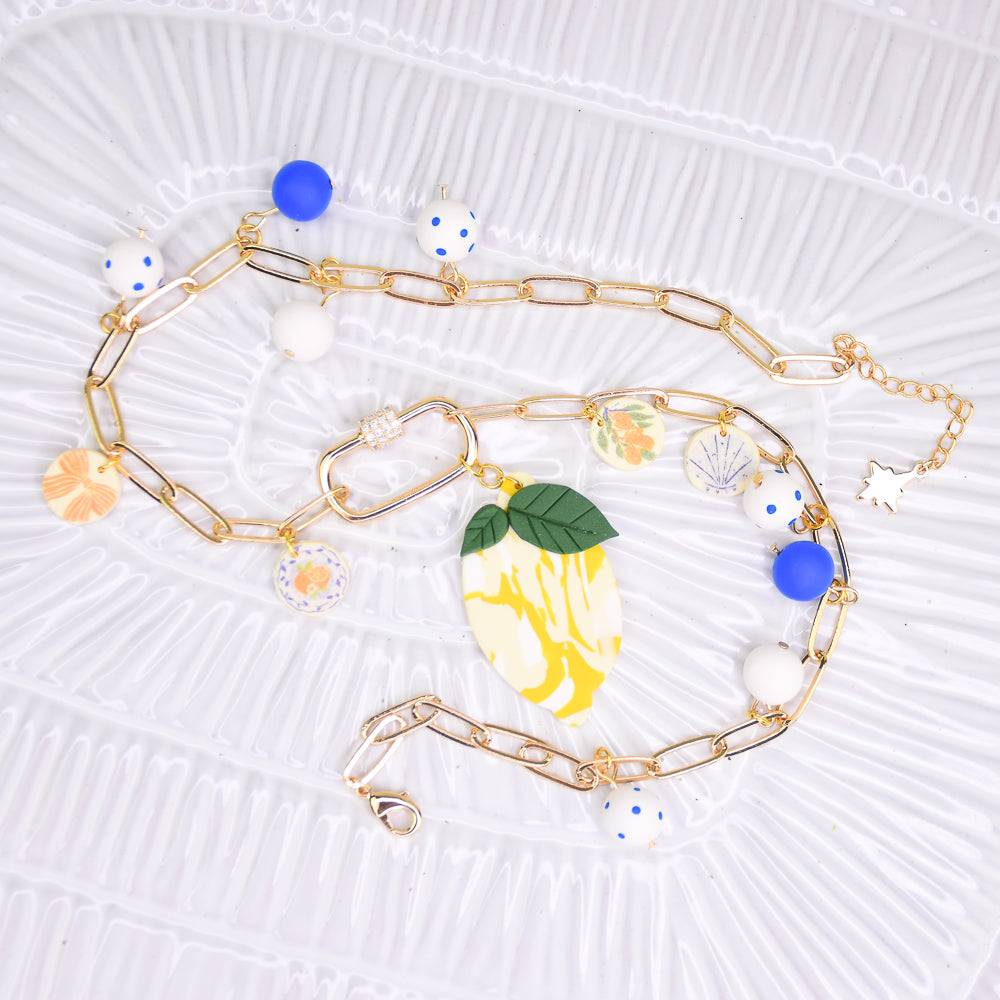
Set a playful tone with this Terrazzo inspired lemon necklace blends bright citrus tones with playful speckled texture for a fresh, summery accessory.
Read Less
ADDITIONAL SUPPLIES
  • Scissors
  • Ceramic Tile
  • Wire cutters
  • Jewelry pliers
  • Small dotting tool
  • Cobalt acrylic paint
  • Carbineer necklace
  • 6 mm gold-toned jump rings
  • Water transfer images
View full details
Project Instructions

Step 1

Getting Started:

Please make sure your work area is covered and you are not working on an unprotected surface. We recommend working on the Sculpey® Oven Safe Work Mat, wax paper, metal baking sheet, or disposable foil. Uncured clay may damage unprotected furniture or finished surfaces. Be sure to cover your crafting area appropriately.

Start with clean hands, unwrap and knead clay until soft and smooth, or condition by running clay though a Pasta Machine. We recommend using a designated machine for clay purposes only. When working with multiple colors, clean hands with soap and
water or baby wipes (we have found that baby wipes work best) before switching
colors. Shape clay, pressing pieces firmly together.  Wash hands after use.

Baking (also called Curing):

Begin by preheating oven to 275 °F (130 °C). After you are done creating; for best results bake clay on an oven-proof surface such as metal, aluminum foil, an index card or the Sculpey® Oven Safe Work Mat at 275°F (130 °C) for 30 minutes per ¼"
(6 mm) of thickness according to package directions. Oven safe glass or ceramic
surfaces are also acceptable for baking; however please note that the baking
times may take longer as the glass or ceramic surfaces take longer to heat
up. For best baking results, use an oven thermometer. DO NOT USE MICROWAVE
OVEN. DO NOT EXCEED THE ABOVE TEMPERATURE OR RECOMMENDED BAKING TIME.

Step 2

Condition one bar of Butter Yellow clay, half a bar of Cadmium Yellow, and one-quarter bar of White. Roll each color into smooth balls.

Step 3

Roll each ball into a flat slab. Use a clay blade to cut random, irregular shapes from each slab to create terrazzo-style pieces.


Step 4

Gather all the pieces into one pile and lightly mix them. Form the mixture into a ball, then shape it into a chunky rectangular cube as shown.

Step 5

Slice several thin pieces from the cube, chop those slices into smaller bits, and combine again into a new rectangular cube. Mix only until the colors are combined but still clearly defined—avoid over-mixing so the terrazzo effect remains visible.

Step 6

Cut multiple slices from the cube and arrange them into a rough slab. Roll with an acrylic roller to flatten and create an even terrazzo slab.


Step 7

Use a lemon-shaped cutter or a hand-cut template (about 1.5 inch), to cut out one lemon shape from the slab.


Step 8

Condition a small amount of Racing Green clay and roll it into a thin slab. Cut out two leaf shapes, add vein lines with a needle tool, and attach them to the top of the lemon, pointing downward.

Step 9

Roll a slab of Butter Yellow clay on the thickest setting of the clay conditioning
machine and place it on a ceramic tile or another water-safe surface.

Select three water transfer images and trim them to size. Place each image face down on the slab and rub firmly to adhere. Add a bit of water and gently remove excess paper pulp with your finger. (It’s fine if some residue remains; any remaining paper will be removed after baking.)

Step 10

Use a small circle cutter to cut each image into individual charms. Use a needle
tool to poke a hole at the top center of each charm, as well as at the top of the lemon.

Step 11

Roll eight small balls of White clay and four small balls of Cobalt Blue clay. Thread each bead onto the Sculpey Bead Baking Rack, leaving small space between beads.

Bake/cure according to Step 1.

Step 12

While the beads are still on the skewers, use a small dotting tool to paint tiny cobalt dots onto each white bead. Allow the paint to dry.

Step 13

Remove the beads from the skewer. Thread each bead onto a headpin as shown. Use round-nose pliers to bend the wire just above the bead at a slight angle. Trim the excess wire, leaving enough to create a loop. Use the pliers to roll the wire toward you, forming a closed loop for each bead.


Step 14

Attach each charm, lemon, and beads to the necklace chain, using jump rings and pliers. spacing them evenly by leaving one chain link between every added piece. Continue until all charms and beads are secured.

Step 15

Here is a look at the completed necklace!