Skip to product information
1 of 1

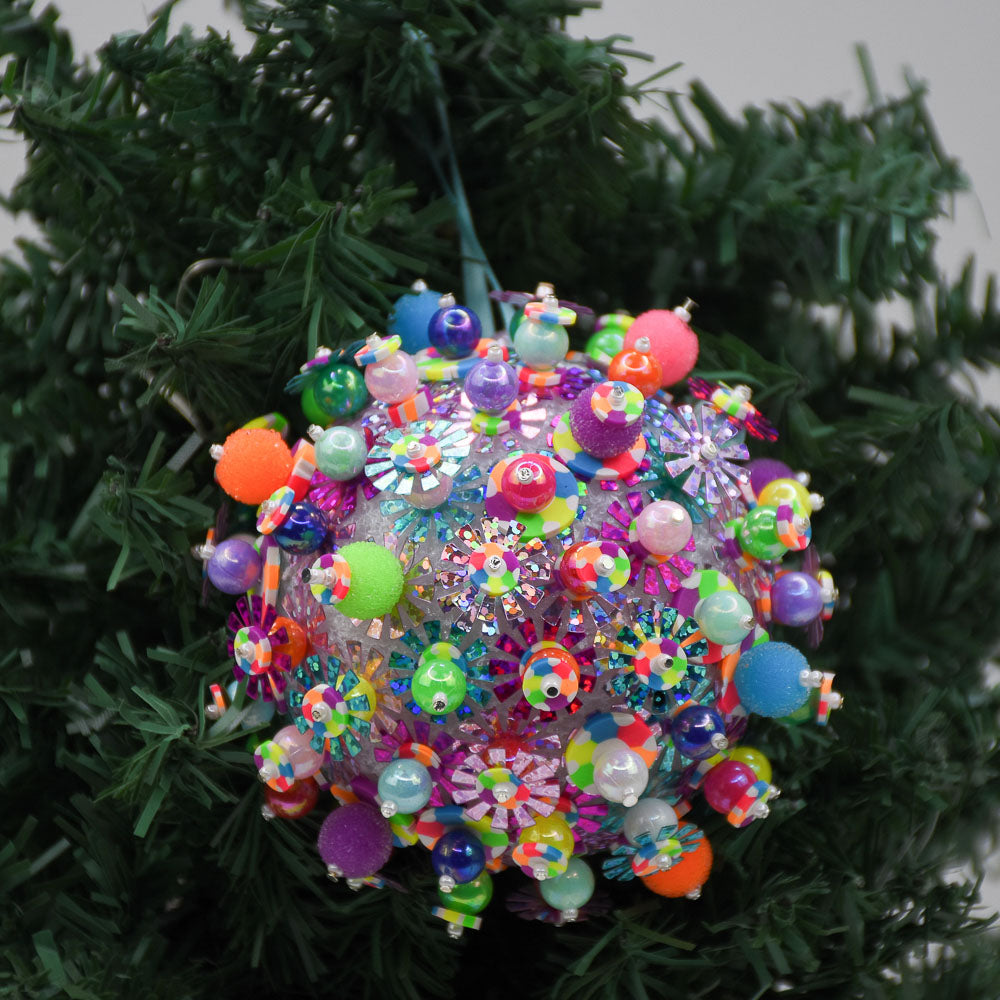
Sculpey Premo™ Confetti Christmas Ornament

Sculpey Premo™ Confetti Christmas Ornament

Designed by Amy Koranek
Read More
Adorn your tree, your favorite wreath – even stack these FABULOUS balls in a large bowl for a fantastic centerpiece! COMPLETION TIME: 90 Minutes to make, bake, and assemble. Some time should be allowed for glue to fully dry.
Read Less
ADDITIONAL SUPPLIES
  • 3” Styrofoam ball
  • Star shaped sequins (approximately 90)
  • 8mm Glossy ball beads
  • Confetti ball beads (18)
  • Opal seed beads
  • White tacky glue like Aileen’s or Elmer’s
  • 2” Head pins
  • Flat nose pliers
  • 9” Coordinating ribbon
  • Scissors
View full details
Project Instructions

Step 1

Getting Started:

Please make sure your work area is covered and you are not working on an unprotected surface. We recommend working on the Sculpey® Oven Safe Work Mat, wax paper, metal baking sheet, or disposable foil. Uncured clay may damage unprotected furniture or finished surfaces. Be sure to cover your crafting area
appropriately.

Start with clean hands, unwrap and knead clay until soft and smooth, or condition by running clay though a Pasta Machine. We recommend using a designated machine for clay purposes only. When working with multiple colors, clean hands with soap and water or baby wipes (we have found that baby wipes work best) before switching colors. Shape clay, pressing pieces firmly together.  Wash hands after use.

Baking (also called Curing):

Begin by preheating oven to 275 °F (130 °C). After you are done creating; for best results bake clay on an oven-proof surface such as metal, aluminum foil, an index card or the Sculpey® Oven Safe Work Mat at 275°F (130 °C) for 30 minutes per ¼" (6 mm) of thickness according to package directions. Oven safe glass or ceramic surfaces are also acceptable for baking; however please note that the baking times may take longer as the glass or ceramic surfaces take longer to heat up. For best baking results, use an oven thermometer. DO NOT USE MICROWAVE OVEN. DO NOT EXCEED THE ABOVE TEMPERATURE OR RECOMMENDED BAKING TIME.


Step 2

Make a short log from 1/8 bar of each neon color

Make a short log from 1/8 bar of White. Since the White is a 2 ounce bar and the
neons are 1 ounce bars, the White will be larger than the neons.

Step 2

Step 3

Bundle the colors together as shown to make a cane.

Step 3

Step 4

Roll another 1/8 bar White into a long rope.

Step 4

Step 5

Pinch the top of the White rope to make a point all along the edge of the cane.


Step 5

Step 6

Push the point of the White cane into the spaces between the colors to fill the negative
spaces. Trim excess White as needed.

Step 6

Step 7

Roll the cane gently on the work surface to smooth the outside and to help the clay
fill all the spaces.

Step 7

Step 8

Continue rolling and stretching the cane until it is a little less diameter than the
large flower shaped sequins.

Step 8

Step 9

Cut off 1-3/4” from the cane. Trim both ends neatly. Poke a 2” head pin all the way
through the cane.

Step 9

Step 10

Here’s a look at the cane with the head pin in it.

Step 10

Step 11

If desired, you can give the cane some grooves on the outside to add more shape to
it with a Needle Tool. Make two 1-3/4” canes like this and bake them on the head pins. We will cut the cane later into thin slices after it is baked to help each slice retain its circular shape. Baking the clay on the head pin will ensure that each cane slice is pre-drilled.

Step 11

Step 12

Roll the remainder of the cane down to make it longer and smaller in diameter. When it
is about the diameter of the other beads that you are working with, remove
1-3/4” canes.

Step 12

Step 13

Thread head pins through each cane.

Step 13

Step 14

I made three of these smaller canes. Bake the canes on the head pins following the
baking instructions for Sculpey Premo™ in Step 1 above. Allow to cool completely.

Step 14

Step 15

Once the cured canes are cool, remove the head pins. You can loosen the head pins by pushing the head down hard on the work surface.

Step 15

Step 16

You can also remove the head pins by pulling them out with pliers.

Step 16

Step 17

Carefully slice the baked canes into very thin slices with a Clay Blade. This helps the
canes to retain their circular shape and be already drilled with holes making this project much easier to assemble.

Step 17

Step 18

Some of my cane slices have 2 holes in them where I had a little difficulty threading
my head pins perfectly through the raw canes. However this won’t show in the
finished project.

Step 18

Step 19

Now we will start collecting groups of sequins, beads, and cane slices onto more head
pins to decorate the styrofoam ball. Add drops of white glue everywhere you want to add a set of bobbles. Just do 3-4 drops of glue at a time so it doesn’t dry too quickly. The glue will help set the base sequins in place and also the head pin will carry some of the glue into the ball to secure everything.

Step 19

Step 20

Position one of the large flower sequins on top of each glue dot.


Step 20

Step 21

Make groupings of bobbles by threading them onto head pins. I used small seed beads
at the head of each pin so that the head wouldn’t go through some of the beads with larger holes. In this photo there is a seed beads, then a ball bead, then a cane slice.

Step 21

Step 22

Keep pushing groups of bobbles to the ball by poking the head pins through the
sequins that you glued into place in Step 20. Make a variety of different groupings so the ball has a very chaotic look.

Step 22

Step 23

Finally, cut a piece of coordinating ribbon to 9”. Push a head pin and bead through the
center point of the ribbon and add it to the ball for the hanger. Allow the glue to set for at least an hour to make sure its all dry. Then tie the ends of the ribbon for an ornament hanger.

Step 23