

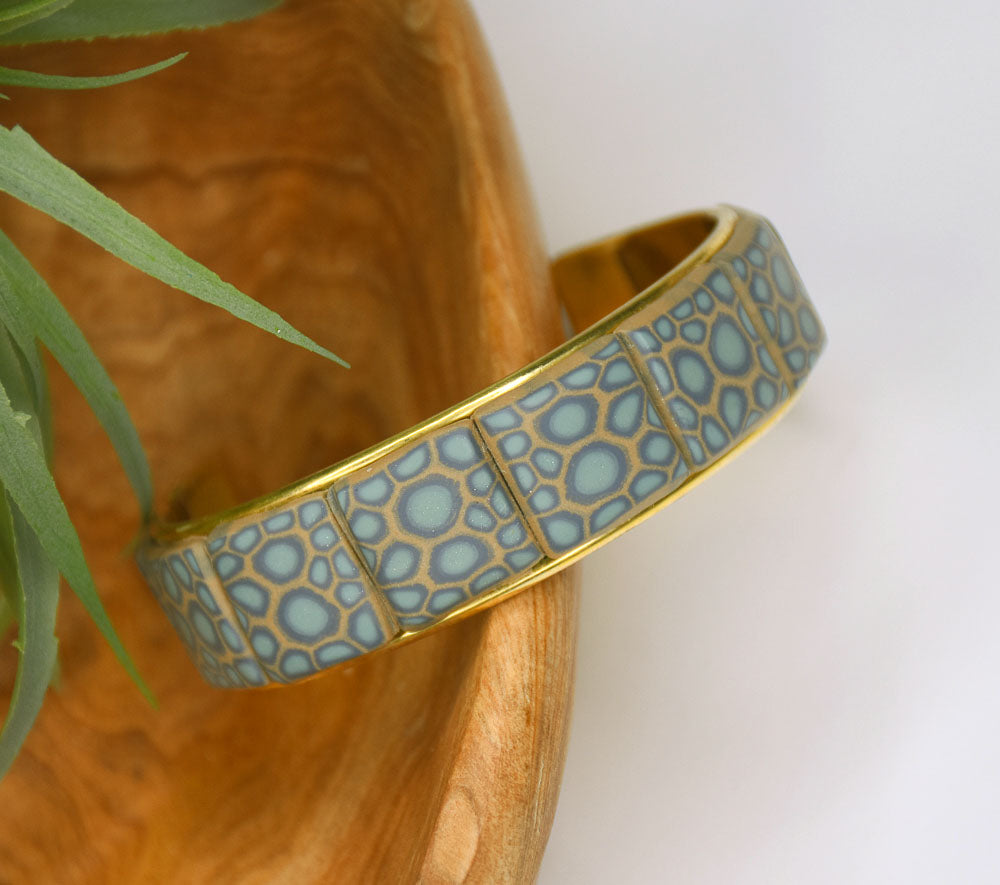
Sculpey Premo™ Faux Petosky Stone Bangle
Sculpey Premo™ Faux Petosky Stone Bangle
Read More
A real Petosky stone is a rock fossil composed of fossilized coral. This project recreates the look of a Petosky stone with a cane building technique.
COMPLETION TIME:
60 Minutes to make and bake.
Designed by Amy Koranek
Read Less
ADDITIONAL SUPPLIES
- Metal channel bracelet blank available from Etsy
- Silicone glue
Project Instructions
Step 1
Step 2

Step 3

Step 4

Step 5

Step 6

Step 7

Step 8

Step 9

Step 10

Step 11

Step 12

Step 13

Step 14

Step 15

Step 16

Step 17

Step 18

Step 19

Step 20

Step 21
