

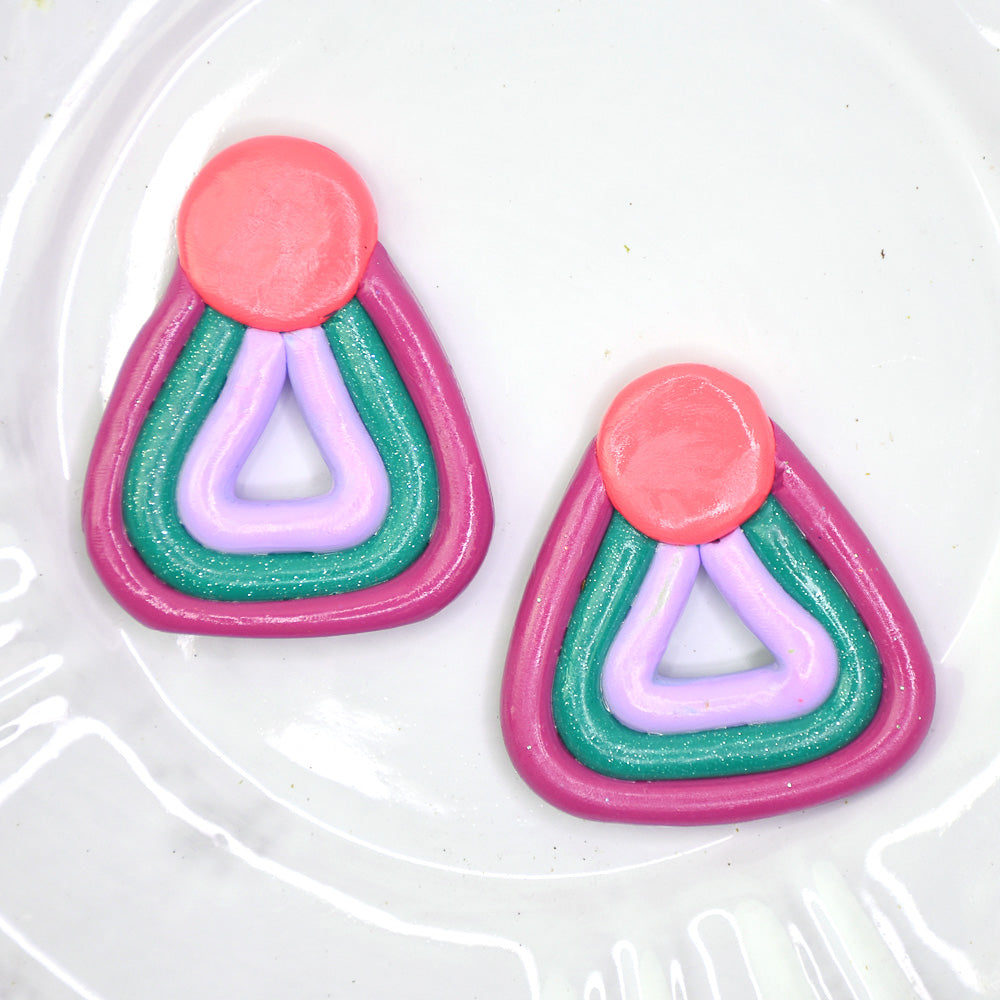
Sculpey III® Color Blocked Earrings
Sculpey III® Color Blocked Earrings
Read More
I have only made earrings once or twice, but this was a fun learning experience. I still have more to learn, but this also made me realize how fun making earrings with clay can be!
TIME TO COMPLETION: About 45 minutes to make/bake
Read Less
ADDITIONAL SUPPLIES
- Metal earring findings (I've used posts but ear wires would work with this design as well)
- Glue for post backs
Project Instructions
Step 1
Step 2

Step 3

Step 4

Step 5

Step 6

Step 7

Step 8
