

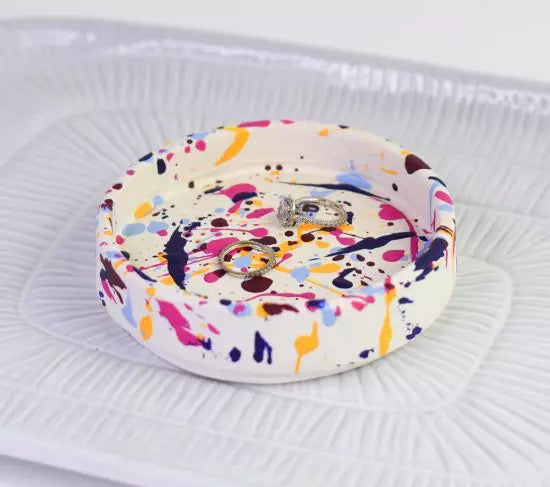
Original Sculpey® Splatter Dish
Original Sculpey® Splatter Dish
Designed by Amy Koranek
Read More
Read Less
This super fun dish will be great to make for yourself or as a gift for a friend. You can tailor the colors to any decor and style.COMPLETION TIME:90 Minutes to make and bake (bakes twice). But allow plenty of extra time for painting. There are several colors of paint to add and each one should dry before the next.
ADDITIONAL SUPPLIES
- 4-1/4” Circle cutter - or smaller if desired
- Piece of paper
- Glossy or enamel acrylic paint - I used Folk Art: School Bus Yellow, Hydrangea, Berry Wine, Night Sky, and Americana: Royal Fuchsia
- Acrylic floating medium
- Stir sticks
Project Instructions
Step 1
- Getting Started:
Start with clean hands, unwrap and knead clay until soft and smooth, or condition by running clay though a Pasta Machine. We recommend using a designated machine for clay purposes only. When working with multiple colors, clean hands with soap and water or baby wipes (we have found that baby wipes work best) before switching colors. Shape clay, pressing pieces firmly together. Wash hands after use.
- Baking (also called Curing):
Step 2
If you work your project on top of a piece of paper it will be easy to lift it so that you can flip it upside down as needed.First let’s make the dish. The dish in this tutorial is pretty large - 4-1/2” in diameter. You don’t have to make your dish this big if you don’t want too. You can adjust easily by decreasing the diameter of the base.
From 1/4 pound of Original White Sculpey® roll out a sheet that is 1/4” thick. Cut out your base circle. The circle shown here is 4-1/4” in diameter. Lay the circle on a piece of paper.

Step 3
Next, from 1/8 pound of Original White Sculpey® roll a strip of clay 1/4” thick and long enough to surround the base completely. Trim the ends with a Clay Blade.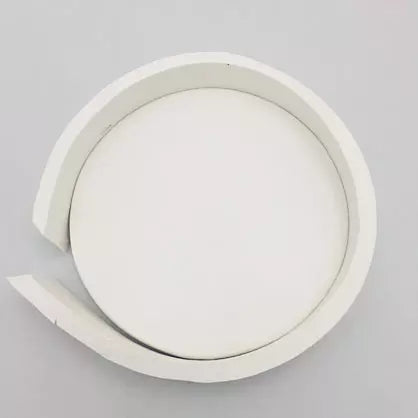
Step 4
Press the edge strip all the way around the dish base with the palms of your hands. Smooth the standing seam with your fingertips. Make sure the edge is standing up straight.
Step 5
Pick the dish up on the piece of paper and flip it upside down. Push the rim to the base with the palms of your hands. Smooth the seam with your fingertips. Smooth the outer bottom edges of the rim with your fingertips.
Step 6
Flip the dish over again. Use the 6 mm Ball Tool to really smooth the seam between the inside base and the rim. Smooth the top edges of the rim with your fingertips.Bake the dish following the baking instructions for Original Sculpey®. Allow the dish to cool completely before handling.

Step 7
From more of the Original White Sculpey® or using scraps from the first Steps, make another 1/4” base piece the same diameter as the original circle from Step 2. Place this piece on the bottom of the dish as a foot.
Step 8
Make sure the foot is well connected to the dish. Smooth the edges with your fingertips.
Step 9
Bake the dish again following the baking instructions for Original Sculpey®. Allow to cool completely before handling.
Step 10
Now we will splatter paint the dish. For my dish I am using acrylic paints in either glossy or enamel finishes. I love the way the glossy paint contrasts to the flatness of the Original White Sculpey®. Stir each color of paint well and then see how quickly it drips from your stir stick.You will want your paints to be fairly fast moving and not clumpy at all. A good way to thin acrylic paints is with Floating Medium. You can add just a few drops at a time to the paint and stir it in completely before testing again for runny-ness.
I started with the lightest colors first so they look pure against the white background. Here, I dipped my stir stick into my School Bus Yellow paint and flung it onto the dish randomly. Allow the yellow paint to dry.

Step 11
Then add the Hydrangea color. Allow the paint to dry.
Step 12
Then add Berry Wine and Royal Fuchsia allowing each to dry before adding the next.
Step 13
Lastly add Night Sky and allow the paint to dry completely.