Skip to product information
1 of 1

Original Sculpey® and Sculpey Premo™ Funky Pop Art Vase

Original Sculpey® and Sculpey Premo™ Funky Pop Art Vase

Designed by LMedina
Read More
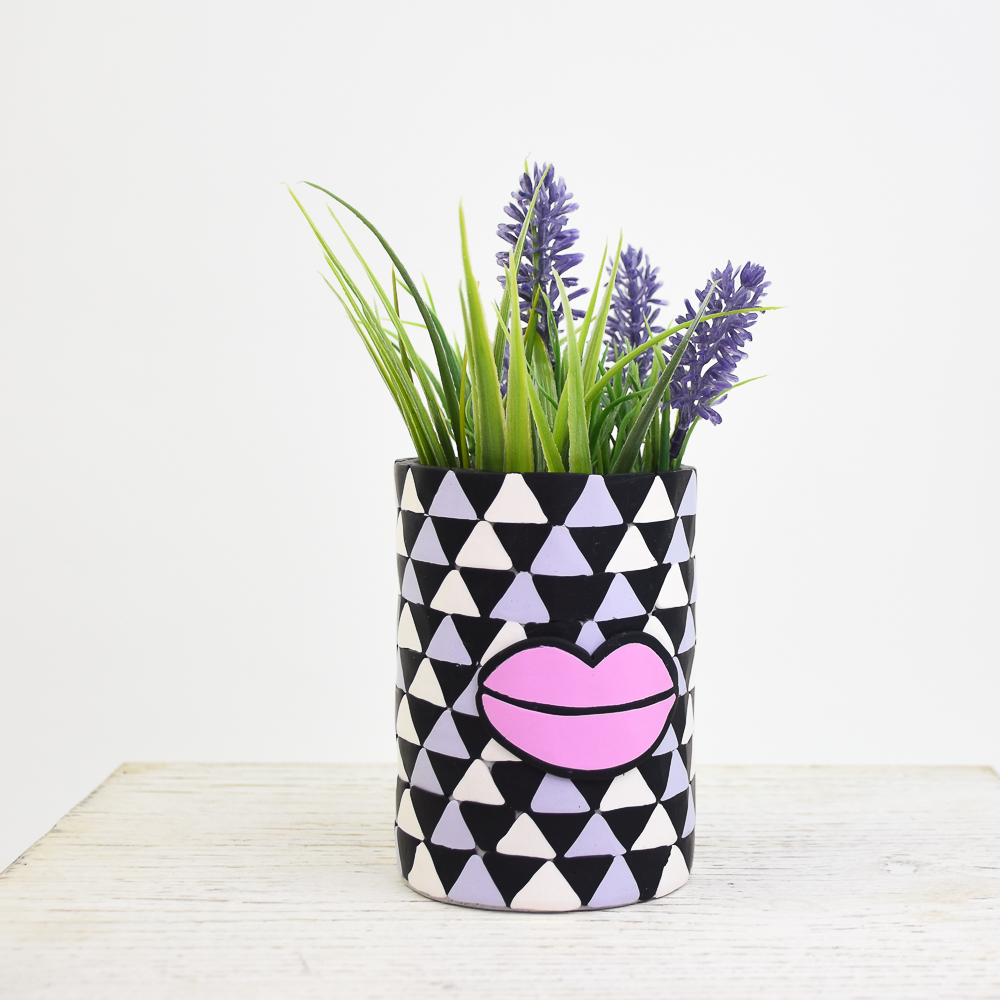
Add a POP! to your decor with this funky Pop Art vase designed for faux floral or use it as a great pen holder on your desk! TIME TO COMPLETION: Make time: 1 hour Bake time: 45 mins
Read Less
ADDITIONAL SUPPLIES
  • Clean, emptied 15oz can (vegetable or fruit cans)
  • Craft knife
  • Flat tool, for smoothing
  • Cling wrap
  • (OPTIONAL) Microfinishing Polishing Papers
View full details
Project Instructions

Step 1

Getting Started:

Please make sure your work area is covered and you are not working on an unprotected surface. We recommend working on the Sculpey® Oven-Safe Work Mat, wax paper, metal baking sheet, or disposable foil. Uncured clay may damage unprotected furniture or finished surfaces. Be sure to cover your crafting area appropriately.

Start with clean hands, unwrap and knead clay until soft and smooth, or condition by running clay though a Pasta Machine. We recommend using a designated machine for clay purposes only. When working with multiple colors, clean hands with soap and water or baby wipes (we have found that baby wipes work best) before switching colors. Shape clay, pressing pieces firmly together. Wash hands after use.

Baking (also called Curing):

Begin by preheating oven to 275 °F (130 °C). After you are done creating; for best results bake/cure clay on an oven-proof surface such metal, aluminum foil, an index card or the Sculpey® Clay Mat at 275°F (130 °C) for 30 minutes per 1/4" (6
mm) thickness according to package directions. Oven safe glass or ceramic
surfaces are also acceptable for baking/curing; however please note that the
baking/curing times may take longer as the glass or ceramic surfaces take
longer to heat up. For best baking results, use an oven thermometer. DO NOT USE
MICROWAVE OVEN. DO NOT EXCEED THE ABOVE TEMPERATURE OR RECOMMENDED BAKING TIME.

Step 2

Do you have a lot of scrap clay? Or maybe an older clay you haven’t found a use for yet? This is the perfect project for you. First, we need to construct the base layer of our vase. It doesn’t need to be pretty. Roll out enough clay to trace around a tin can. In total, I used ⅘ of a 1lb. block of Sculpey Original in granite.

Step 3

Roll out the remaining base clay color, enough to wrap all the way around the can. My slab is about 10 inches wide by 6 inches high. Wrap your can in cling wrap and leave enough to grab at the top. DO NOT bake the cling wrap.

Step 4

Set the can on top of the clay circle you cut out, then wrap the clay around the can and close the seams. Don’t worry about any gaps at the bottom yet. Make sure you have enough cling wrap sticking out to grab later to remove the can easily.

Step 5

Trim excess clay with a tissue blade.

Step 6

Press the bottom edges of the base together. I used a flat tool to spread a small snake of clay into the gaps at the bottom of the vase.

Step 7

Gather the cling wrap and carefully shimmy the can out of the vase. Bake at 275 degrees for 15 mins. Do not skip this step because it will make the remaining steps much easier!

Step 8

Roll out 2 snakes of white, 4 snakes of black, and 2 snakes of lavender clay. You want these to be thick and roughly the same size each. Pinch the top of each snake and press down to form triangles.

Step 9

Arrange your triangles into a pattern and firmly press together.

Step 10

Use the acrylic roller to gently flatten and press your triangles together. Be careful not to distort your triangles though.

Step 11

Use a clay blade to trim edges so they’re even. Cut very thin slices about 1/16 inches thick.

Step 12

Once the vase cools, arrange your pattern. Press each section firmly, with even pressure. If you distort your pattern that means you are pressing too hard. Cover the whole vase.

Step 13

We’re going for funky not perfect. Don’t worry if your pattern doesn’t align.

Step 14

Fill the gaps with however many triangles you need. I used a black and purple triangle to stay close to the pattern. I still had a tiny gap so I added a bit more black and used a flat tool to smooth out the seam.

Step 15

OPTIONAL: My slices weren’t as uniform as I would have liked - if this happens you can carefully shave off any areas that stick out too much with a tissue blade. Be careful not to shave off too much clay though.

Step 16

Roll a ¼ block Premo Carnation to about 1/16 inch thick. Cut out a top and bottom lip using a craft knife. Then roll out one long thin snake of Premo black to create an outline around the lips.

Step 17

Wrap the snake all the way around the lips and join them together. Cut off any excess black. Gently roll over the whole piece with an acrylic roller using even pressure.

Step 18

Attach the lip to your vase using firm and even pressure. You shouldn’t need liquid clay to attach these but you can add it for good measure if you’d like. In my case, I didn’t need any. Bake the whole piece at 275 degrees for 30 mins.

Note:
Time may vary if you cut your patterned slices thicker than ¼ inch. Consult
directions on the clay packaging.

OPTIONAL: You can sand the cured clay with varying grits of sand paper for a smooth finish. I used Microfinishing Polishing paper (Green) 600 grit, (Grey) 1200 grit, (Sky Blue) 1800 grit, (Pink) 8000, (Aqua blue) 10,000 grit, (Ivory) 14,000 grit