

Sculpey Soufflé™ Ochre Sleek Pencil Tray
Sculpey Soufflé™ Ochre Sleek Pencil Tray
Designed by syndee holt
Read More
Read Less
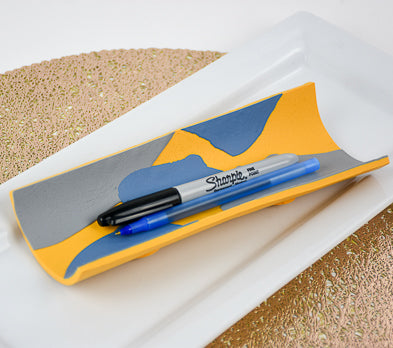
This pencil tray is not only a unique eye-catching desk accessory, it is really simple to make as well using a mailing tube for shape.
TIME TO COMPLETION: 60 minutes including baking.
ADDITIONAL SUPPLIES
Have on hand:
- Cardboard tube about 3 inches in diameter on the inside
- Ruler or straight edge
- Craft knife (like Exacto)
- Texture tools – I used a toothpick and a small wire art brush
- Several sheets of clean white paper to work on
- Small piece of texture – mine is Safety Tred which is like a round sandpaper
Project Instructions
- Getting Started:
Start with clean hands, unwrap and knead clay until soft and smooth, or condition by running clay though a Pasta Machine. We recommend using a designated machine for clay purposes only. When working with multiple colors, clean hands with soap and water or baby wipes (we have found that baby wipes work best) before switching colors. Shape clay, pressing pieces firmly together. Wash hands after use.
- Baking:
Create and trim a sheet of Ochre clay created on the 2nd from widest setting on the Clay Conditioning Machine (pasta machine) that is the length you wish your pencil tray. Mine is about 8.5 inches by 5 inches. Use the ruler or straight edge to help you trim the edges.

Sheet out a small piece of the Concrete and Bluestone each on a thin setting and use the craft knife to cut some random shapes. Add to the sheet of Ochre and lightly roll with the acrylic roller to remove any air bubbles.
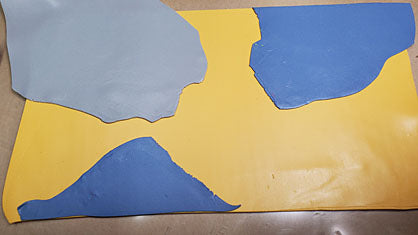
Lightly texture your clay shapes

Create a second sheet of Ochre clay for the back on the same setting. Stack the first piece on top and lightly roll together with the acrylic roller. Trim through both pieces to about 8x4.5 inches.

Flip the combined sheets over and lightly texture the plain sheet of clay.

CLEAN THE INSIDE OF THE TUBE with a paper towel or piece of toweling. (I didn’t and you will see it later). Gently fold and slide your clay into the tube for baking, making sure that your edges are even and level with each other. Putting it IN the tube was a LOT easier than trying to get it to lay evenly on the outside. Bake according to the directions above in step 1. You may need to prop the tube with a couple of small bakeable cups.

Once the clay has baked and cooled, make a small sheet of Ochre clay and use the smallest of the Sculpey Circle Cutters (3/4 inch) to punch out 4 “legs” and position them onto the baked tube. You can add a drop of the Sculpey Oven Bake Clay Adhesive as well and bake again just by inverting the baked tube on your baking sheet. NOTE: You can see that I didn’t clean the INSIDE of my tube in this photo. Fortunately, I was able to scrub most of it off at the final baking. And your new pencil tray is done!
