

Sculpey Soufflé™ Latte Pressed Flower Rustic Dish
Sculpey Soufflé™ Latte Pressed Flower Rustic Dish
Designed by syndee holt
Read More
Read Less
It’s very easy to find these pressed flowers online or press your own! Once you have the flowers, shaping and forming the dish is a breeze (and meditative).
TIME TO COMPLETION:To create: 45 minutes
To Bake: 30 minutes
To Bake: 30 minutes
ADDITIONAL SUPPLIES
- Pressed flowers in color of your choice (mine are from Amazon and came in little sleeves)
- Tweezers
- Gold paint or Pearl Ex (mica powder) to edge the rim of your bowl
- Brush for glaze
Project Instructions
Step 1
- Getting Started:
Start with clean hands, unwrap and knead clay until soft and smooth, or condition by running clay though a Pasta Machine. We recommend using a designated machine for clay purposes only. When working with multiple colors, clean hands with soap and water or baby wipes (we have found that baby wipes work best) before switching colors. Shape clay, pressing pieces firmly together. Wash hands after use.
- Baking (also called Curing):
Step 2
Condition and knead about 3 oz of the Latte and roll into a roughly shaped ball.
Step 3
Flatten the ball out into a rough circle.
Step 4
Once the circle is about the size you wish (you can see mine is about 5 inches in diameter), you can use your acrylic roller to smooth the surface a little.
Step 5
Now the flower part! You can see that my flowers came in a collection of roughly the same color flowers, so I picked out several tall daisies and then smaller flowers to fill around it.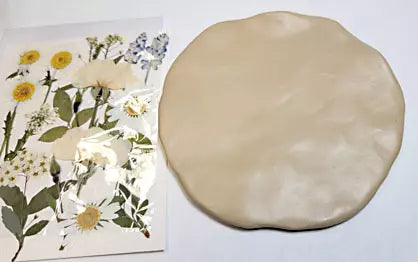
Step 6
My floral set came with tweezers which I found quite handy to help me place the more delicate flowers and leaves.MAKE SURE THAT YOU LEAVE ROOM FOR THE ROLLED EDGE that we will create later!

Step 7
I also cut off any bulky stems when possible since they would most likely stick up too much in the design!
Step 8
Once you have your design in place, cover the top of the design with a piece of thin paper (like patty paper) and use your acrylic roller to LIGHTLY roll across the paper and help “settle” the flowers into the surface of the clay.
Step 9
Here is a look at my bowl before I work the edge up.
Step 10
Now we are going to create the rolled edge of the dish. I used the largest of the Dual End Detail Tools to help me gently roll up the edge to help create the dish. Notice that I’m using my hands on the outside to gently roll the edge of the clay up and I’m using the tool to help with this process.
Step 11
Once the edge is created on your dish, you can add a little gold shimmer to the edge of the dish with either Gold Pearl Ex as I’m doing (dipping my finger in the powder of the lid to get just a tiny bit each time) or you can use a Gold Acrylic paint.
Step 12
Here is a look at my dish as it is ready to cure!Cure the clay according to the directions in Step 1 above and allow to cool.

Step 13
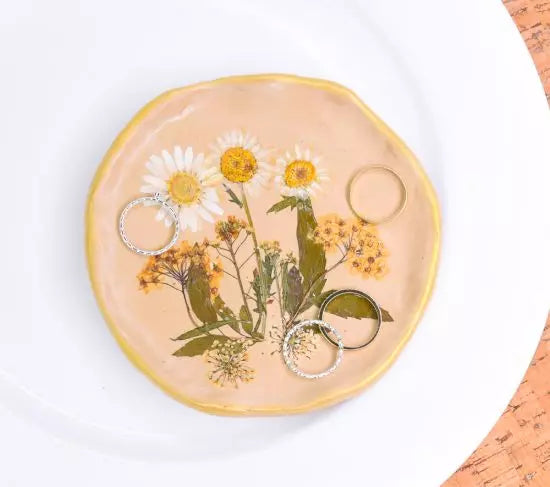
After the clay has cured and cooled, apply several coats (3 or 4) of the Sculpey Satin Glaze to the completed bowl.NOTE: If some of your delicate flower petals become too transparent after applying a coat of glaze (like my center daisy), you can use a matching acrylic paint to gently nudge them back into their colorful glory. Allow the paint to dry before applying another coat of glaze.

Step 14
Here is a look at my finished bowl