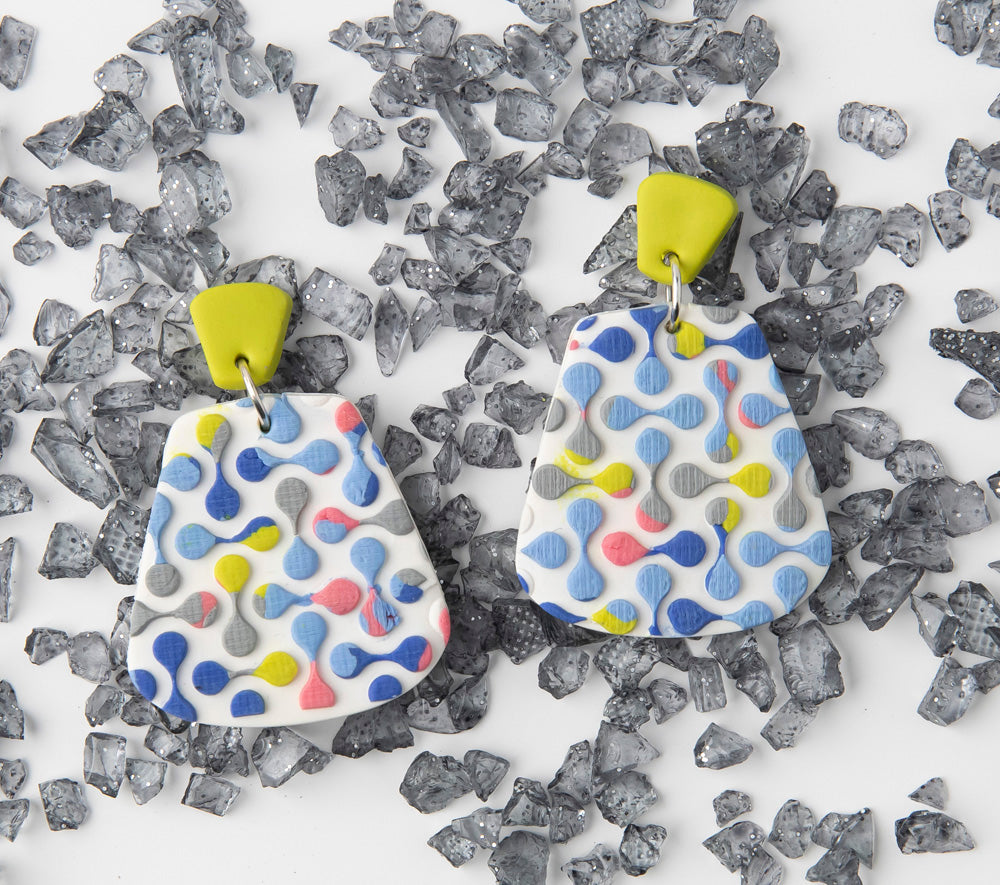


Sculpey Soufflé™ Sutton Slice Earrings
Sculpey Soufflé™ Sutton Slice Earrings
Read More
Texture mats and thin silicone molds are easy to fill with colorful clays and then transfer them to a solid color sheet to make a cool relief pattern. In this tutorial I used a rubber texture sheet. This worked out fine for the first impression, but the same outcome was difficult to repeat in subsequent projects. I learned that silicone material will deliver a more consistent outcome than rubber material.
COMPLETION TIME:
60 Minutes to make, bake, and assemble
Project Design: Amy Koranek
Read Less
ADDITIONAL SUPPLIES
- Texture mat or thin silicone mold
- Pendant cutter set
- Ear posts with backs (2)
- 6 mm Silver tone jump rings (2)
- Flat nose pliers
- Silicone glue or instant drying glue

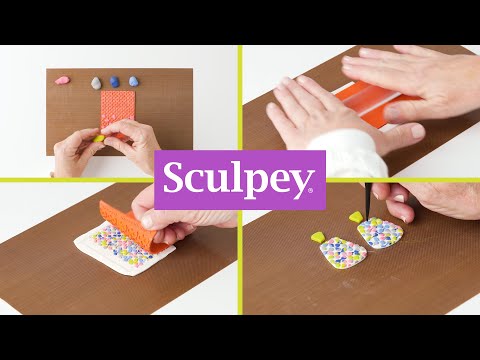
Project Instructions
Step 1
719-2

719-3

Step 4

719-5

Step 6

Step 7

719-8

Step 9

719-10

719-11

719-12

Step 13

719-14

719-15
