

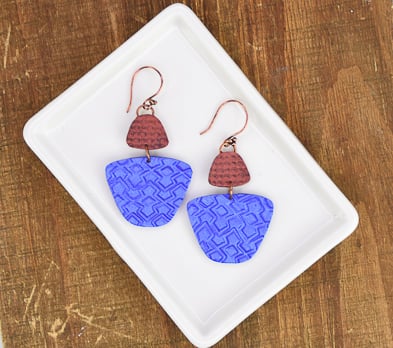
Sculpey Premo™ Indigo Metallic Mica Shift Earrings
Sculpey Premo™ Indigo Metallic Mica Shift Earrings
Designed by Gretchen Amberg
Read More
The new Sculpey Premo™ Indigo Metallic teams up with the classic Sculpey Premo™ Bronze for some mica-shift magic in these great earrings.
Read Less
ADDITIONAL SUPPLIES
- Pair Antique Copper hook earring findings
- 6 mm Antique Copper jump-rings (4)
- Small chain nose-pliers
- Needle tool or toothpick
- Craft Knife
Project Instructions
- Getting Started:
Start with clean hands, unwrap and knead clay until soft and smooth, or condition by running clay though a Pasta Machine. We recommend using a designated machine for clay purposes only. When working with multiple colors, clean hands with soap and water or baby wipes (we have found that baby wipes work best) before switching colors. Shape clay, pressing pieces firmly together. Wash hands after use.
- Baking:
Condition 1/4 block of Bronze and 1/2 block of Indigo Metallic. Roll each color into a medium/thin sheet. Set the sheet of Bronze to the side.
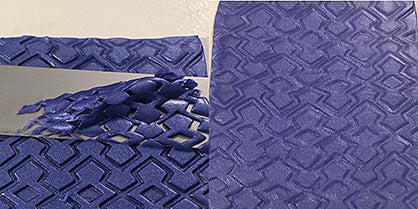
Press the Diamond pattern portion of the flexible texture sheet into the Indigo Metallic sheet of clay. Make sure the texture sheet is pressed deep into the sheet of clay. Carefully lift the texture sheet from the clay.
Press the Diamond pattern portion of the flexible texture sheet into the Indigo Metallic sheet of clay. Make sure the texture sheet is pressed deep into the sheet of clay. Carefully lift the texture sheet from the clay.

Use the Super Slicer blade to carefully shave the raised portion of the texture from the top of the sheet of clay. When you are finished removing the raised portion of the texture you will be left with a smooth sheet of clay.
Position the largest shape in the template as indicated in the first image onto the sheet of clay: try to place the template in a location which will maximize the amount of clay available to cut a second shape. Use the craft knife to cut around the inside of the template. Remove the excess clay and set the two Indigo pieces to the side.
Note: If you do not have enough of the sheet of clay to fit a second piece use the leftover clay and repeat Steps 2 and 3 to make another sheet.
Note: If you do not have enough of the sheet of clay to fit a second piece use the leftover clay and repeat Steps 2 and 3 to make another sheet.

Press the Dot design block into the sheet of Bronze clay. Press the block firmly into the clay to make a deep impression. Carefully remove the Design Block from the sheet of clay.

Follow Step 3 to create a smooth, patterned sheet of Bronze clay.
Position the smallest shape in the template as indicated in the first image onto the sheet of clay. Try to place the template in a location which will maximize the amount of clay available to cut a second shape. Use the craft knife to cut around the inside of the template.
Position the smallest shape in the template as indicated in the first image onto the sheet of clay. Try to place the template in a location which will maximize the amount of clay available to cut a second shape. Use the craft knife to cut around the inside of the template.

Turn the two pieces of Bronze clay over. Pick up one of the jump-rings and place it at the narrow end of the cut piece of clay. Potion the ring so that a little bit of the opening is extended past the edge of the cut piece of clay.
Roll a small piece of Bronze clay into a ball. Press the ball flat, place over the ring, and press onto the back of the cut bronze piece. This small piece of clay will hold the ring place.
Repeat this process with the second ring and cut piece of clay.
Roll a small piece of Bronze clay into a ball. Press the ball flat, place over the ring, and press onto the back of the cut bronze piece. This small piece of clay will hold the ring place.
Repeat this process with the second ring and cut piece of clay.

Turn the Bronze pieces of clay over so the pattern side is facing up. Pick up the Indigo pieces of clay and place pattern side up on the work surface. Use the toothpick or needle tool to poke a hole along the middle of the wide edge of all four pieces of clay. Bake according to the directions in Step 1 above and allow the clay to cool after baking.

Use the pliers to open the remaining two jump-rings.
Note: Open the jump-rings by twisting opening the gap in a side-to-side motion. Do not open the jump-rings by pulling the cut ends straight away from each other. Opening a jump-ring in this manner distorts the shape and makes it difficult to close.
Slide a jump-ring through the hole in one each of the Bronze and Indigo pieces. Make sure that the pattern sides of the clay are facing each other. Use the pliers to close the jump-ring. Repeat this process with the two remaining pieces of clay.

Complete the earrings by attaching the ear hooks to the ring portion of the small Bronze pieces.
