

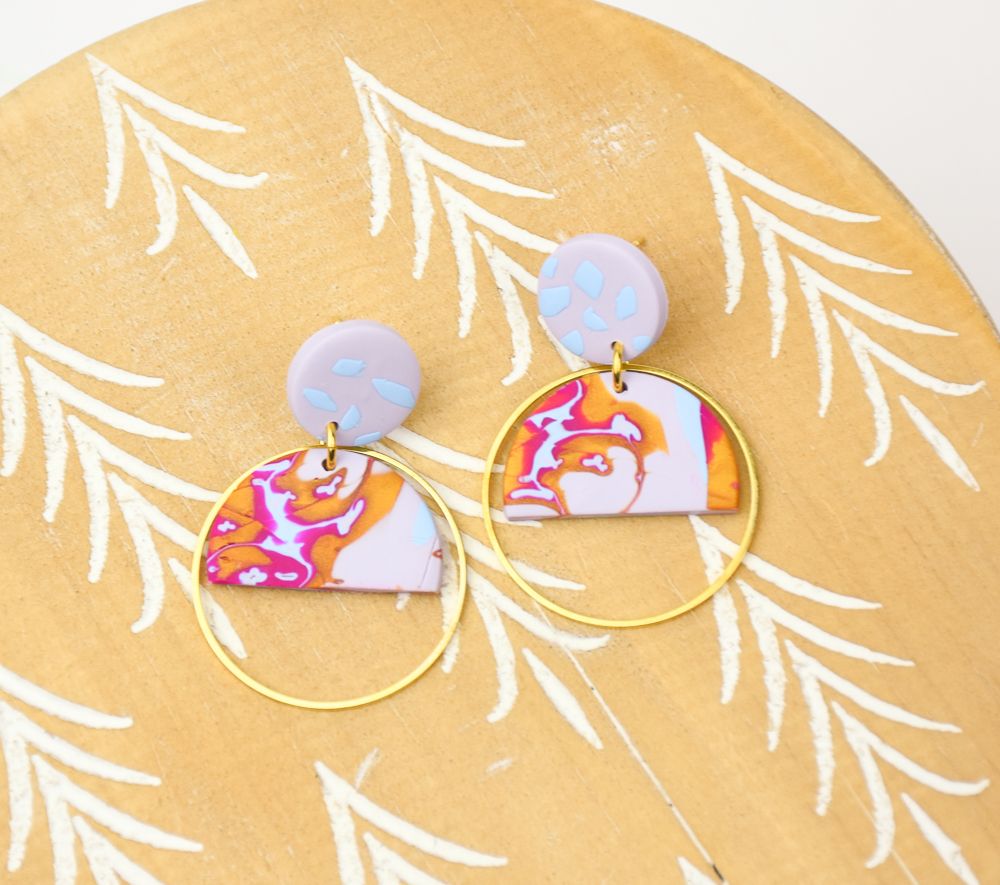
Sculpey Premo™ Funky Mokume Gane and Terrazzo Earrings
Sculpey Premo™ Funky Mokume Gane and Terrazzo Earrings
Designed by Nidhal McMahon
Read More
Read Less
Why not team some gorgeous Mokume Gane with pieces of a terrazzo slab? NOTE: Instructions will make 4 pairs of earrings.TIME TO COMPLETION:45 minutes to make and 30 minutes to bake
ADDITIONAL SUPPLIES
For each earring pair you will need:
- 1 inch (or larger) gold-toned hoops(2)
- 7 mm gold-toned jump rings (4)
- Post and back
- Silicone glue
Project Instructions
Step 1
- Getting Started:
Start with clean hands, unwrap and knead clay until soft and smooth, or condition by running clay though a Pasta Machine. We recommend using a designated machine for clay purposes only. When working with multiple colors, clean hands with soap and water or baby wipes (we have found that baby wipes work best) before switching colors. Shape clay, pressing pieces firmly together. Wash hands after use.
- Baking (also called Curing):
Step 2
Cut a 1/2 oz or 1/4 of a 2 oz package each of Premo Pale Blue, Premo Gold, Premo Fuchsia and Premo Lavender and condition eacg color.
Step 3
Roll the first 3 colors (Pale blue, Gold and Fuchsia) to 1/16-inch thickness. If a pasta machine is used, opt for a level 3 or 4 on your machine.Roll the lavender clay to 1/4 inch thickness. If a pasta machine is used, opt for a level 0 or 1. Note* Lavender is rolled thicker because we want this to be our dominant color in the slab.

Step 4
Using a 2-inch rectangle cutter or clay blade, cut 3 large rectangles of each color.
Step 5
Layer the rectangles on top of each other starting with the Lavender as the base, Pale Blue, Gold and Fuchsia and repeat until all pieces are layered.
Step 6
Once the layers are set, use your fingers to gently press your rectangle together on all sides until the layers are connected but not combined. You can also use an acrylic roller to gently roll each side to connect the pieces.
Step 7
Use any rounded clay tools (small round cutters, dotting tools, ball stylus, toothpicks, pottery tools, flexible clay blade, etc) or a combination of tools to push into the clay from the top down.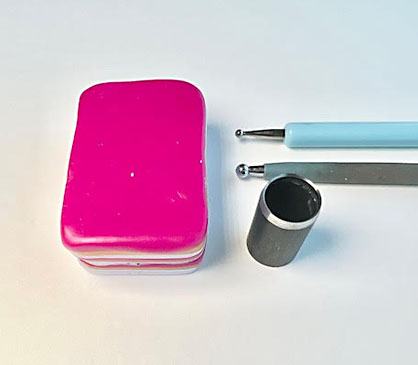
Step 8
Push each tool deep into the clay, being careful not to go all the way to the bottom. You don’t want to break through the bottom of the clay!
Step 9
Once you have made all the “holey” marks, use your fingers to gently begin to bring your piece back together into a solid rectangle. You can do this by pushing the four sides back together. Do not mix the colors, but rather focus on closing the holes so there aren’t holes in your final slab.
Step 10
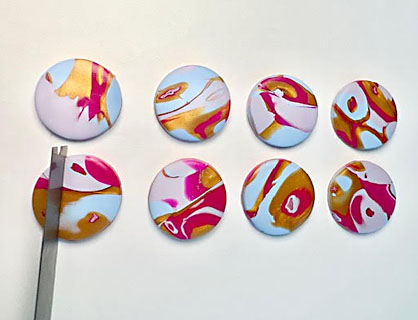
Use your clay blade to cut slices from the top down parallel to the layers.Try to cut even 1/16” slices.
Do not cut too thick as you won’t see the pattern you created.

Step 11
Once all the slices are cut, begin to arrange them to create a slab. You can also use a thin piece of translucent clay (level 5 on your pasta machine) to lay your pieces onto if they are too thin to layer on themselves.
Step 12
Use a 1-inch round cutter or a half circle cutter to cut your eight earrings. If a round cutter is used, simply cut part of the circle off using a tissue blade to achieve a half circle.Note* Never discard scraps. Scraps make beautiful one-of-a-kind pieces!
Step 13
Set aside and begin your terrazzo top.Use the remainder of your lavender clay to roll out a 1/4” slab or a level 0-1 on your pasta machine.

Step 14
Take the remainder of your pale blue clay and roll out to 1/16” or a level 6-7 on your pasta machine.Use an X-acto knife or tissue cutter to cut very small various shapes (triangles, squares, organic shapes) of pale blue clay.
Carefully place your shapes of pale blue clay onto your lavender slab. Gently roll over the slab to combine the two clay layers and cut eight 1/2” circles

Step 15
Bake all pieces according to package instructions and (if desired) sand pieces for a flawless finish.Apply gold posts to the Terrazzo top using glue or liquid clay methods.
Assemble your earrings using a round gold hoop and a 7 mm jump ring for each earring.

Step 16
Enjoy your Mokume Gane and Terrazzo Earrings!