

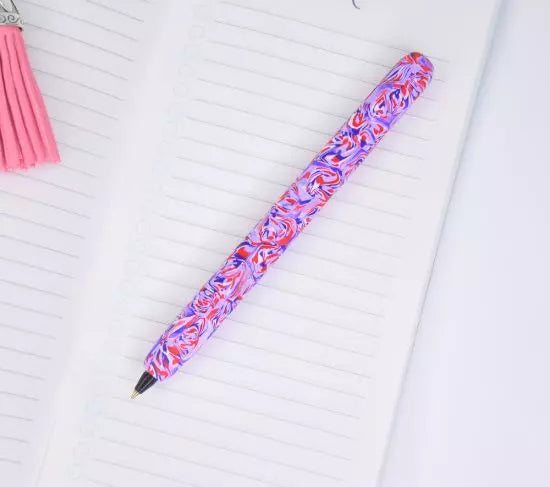
Sculpey III® Easy Marbled Slab Pen
Sculpey III® Easy Marbled Slab Pen
Designed by Phoebe Doehring
Read More
Read Less
Twisted snakes of clay color can create beautiful marbled slices that can be applied to a simple pen shaft. Once you make one, you will want to make them in all the colors you can!
Time to Completion:
30 minutes to make 25 minutes to bake and assemble
Time to Completion:
30 minutes to make 25 minutes to bake and assemble
ADDITIONAL SUPPLIES
- Ball Point Pen with removeable ink shaft like a Stik Pen
Project Instructions
Step 1
- Getting Started:
Start with clean hands, unwrap and knead clay until soft and smooth, or condition by running clay though a Pasta Machine. We recommend using a designated machine for clay purposes only. When working with multiple colors, clean hands with soap and water or baby wipes (we have found that baby wipes work best) before switching colors. Shape clay, pressing pieces firmly together. Wash hands after use.
- Baking (also called Curing):
Step 2
Roll snakes of each of your colors that are 1/4” x 6” long.
Step 3
Press them together and roll.Twist the snake and then fold in half.
Roll again, twist and fold.
Repeat this process about four times to marble the colors together.

Step 4
Roll your marbled snake out so that it is approximately 1/4” thick.Use your clay slicer and slice little equal sized pieces off of the snake that are about 1/8” thick.

Step 5
Remove the pen shaft from your ball point pen.Press the clay slices that you cut all over the pen. You can leave a little bit of space between the slices.

Step 6
Once the pen is completely covered, roll the pen on your work surface area to press the slices together and smooth.Once your pen is completely smooth and no lines are showing from the slices remove any excess clay from the tip.

Step 7
Bake according to the directions in Step 1 above. Allow to cool completely. Re-insert the pen shaft.