

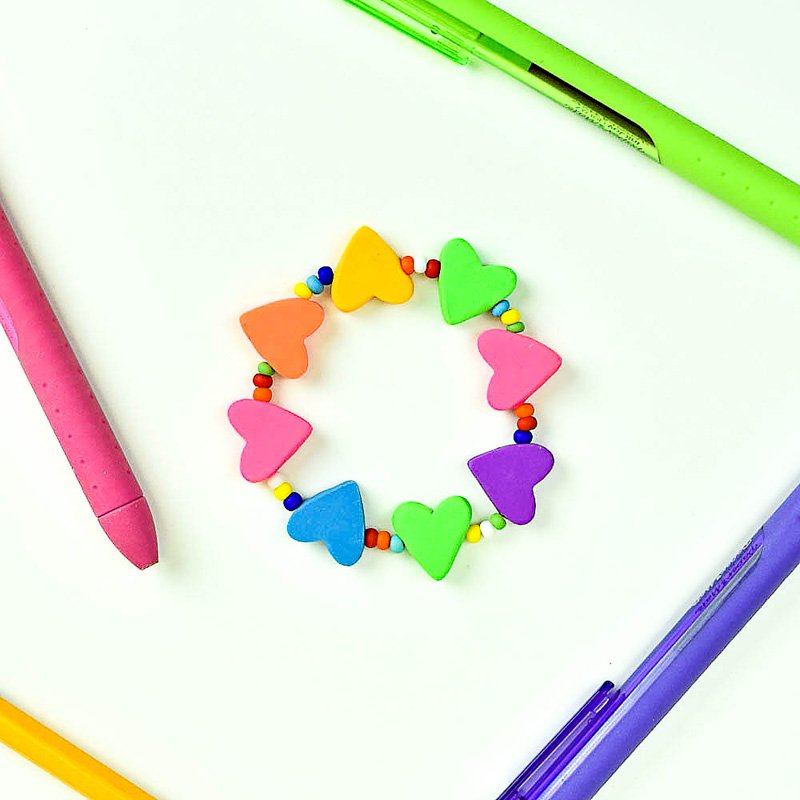
Sculpey Bake Shop® Eraser Clay Colorful Hearts Charm Bracelet
Sculpey Bake Shop® Eraser Clay Colorful Hearts Charm Bracelet
Designed by Phoebe Doehring
Read More
Read Less
Make eraser bracelets that are fun and functional!
ADDITIONAL SUPPLIES
- Stretch Magic Cord
- Colored Seed Beads
Project Instructions
- Getting Started:
Start with clean hands, unwrap and knead clay until soft and smooth, or condition by running clay though a Pasta Machine. We recommend using a designated machine for clay purposes only. When working with multiple colors, clean hands with soap and water or baby wipes (we have found that baby wipes work best) before switching colors. Shape clay, pressing pieces firmly together. Wash hands after use.
- Baking:
Condition 1/2” block of each of your clay colors. Roll each color flat with your acrylic roller to about 1/8 inch thickness.
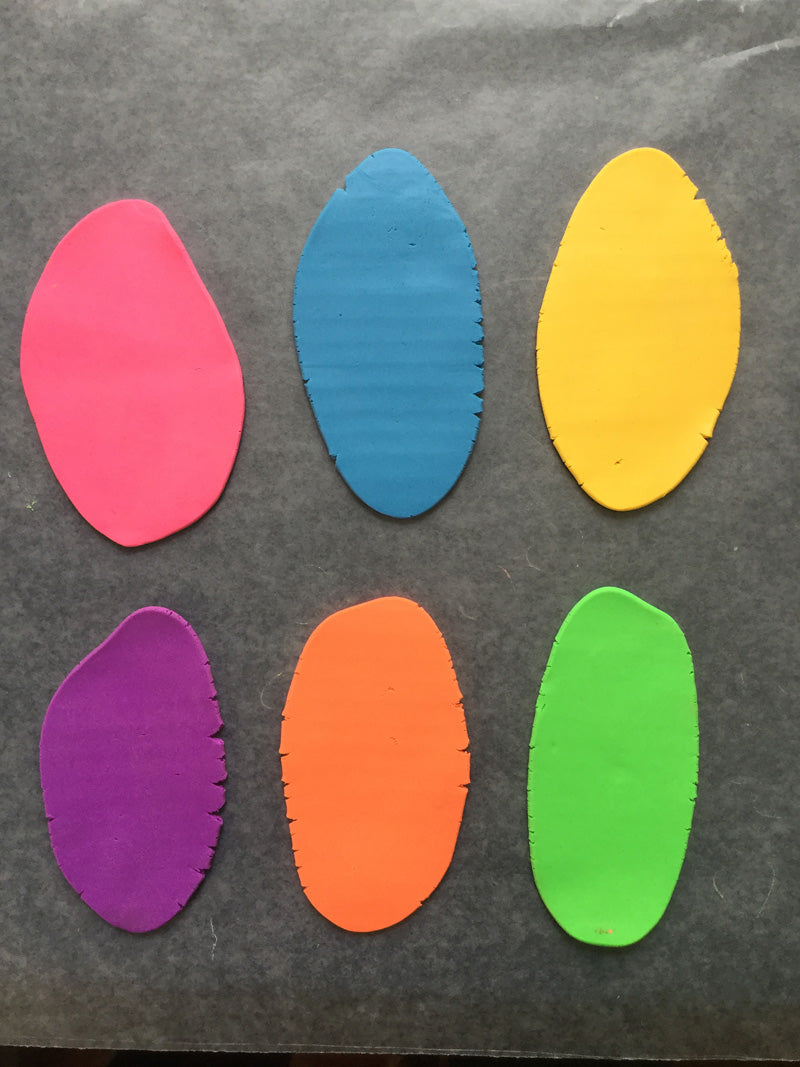
Fold each clay piece in half to double the thickness. Use your little heart shaped cutter and cut out little heart beads. We used 8 heart beads for this bracelet so you can use one heart for each color but then choose two colors to make two more beads from.

Using your 5 in 1 needle tool make horizontal holes in each of your hearts to turn them into beads. Bake the beads according to the directions above. Allow the beads to cool completely.
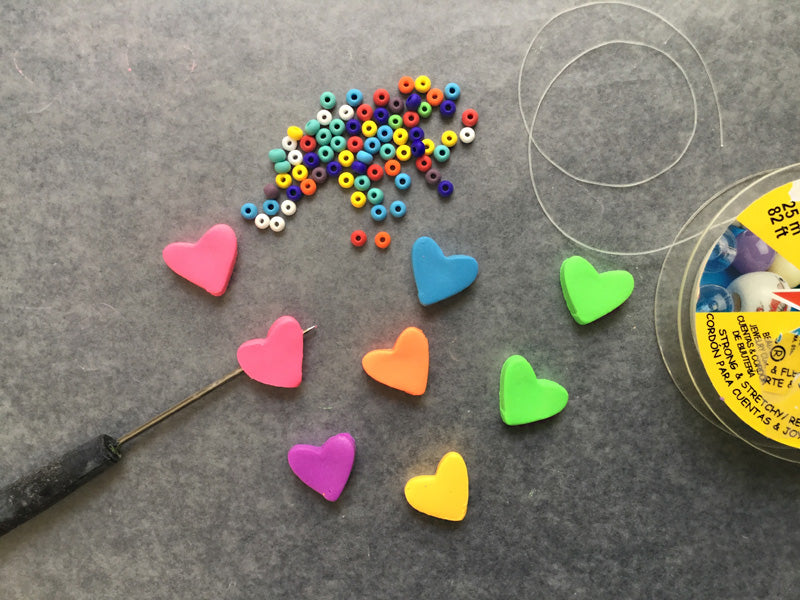
After the beads have cooled completely (the heat from warm beads can shrink the elastic!) Cut a piece of Stretch Magic cording approximately 5” long. Tie a loose knot at one end so your beads won’t slide off when stringing them on the cord. String one heart on and then three seed beads, repeat this process until you have all your beads on. Knot your stretch cord several times to finish off. Trim excess and hide the knot in one of your heart beads.
