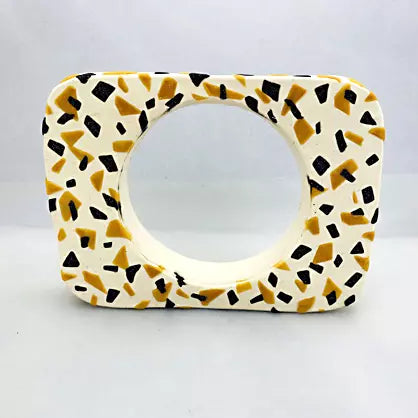


Original Sculpey® Waterless Vase
Original Sculpey® Waterless Vase
Designed by Amy Koranek
Read More
Read Less
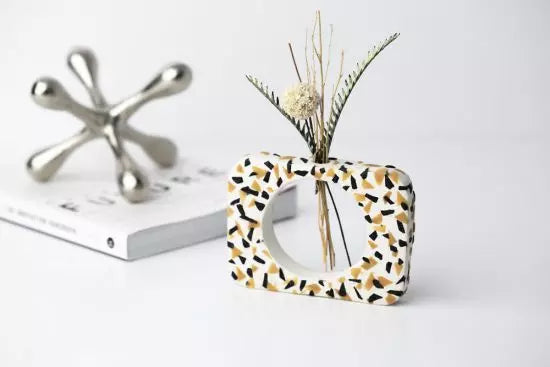
A trendy waterless vase to accent your desk or shelf will hold dried flowers in style.COMPLETION TIME:90 Minutes to make and bake
ADDITIONAL SUPPLIES
- 4” X 3” Rectangle Cutter (Etsy)

Project Instructions
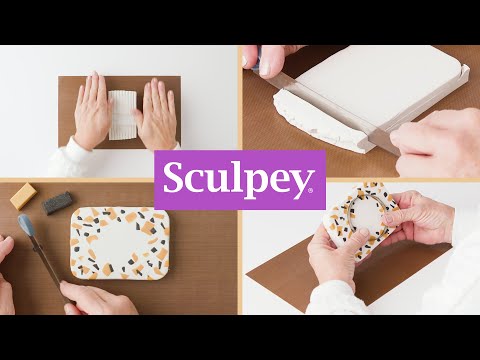
Step 1
Roll out the entire bar of Original Sculpey® to 3/4” thick and large enough to accommodate the rectangle cutter.
Step 2
Use the cutters to score lines in the clay indicating the areas that will require decorating.
Step 3
Slice very thin slivers of Black Glitter and Jewelry Gold using the Clay Blade and place them randomly over the surface of the white clay.Roll the surface flat gently with the Acrylic Clay Roller to make the surface level again.

Step 4
Impress the rectangle cutter as deeply as possible. If your cutter isn’t deep enough to go through the clay slab, carefully remove it and use a Clay Blade to finish the cut.Smooth the cut edges with your fingertips.

Step 5
Flip the slab over, mark the circle to be cut out with the cutter, and decorate the back side as well.
Step 6
Make sure to add some black and gold elements to the edges too.
Step 7
Cut out the center with the circle cutter. Smooth the cut edges on both sides with your fingertips.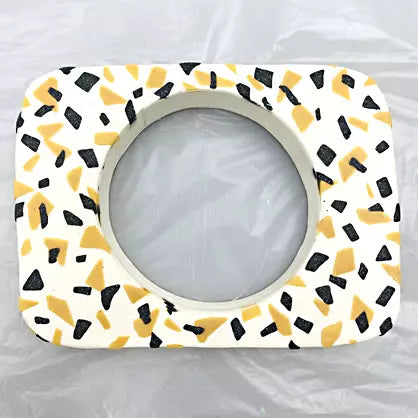
Step 8
Next make a hole in the top center of the shape using progressively larger tools. You can do this with either the Clay Tool Starter Set or the Dual Ended Clay Tools. Starting with the smallest tool, poke a hole through the top edge in the center going through to the open circle area.
Step 9
Next repeat with a larger tool. Keep increasing the size of the tool until you have the size hole that is needed. The finished hole in my vase is 1/4” - 3/8” in diameter so that it can hold several stems.
Step 10
Make sure the bottom of your vase is flat enough to stand up on its own.Lay the vase flat and bake following the baking instructions for Original Sculpey®.
Allow to cool completely before handling.