
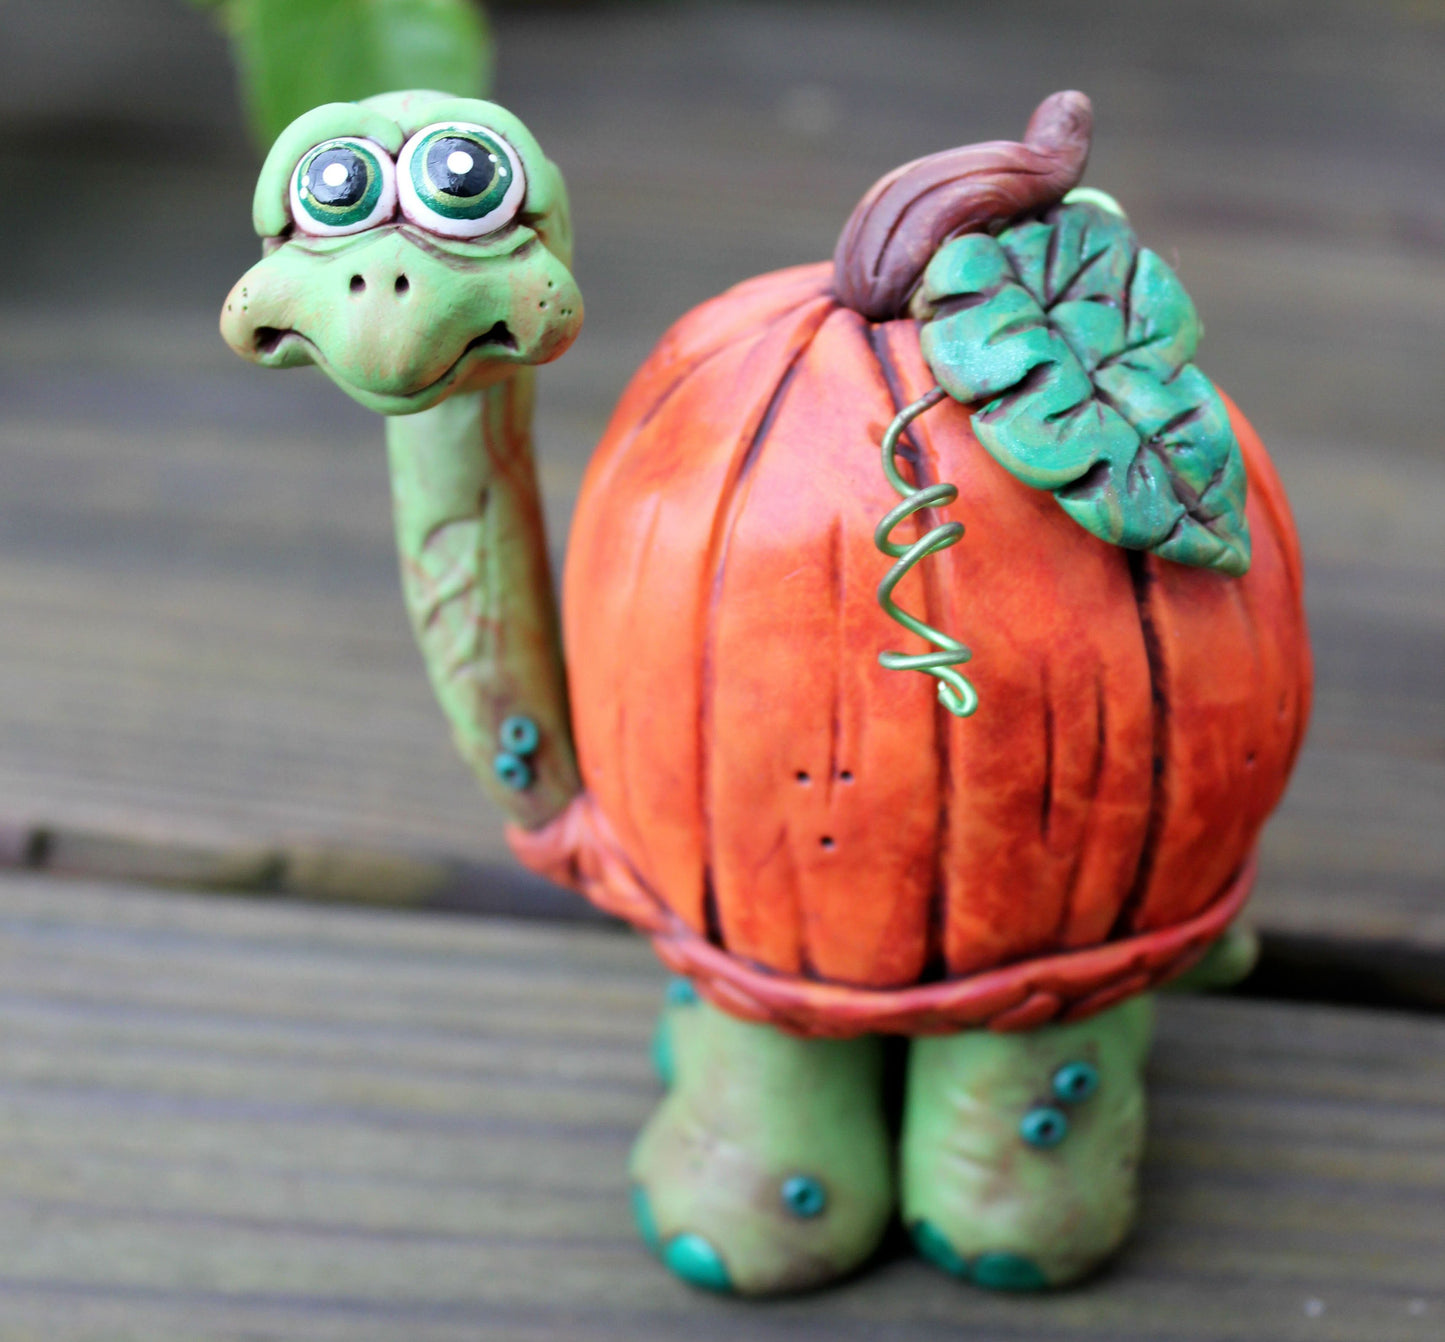
Sculpey Premo™ Pumpkin Turtle
Sculpey Premo™ Pumpkin Turtle
Read More
Decorate your home with the cutest Autumn turtle. This little guy will make you forget winter is on it's way.
Read Less
ADDITIONAL SUPPLIES
- Aluminum foil
- 18-20 gauge craft wire
- Rubber coated craft wire for tendrils (optional)
- Acrylic paints such as Neon Pink, White, Black, Russet or Black Plum, Metallic greens for eyes (light & dark)
- Paint brushes
- Sponges
- Wire cutter
- Textures
Project Instructions
- Getting Started:
Start with clean hands, unwrap and knead clay until soft and smooth, or condition by running clay though a Pasta Machine. We recommend using a designated machine for clay purposes only. When working with multiple colors, clean hands with soap and water or baby wipes (we have found that baby wipes work best) before switching colors. Shape clay, pressing pieces firmly together. Wash hands after use.
- Baking:
Make compact foil core for the “shell”, rounded on top & flat on the bottom.

Make 4 small cone shaped foil cores for the legs, inserting small lengths of the craft wire into each leg, leaving about 1/2 inch of wire protruding from the top of each leg shape to be inserted into the body.

Make foil core around a long length of craft wire for the head and neck. Slightly roll one end of the wire where the head will be formed to help the foil to stay on the wire. Wrap and form the foil tightly around the length of wire leaving about 1 inch exposed at the base of the neck. The head end should be slightly rounded.

Using 3/4 of a block of the Orange clay, cover the shell foil core. The remaining 1/4 of the block will rolled into a long snake & flattened with your choice of texture tool to make a decorative edging for the base of the turtle shell (do not apply yet). From a small piece of the snake create a small breast-plate piece, it will be used later with the trim. Using the black clay knife tool or a knitting needle, press indented lines in varying lengths up and down the sides of the shell to give the look of a pumpkin.

Mix equal parts of Green, Wasabi and Bright Green Pearl, leaving some variations for interest; do not completely blend. Mix up 1/2 to 1 oz. of each color (there may be leftovers). Wrap & form the neck and head with the green mixture. On the head make two indents on the front to place the eyes (use the ball tool or your finger pads). Form a slight beak shape for the nose & mouth. Add medium-sized half, moon-shaped pieces for the cheeks & blend. Make two eyeballs with small portions of the White clay. Choose if you would like round or slightly oval eye shapes and place on the turtle’s face in the previously made indents. For the eye lids make four rice-shaped green pieces & blend around the white eyeballs. The upper eyelid shapes will be slightly larger than the bottom pieces. Add wrinkles, nose holes, mouth line and details with needle tools, knitting needles and/ or ball points. Use file or other texture tools to press designs into neck as desired.

Cover legs with the Green mixture. Use some of the leftover green shade of your choice or Orange to make little half circle/or round toe nails. I used Wasabi for the nails. Texturize with the same tools used on the head/neck. Add little “barnacles” of clay for details. To make these, use tiny balls of green clay and press into the skin with the end of the knitting needle or tiny ball tool. If you haven’t already done, so use a needle tool to make a hole to insert 1 inch sections of the craft wire into the top of each leg (leaving ½ inch exposed on top to be inserted into the bottom of the shell). Attach to the shell. Make a small cone-like tail from the green mixture, attach to the bottom of the shell with an inserted piece of craft wire like the legs.

Attach the neck/head piece to the shell via the exposed length of craft wire. Apply the flattened, texturized snake of Orange clay that was held in reserve and wrap around the base of the shell. Use the small breast plate and attach at the base of the neck and resting on the trim of the shell to help hold the neck in place and cover any protruding wire.

Use the Green mix to make pumpkin leaves and attach to the top of the shell with craft wire. Use a small portion of the Burnt Sienna for a stem (roll out a small snake, fold and twist to make a twisty stem), attach to the top of the shell with a small piece of craft wire. Make a squiggly length of rubber coated craft wire or regular wire for vine tendrils and attach to the shell near the leaves & stem.

Bake as directed above. Be sure to support the neck of the turtle with polyester fiberfill over a ball of foil (or other bracing method) to make sure the head does not separate from the body.
After thoroughly cooling, use acrylic paints for a patina. Use a dark color such as Black Plum or Russet for an all-over patina. Apply in small parts and wipe off immediately with a slightly damp sponge. I used the Neon Pink to give depth to the Orange areas and add a blush to the cheeks. Paint the eyes in colors of your choice. Use Metallic Crystal Green and Metallic Festive Green by Decoart with Black and White accents. Use Sculpey Gloss Glaze for a nice shiny finish, esp. on the eyes and any other parts that you would like accented.