Skip to product information
1 of 1

Sculpey Bake Shop® Fairytale Characters

Sculpey Bake Shop® Fairytale Characters

Designed by Amy Koranek
Read More
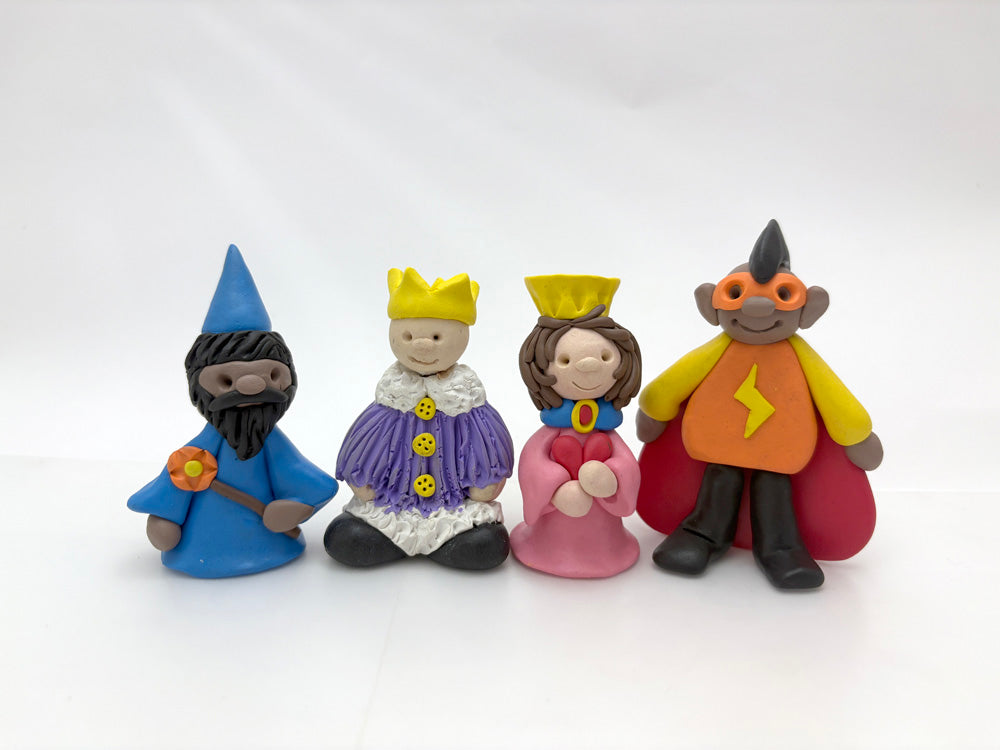
Create your own Fairytale Kingdom with Kings, Queens and even Super Heroes! TIME TO COMPLETION: About 2 hours
Read Less
ADDITIONAL SUPPLIES
  • 2 Toothpicks
View full details
Project Instructions

Step 1

Getting Started:

Please make sure your work area is covered and you are not working on an unprotected surface. We recommend working on the Sculpey® Oven Safe Work Mat, wax paper, metal baking sheet, or disposable foil. Uncured clay may damage unprotected furniture or finished surfaces. Be sure to cover your crafting area appropriately.

Start with clean hands, unwrap and knead clay until soft and smooth, or condition by running clay though a Pasta Machine. We recommend using a designated machine for clay purposes only. When working with multiple colors, clean hands with soap and
water or baby wipes (we have found that baby wipes work best) before switching colors. Shape clay, pressing pieces firmly together.  Wash hands after use.

Baking:

Begin by preheating oven to 275 °F (130 °C). After you are done creating; for best results bake clay on an oven-proof surface such as metal, aluminum foil, an index card or the Sculpey® Oven Safe Work Mat at 275°F (130 °C) for 15 minutes per ¼" (6
mm) of thickness according to package directions. Oven safe glass or ceramic
surfaces are also acceptable for baking; however please note that the baking times may take longer as the glass or ceramic surfaces take longer to heat up. For best baking results, use an oven thermometer. DO NOT USE MICROWAVE OVEN. DO NOT
EXCEED THE ABOVE TEMPERATURE OR RECOMMENDED BAKING TIME.

Step 2

TO MAKE THE KING:

From 3/4 bar Purple make a large teardrop and 2 small teardrops for coat and arm.

From 1/4 bar White make 2 logs for the coat trim and collar.

From 1/4 bar Black make 2 large teardrops for feet.

From 1/4 bar Beige make a round head and 2 teardrops for hands.

From 1/8 bar Yellow make a flat strip for the crown.

Step 3

Assemble the body as shown. Use finger pressure to stick all the pieces together.

Step 4

Trim the flat Yellow strip with triangle cut outs to make a crown.

Step 5

Wrap the crown around the king’s head.

Step 6

Add texture to the trim and collar.

Step 7

Add texture to the robe.

Step 8

Add buttons and face details.

Step 9

TO MAKE THE QUEEN:

Mix together 1/4 bar Red with 1/2 bar White to make Pink.

Step 10

From the Pink, make a large cone and 2 small teardrops for the dress.

From 1/8 bar Blue, make a collar.

From 1/4 bar Brown make a rope for hair.

From 1/8 bar Yellow make a crown.

Step 11

Add the sleeves to the dress. Make sure the bottom of the dress is flat to hold the
queen up.

Step 12

To make a little heart, make 2 little teardrops.

Step 13

Press the teardrops together and place them above the sleeves. Pose the sleeves so
they are holding the heart.

Add the Blue collar.

Step 14

Add head and hands.

Step 15

Roll the Brown rope into little tapered ropes.

Step 16

Add the tapers to the head for hair.

Step 17

Push the crown on top of the head.

Step 18

Add a jewelry detail at the collar. Add face details and texture to the crown.

Make sure the King and Queen are able to stand up on their own.

Step 19

TO MAKE THE WIZARD:

Mix 1/4 bar Brown with 1/8 bar White to make Light Brown.

Step 20

For the head make a Light Brown ball and the hands are 2 teardrops.

From all the remaining Blue make a large cone, 2 long teardrops, and a little cone.

From 1/4 bar Black make hair and beard.

Step 21

Assemble the robe as shown.

Step 22

Add a Brown wand with an Orange top.

Step 23

Add the head, hands holding the wand, hair, beard, and hat. Texture the wand.

Step 24

Add texture to the hair and beard.

Step 25

Poke eye holes, add nose, and mustache.

Make sure the Wizard can stand up on his own.

Step 26

TO MAKE THE SUPER HERO:

Use the remainder of the Red for the cape.

From 1/2 bar Orange for the body.

From 1/8 bar Yellow make 2 arms.

From 1/4 bar Brown make a head and 2 little hands.

Step 27

From 1/4 bar Black make 2 feet with ankles.

Step 28

Poke a toothpick into each foot. Pinch the top of the ankles up around the
toothpicks. The toothpicks will help the Hero stand up by himself.

Step 29

Push the toothpicks up through the Orange body.

Step 30

Wrap the cape around the back of the body.

Step 31

Make sure the feet can hold up the body. Use the bottom of the cape to help the Hero
stand up.

Step 32

Add the arms and head.

Step 33

Add the hands. Add details like decorations, goggles, ears, nose, smile, and hair.

Step 34

Make sure all the characters can stand up by themselves before baking.

Bake following directions for Sculpey Bake Shop®. Allow to cool completely before
handling.