

Original Sculpey® Friendly Puppy pal
Original Sculpey® Friendly Puppy pal
Design by Katie Oskins
Read More
Read Less
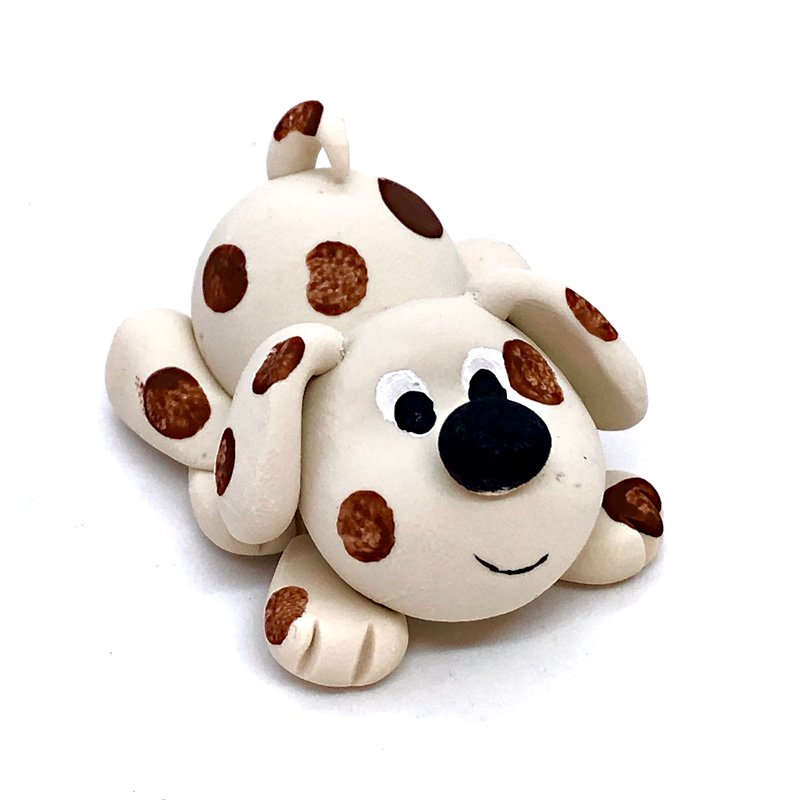
This friendly little puppy is a perfect thing to add cheer to any room.
ADDITIONAL SUPPLIES
- Arylic paint - brown, black, white and red
- Small paint brush
- Water
Project Instructions
- Getting Started:
Start with clean hands, unwrap and knead clay until soft and smooth, or condition by running clay though a Pasta Machine. We recommend using a designated machine for clay purposes only. When working with multiple colors, clean hands with soap and water or baby wipes (we have found that baby wipes work best) before switching colors. Shape clay, pressing pieces firmly together. Wash hands after use.
- Baking:
Cut & Lightly Condition Your Clay•Before you begin your project you will need to cut approximately 1/4” off your block of white Original Sculpey.•Condition this clay either by hand or in a pasta machine.
Making the Body & Back Legs•You will need a ball of clay about the size of a large walnut.•Roll it into a ball; be sure it has no seams.•Use your hands to form that ball into a teardrop; this will be the body for your dog.•Press the teardrop down slightly onto your work surface.

Roll two smaller balls about the size of hazelnuts and form those into teardrops. These will become your back legs. Place them to the left and right of your large teardrop. Press them gently into the body.

Now roll two pea sized balls of clay. Form each ball into a teardrop. Flatten slightly onto your work surface. These will be your feet, so add a few lines for toes and add under your legs. Add a little tail to the back side of your body

Making the Head & Front FeetMake another ball of clay, this time about the size of a small walnut. Press it onto the front of the body as shown

Press your finger into half of it to give it a “line” where it’s eyes will be later. Add a “dot” of clay for his nose.

Make two small teardrops and attach them to either side of his head as ears. Make two more small teardrops and repeat the instructions in Step 2 to make to small paws to place right under the pups head so it appears he’s sitting on them.

Bake according to the directions in Step 1. After the puppy has baked and cooled, use acrylic paint to add any details you’d like to your puppy. You can paint as much or as little of him as you’d like.

